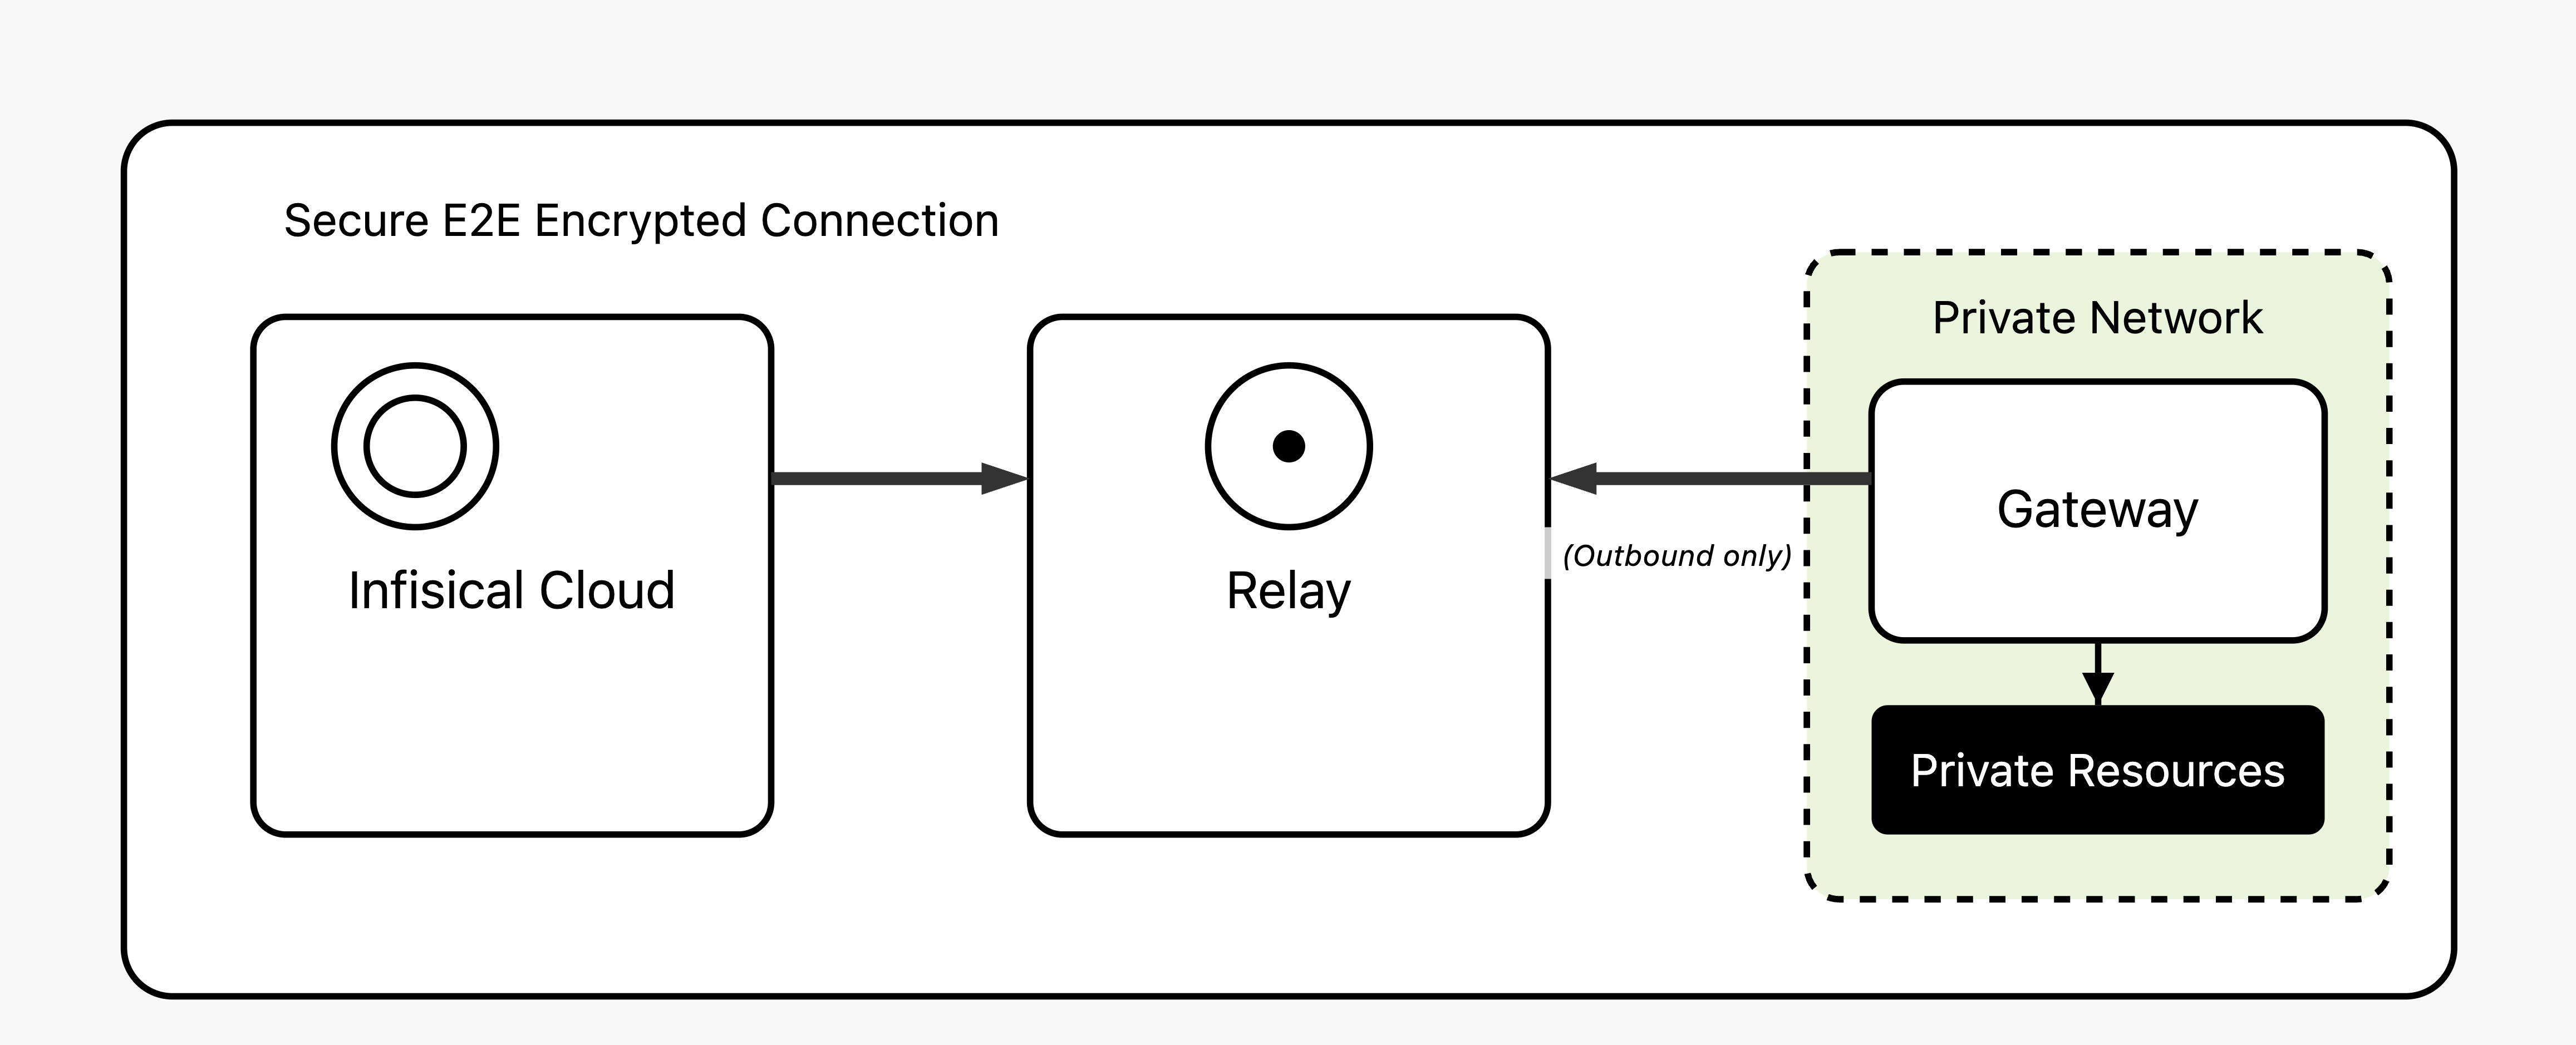
 The Infisical Gateway provides secure access to private resources within your network without needing direct inbound connections to your environment.
This is particularly useful when Infisical isn’t hosted within the same network as the resources it needs to reach.
This method keeps your resources fully protected from external access while enabling Infisical to securely interact with resources like databases.
The Infisical Gateway provides secure access to private resources within your network without needing direct inbound connections to your environment.
This is particularly useful when Infisical isn’t hosted within the same network as the resources it needs to reach.
This method keeps your resources fully protected from external access while enabling Infisical to securely interact with resources like databases.
Gateway is a paid feature available under the Enterprise Tier for Infisical
Cloud users. Self-hosted Infisical users can contact
sales@infisical.com to purchase an enterprise
license.
Core Components
The Gateway system consists of two primary components working together to enable secure network access:- Gateway
- Relay Server
A Gateway is a lightweight service that you deploy within your own network infrastructure to provide secure access to your private resources. Think of it as a secure bridge between Infisical and your internal systems.Gateways must be deployed within the same network where your target resources are located, with direct network connectivity to the private resources you want Infisical to access.
For different networks, regions, or isolated environments, you’ll need to deploy separate gateways.Core Functions:
- Network Placement: Deployed within your VPCs, data centers, or on-premises infrastructure where your private resources live
- Connection Model: Only makes outbound connections to Infisical’s relay servers, so no inbound firewall rules are needed
- Security Method: Uses SSH reverse tunnels with certificate-based authentication for maximum security
- Resource Access: Acts as a proxy to connect Infisical to your private databases, APIs, and other services
How It Works
The Gateway system uses SSH reverse tunnels for secure, firewall-friendly connectivity:- Gateway Registration: The gateway establishes an outbound SSH reverse tunnel to a relay server using SSH certificates issued by Infisical
- Persistent Connection: The gateway maintains an open TCP connection with the relay server, creating a secure channel for incoming requests
- Request Routing: When Infisical needs to access your resources, requests are routed through the relay server to the already-established gateway connection
- Resource Access: The gateway receives the routed requests and connects to your private resources on behalf of Infisical
Health Check
To monitor their operational status, gateways transmit heartbeats every 3 minutes. Each heartbeat includes a TTL (time-to-live) indicating how long the gateway should be considered healthy. If no successful heartbeat is received before the TTL expires, the gateway is marked as unhealthy. Relays continue to transmit hourly heartbeats and are considered unhealthy if a heartbeat is not received within one hour. Infisical automatically notifies all organization admins of unhealthy gateway or relay statuses through email and in-app notifications.High Availability with Gateway Pools
For production workloads, you can group multiple gateways into a Gateway Pool to provide automatic failover. When a gateway in a pool goes down, the platform routes through a healthy member automatically. See Gateway Pools for details.Getting Started
Ready to set up your gateway? Follow the guides below.Gateway Deployment
Deploy and configure your gateway within your network infrastructure.
Gateway Pools
Set up high availability with gateway pools for automatic failover.
Relay Deployment
Set up relay servers if using self-deployed infrastructure.
Security Architecture
Learn about the security model and implementation best practices.