Configure Client Credentials for Infisical
Navigate to Organization Management
In your Camunda Cloud Console, navigate to the Organization tab in the top navigation menu.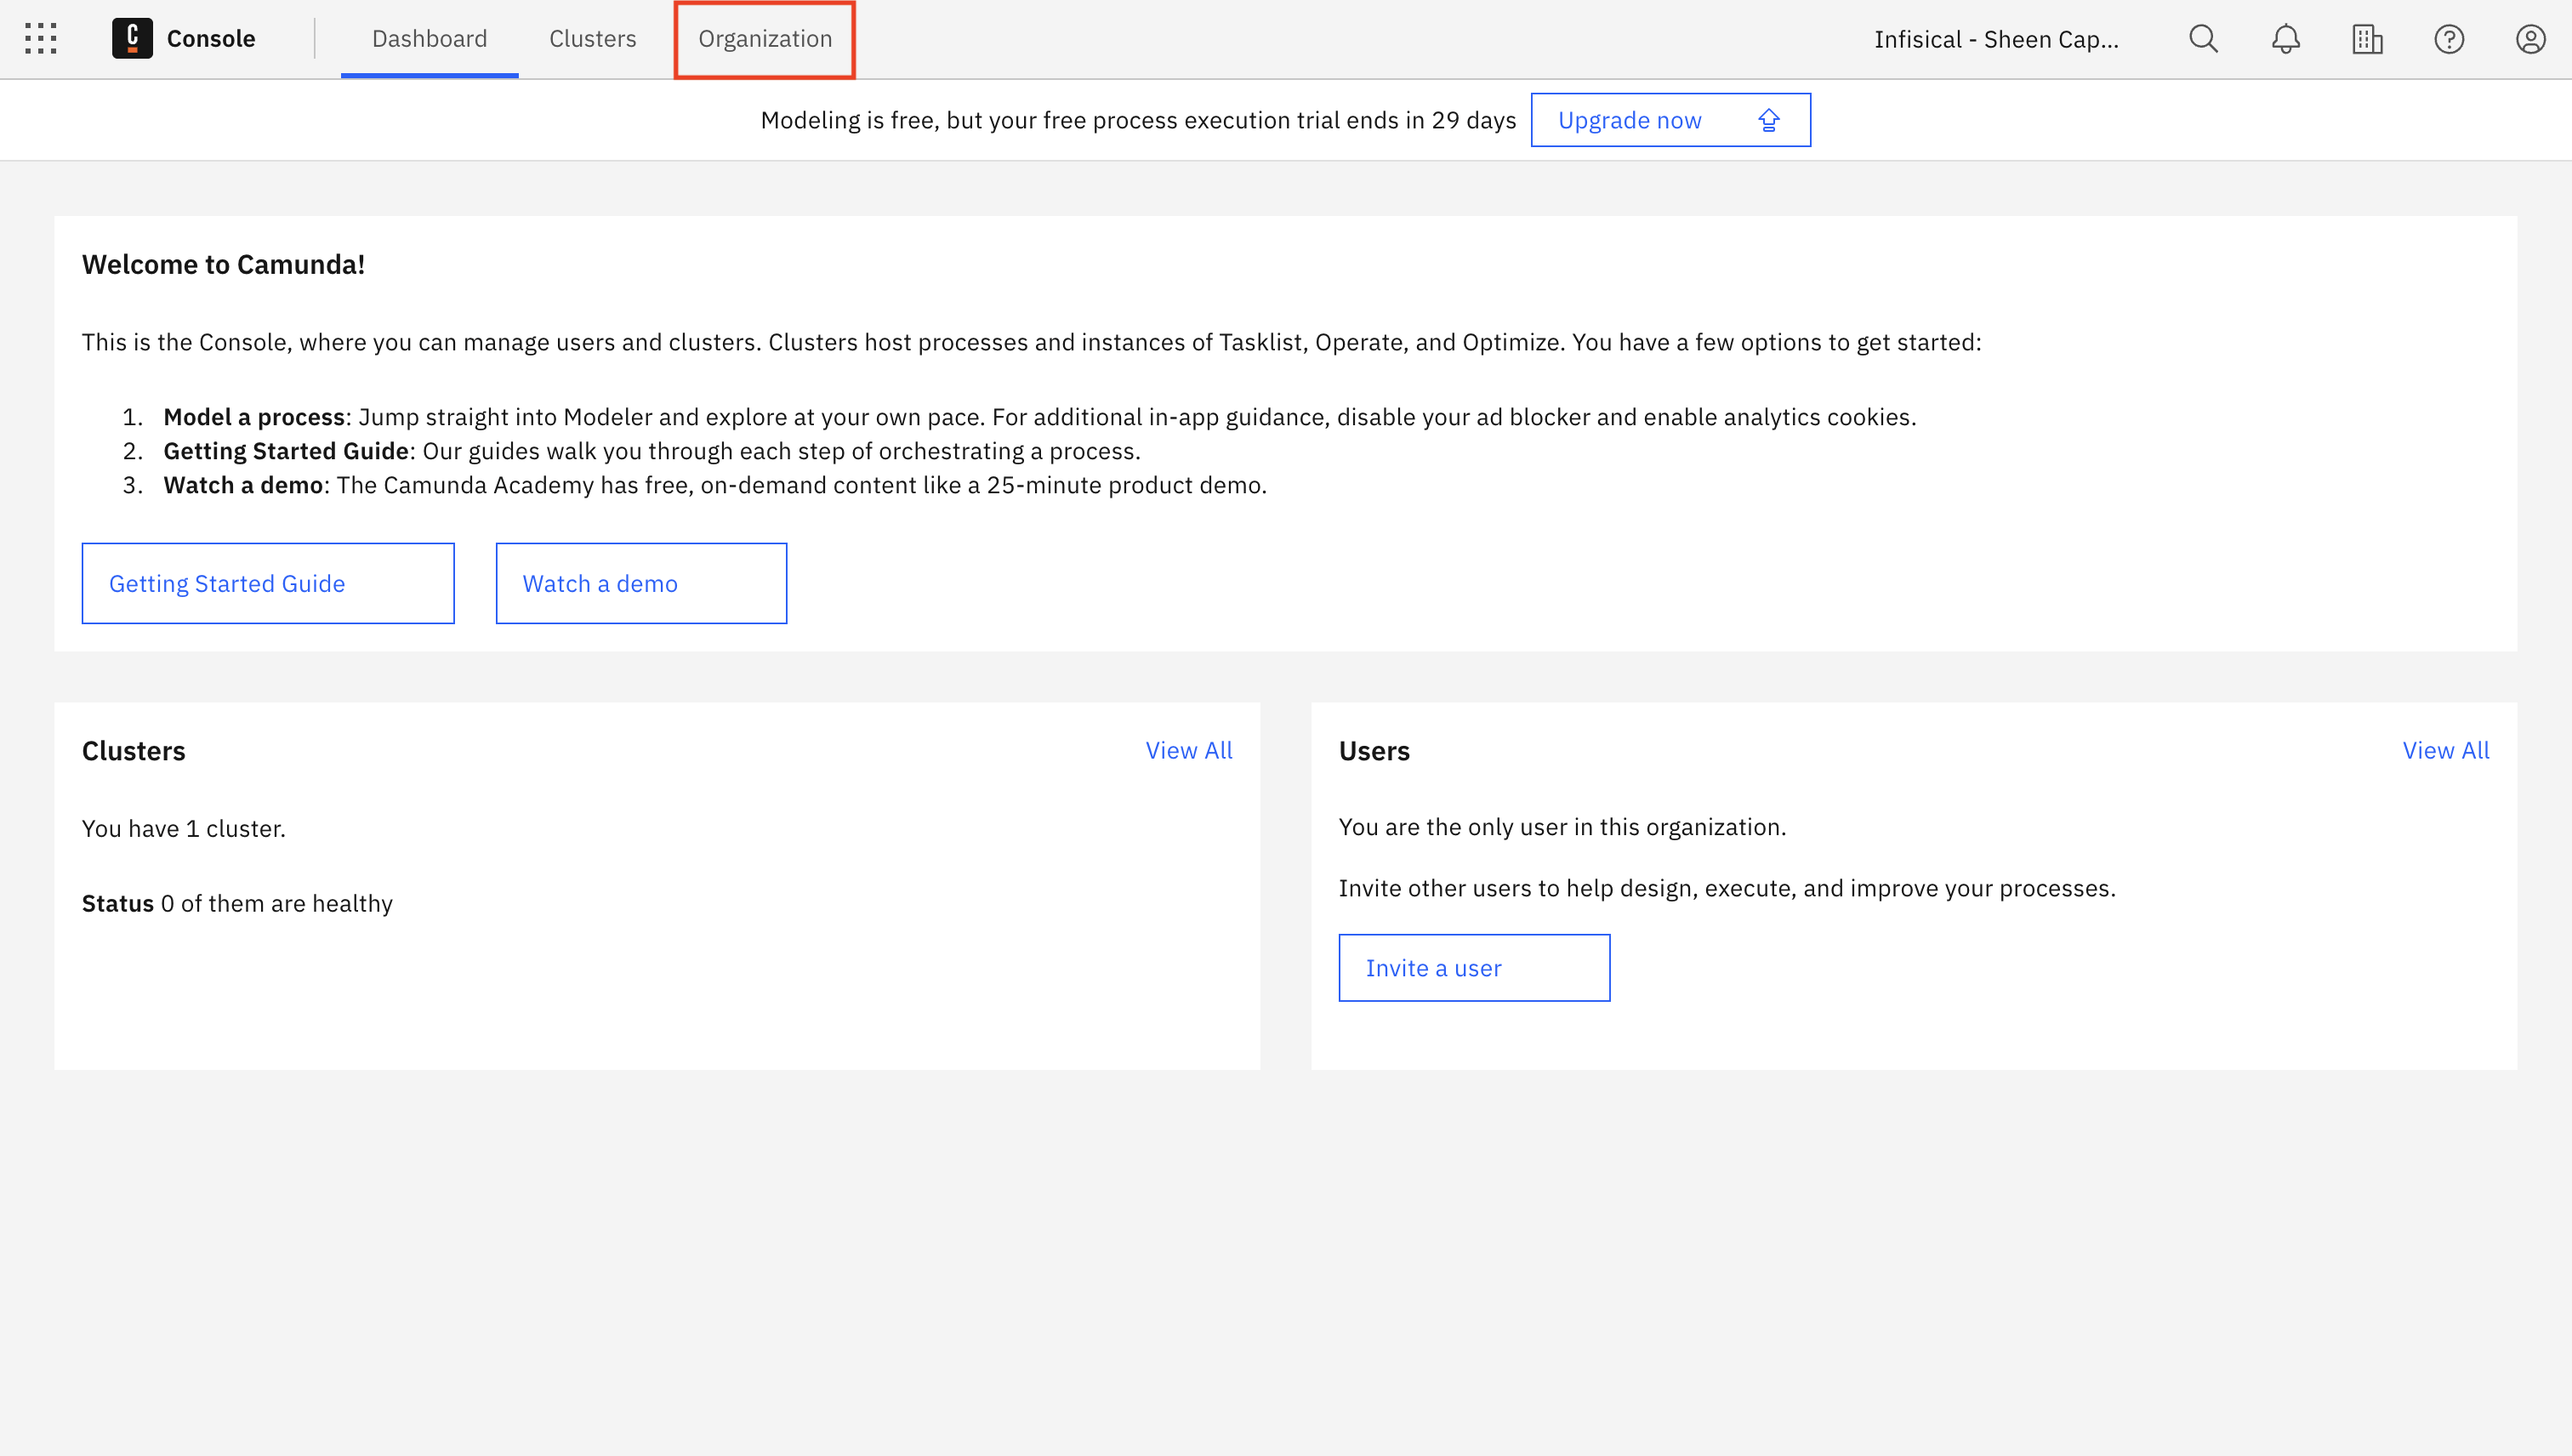
Access Administration API
From the Organization Management tabs, click on Administration API to manage your API credentials and click the Create client credentials button.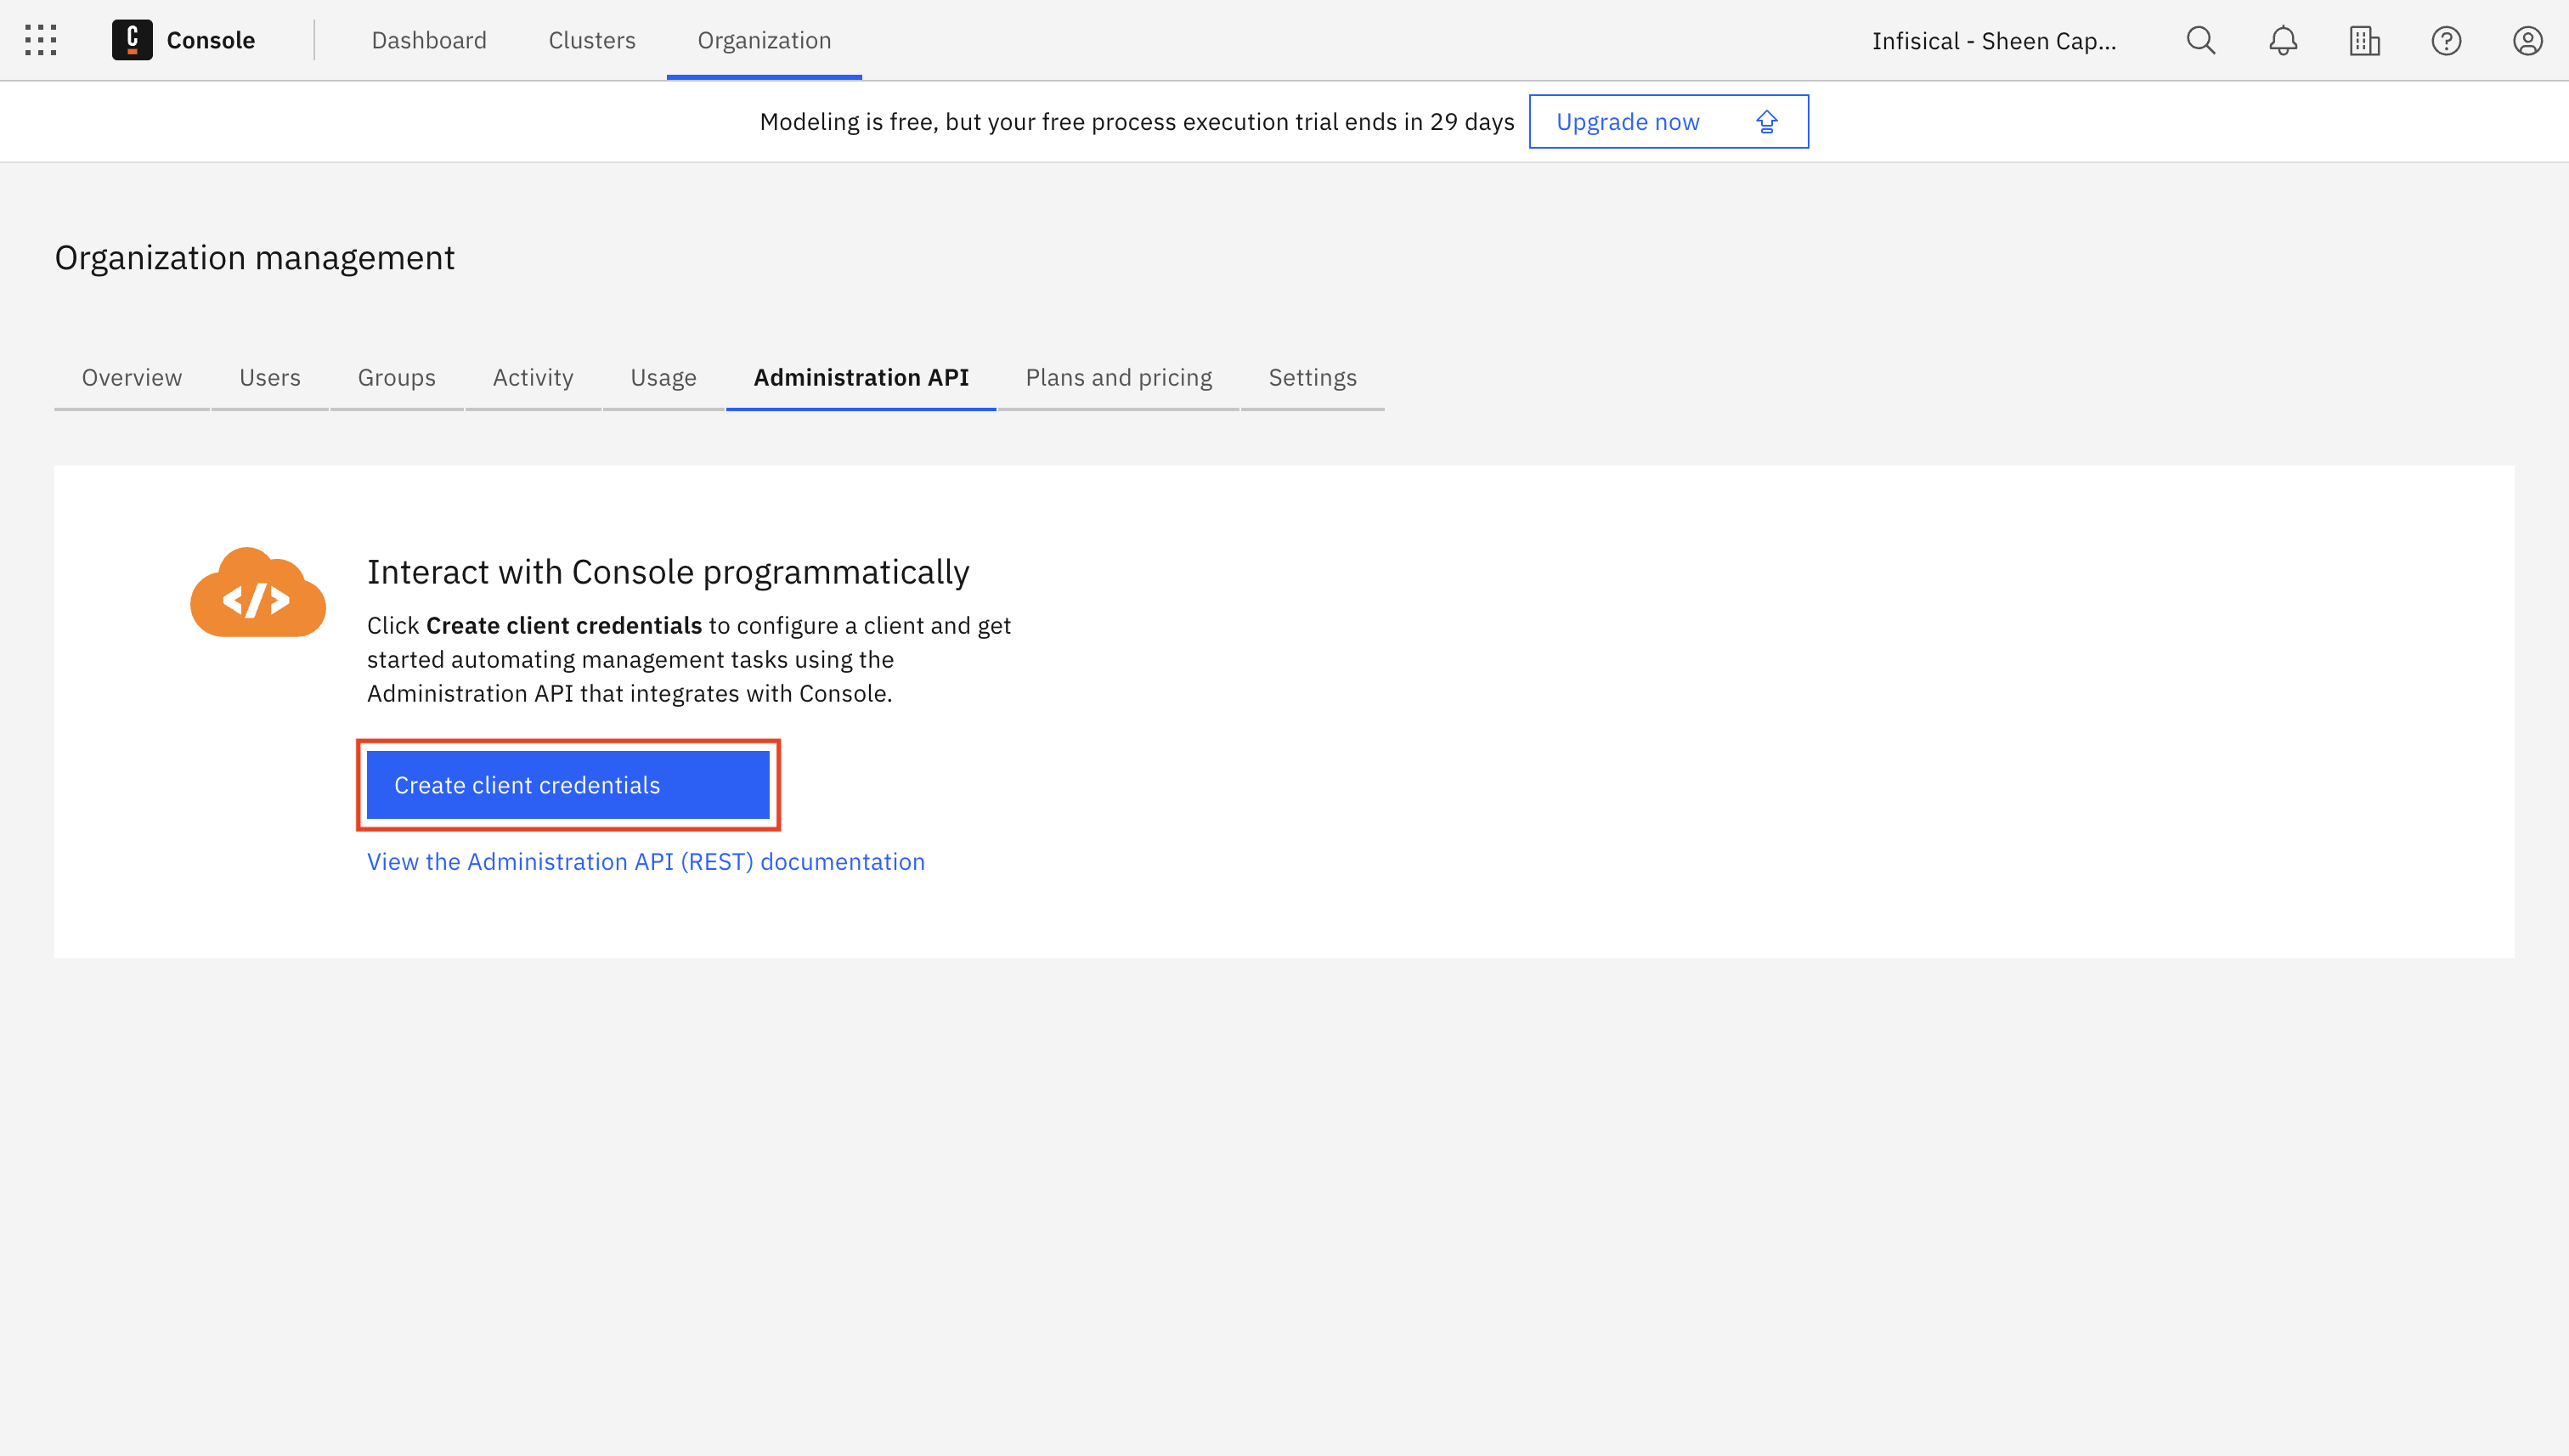
Name Your Client
Enter a recognizable name for your client, such as “my-infisical-client”. The name can contain letters, dashes, underscores, and digits.
Set Credential Permissions
In the “Create new client credentials” modal, select the following permissions required for secret syncs: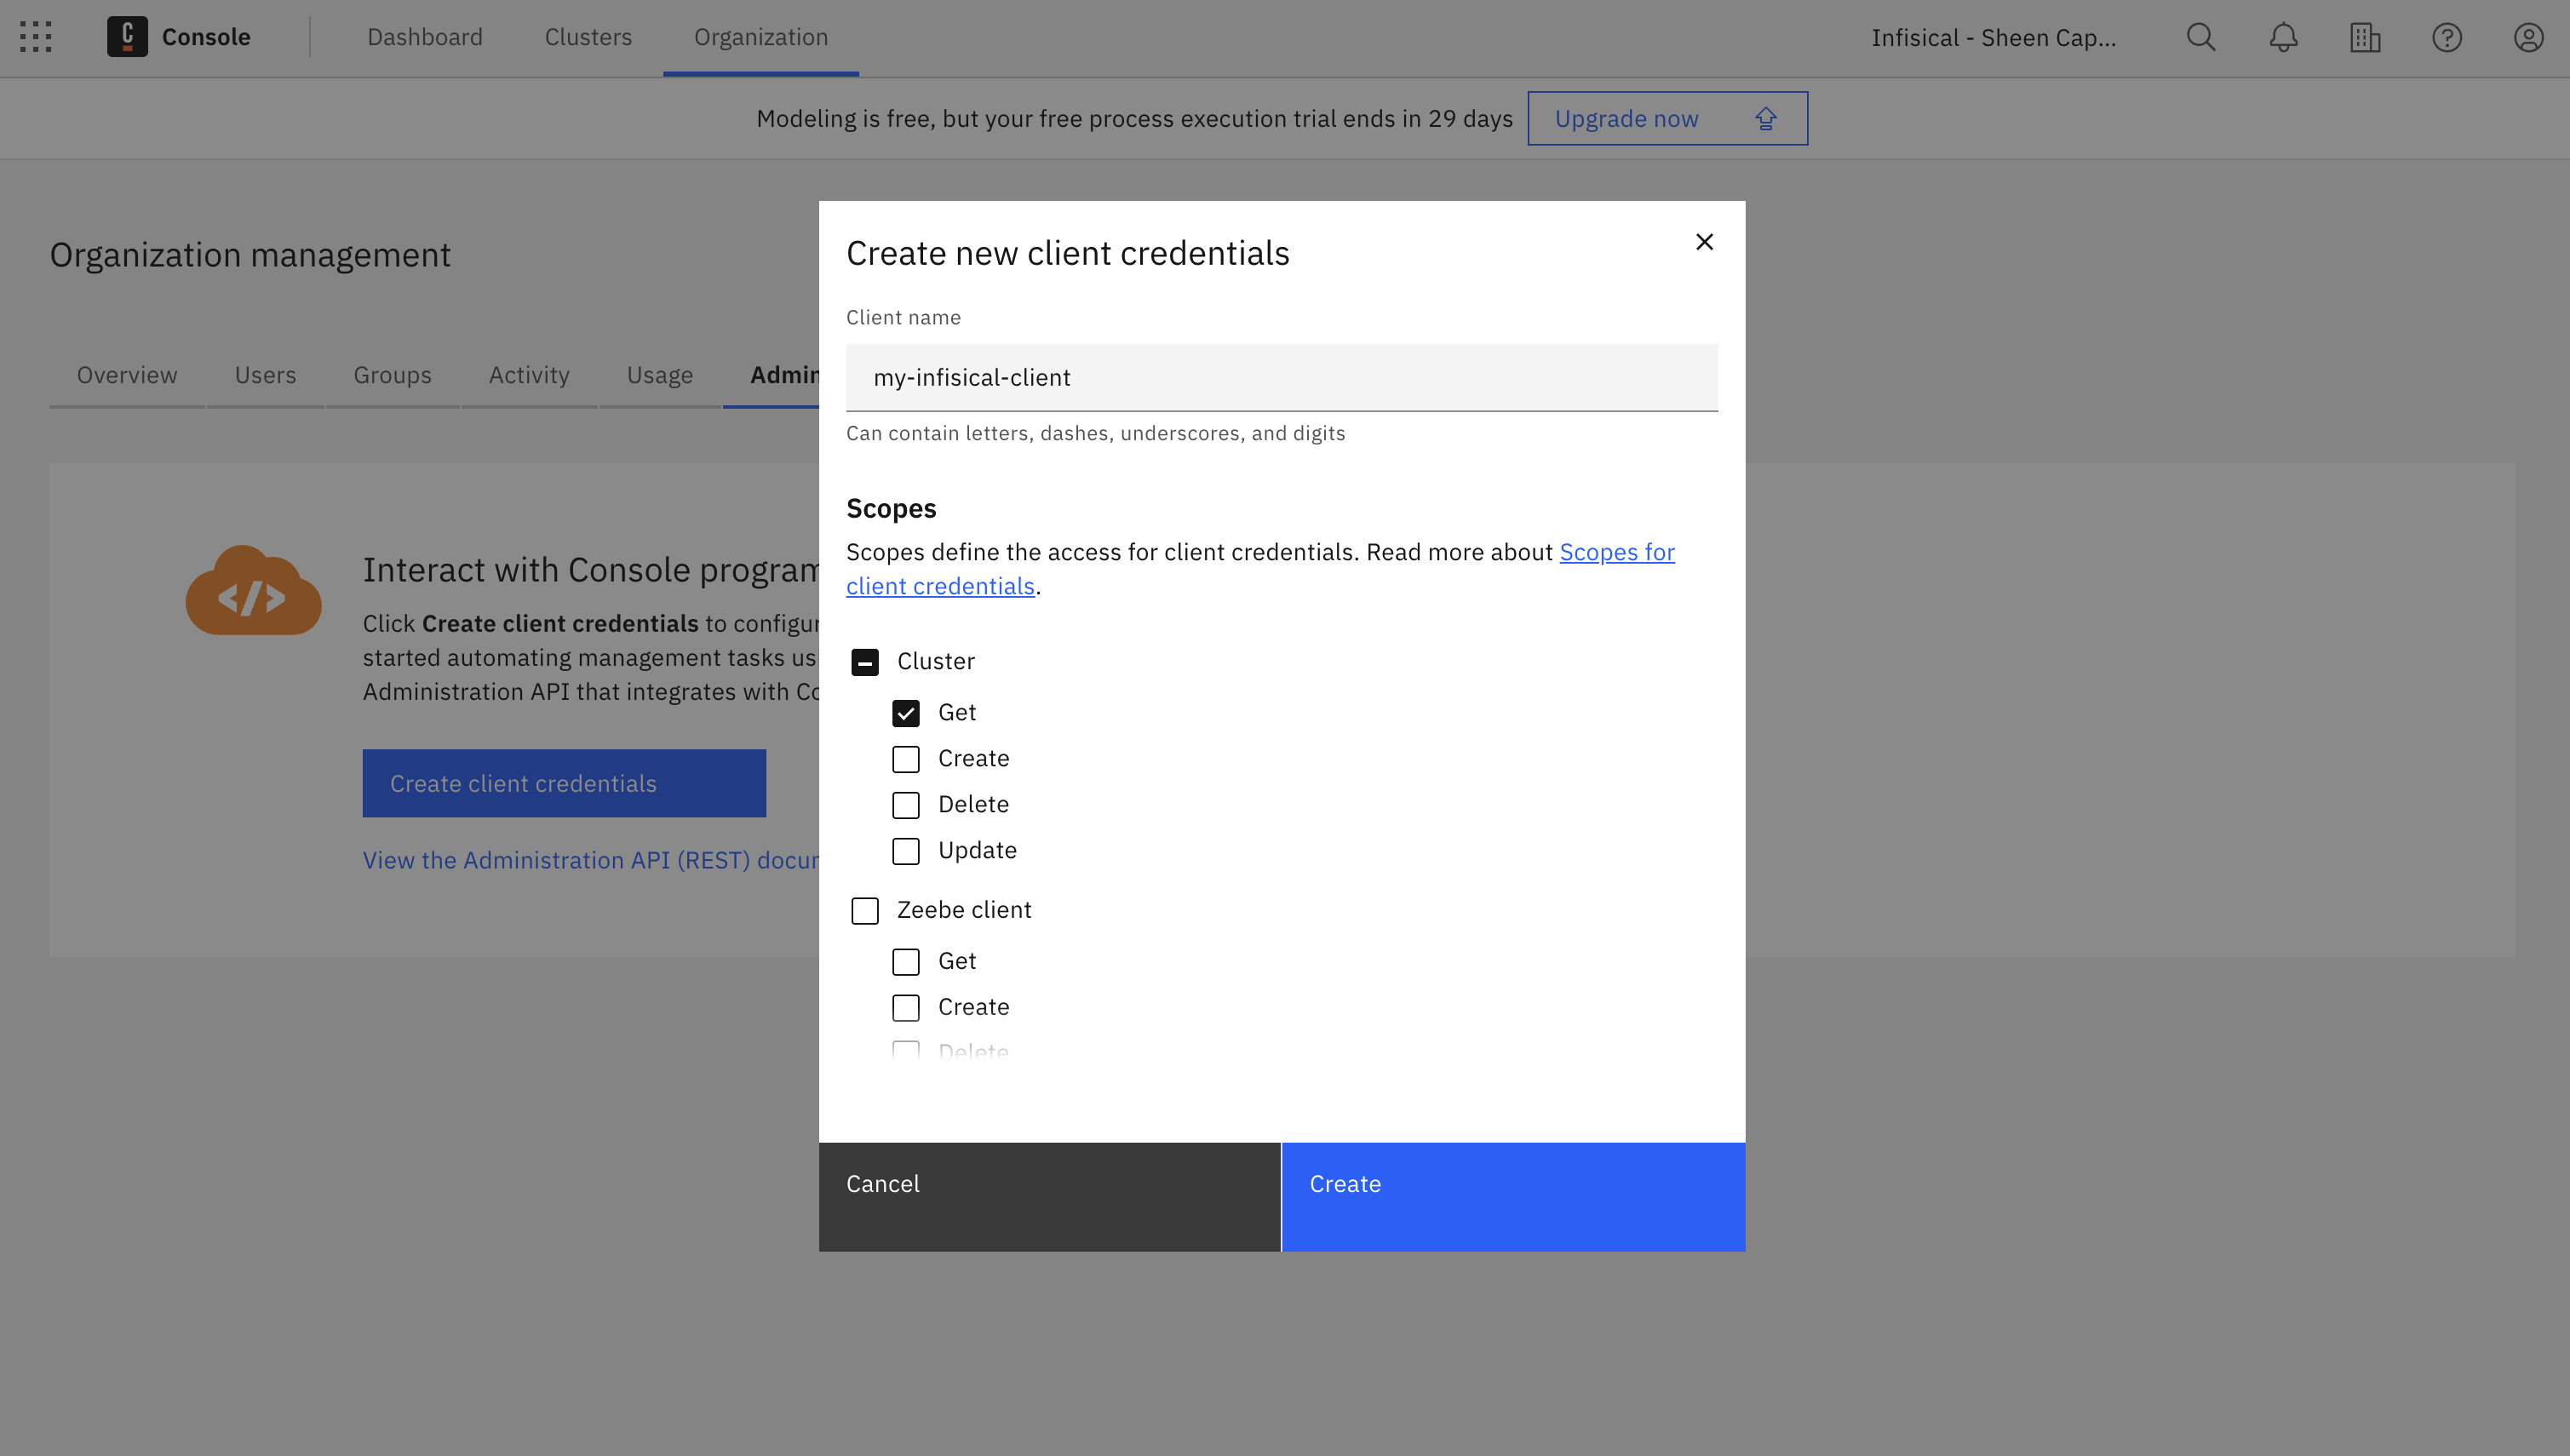
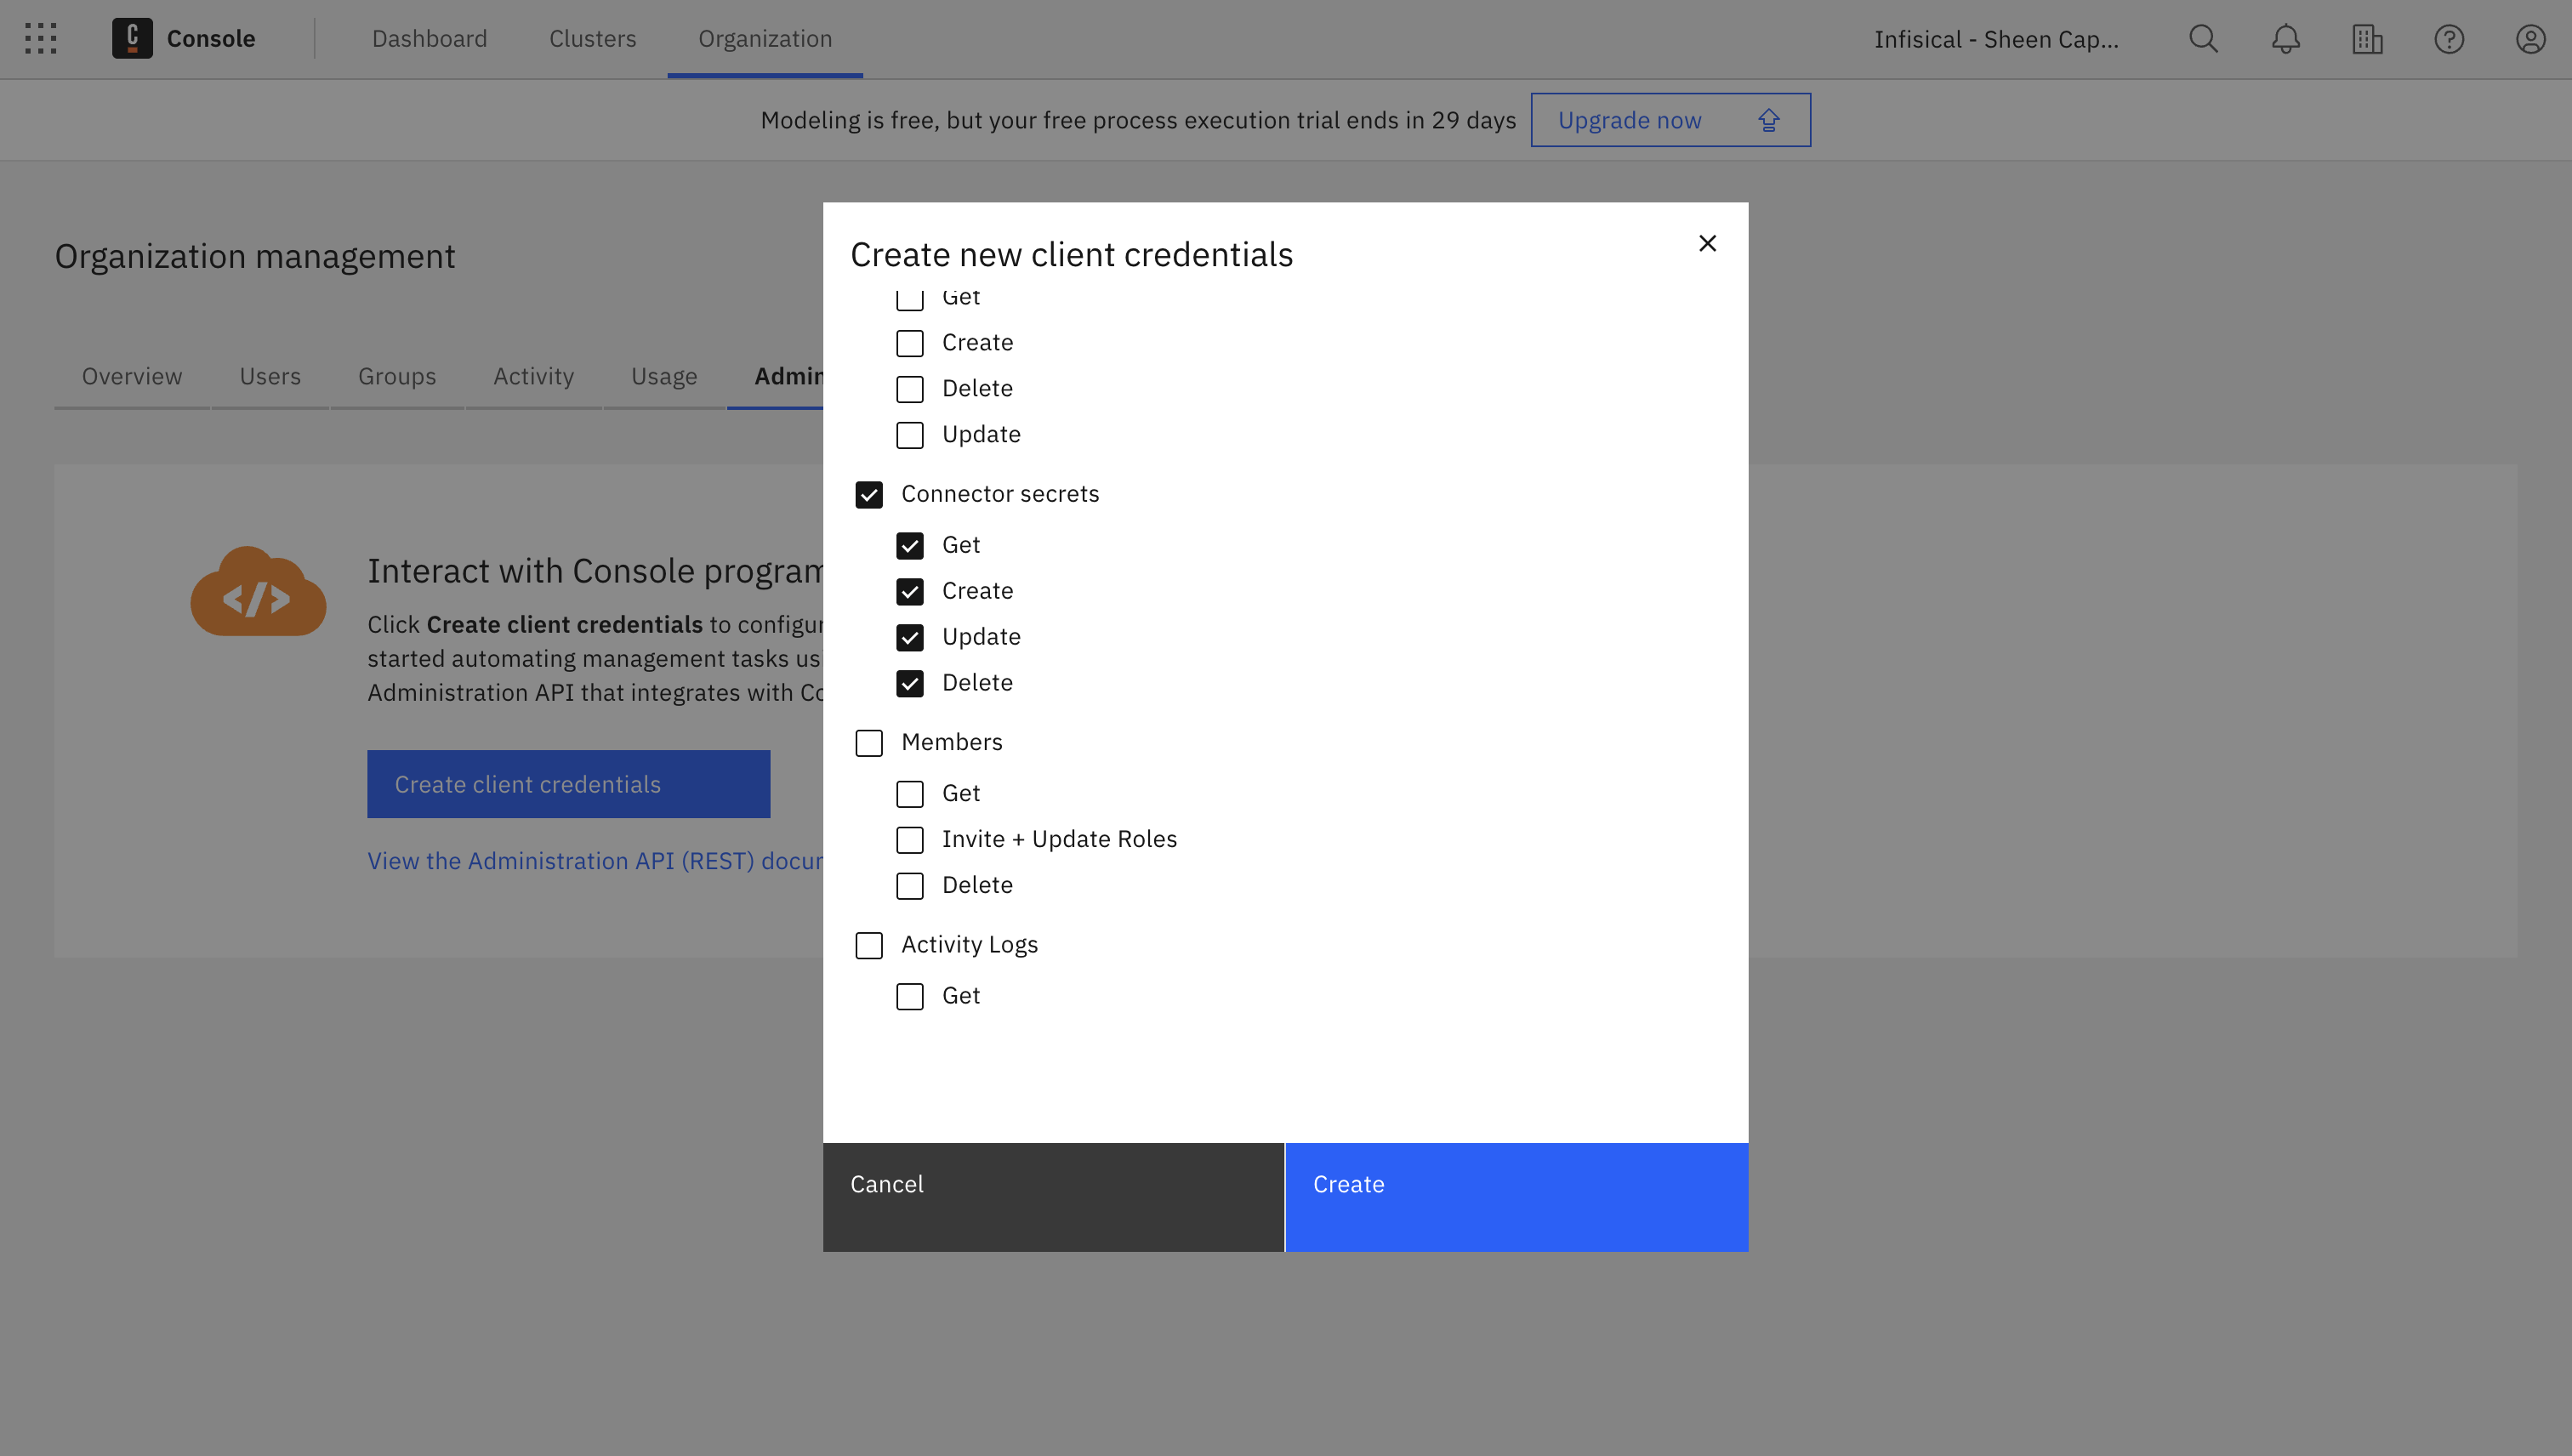
- Cluster: Enable read access (Get)
- Connector secrets: Enable all operations (Get, Create, Update, Delete)
Save Your Credentials
After creation, you’ll be shown your client credentials. For the Infisical connection, you’ll need: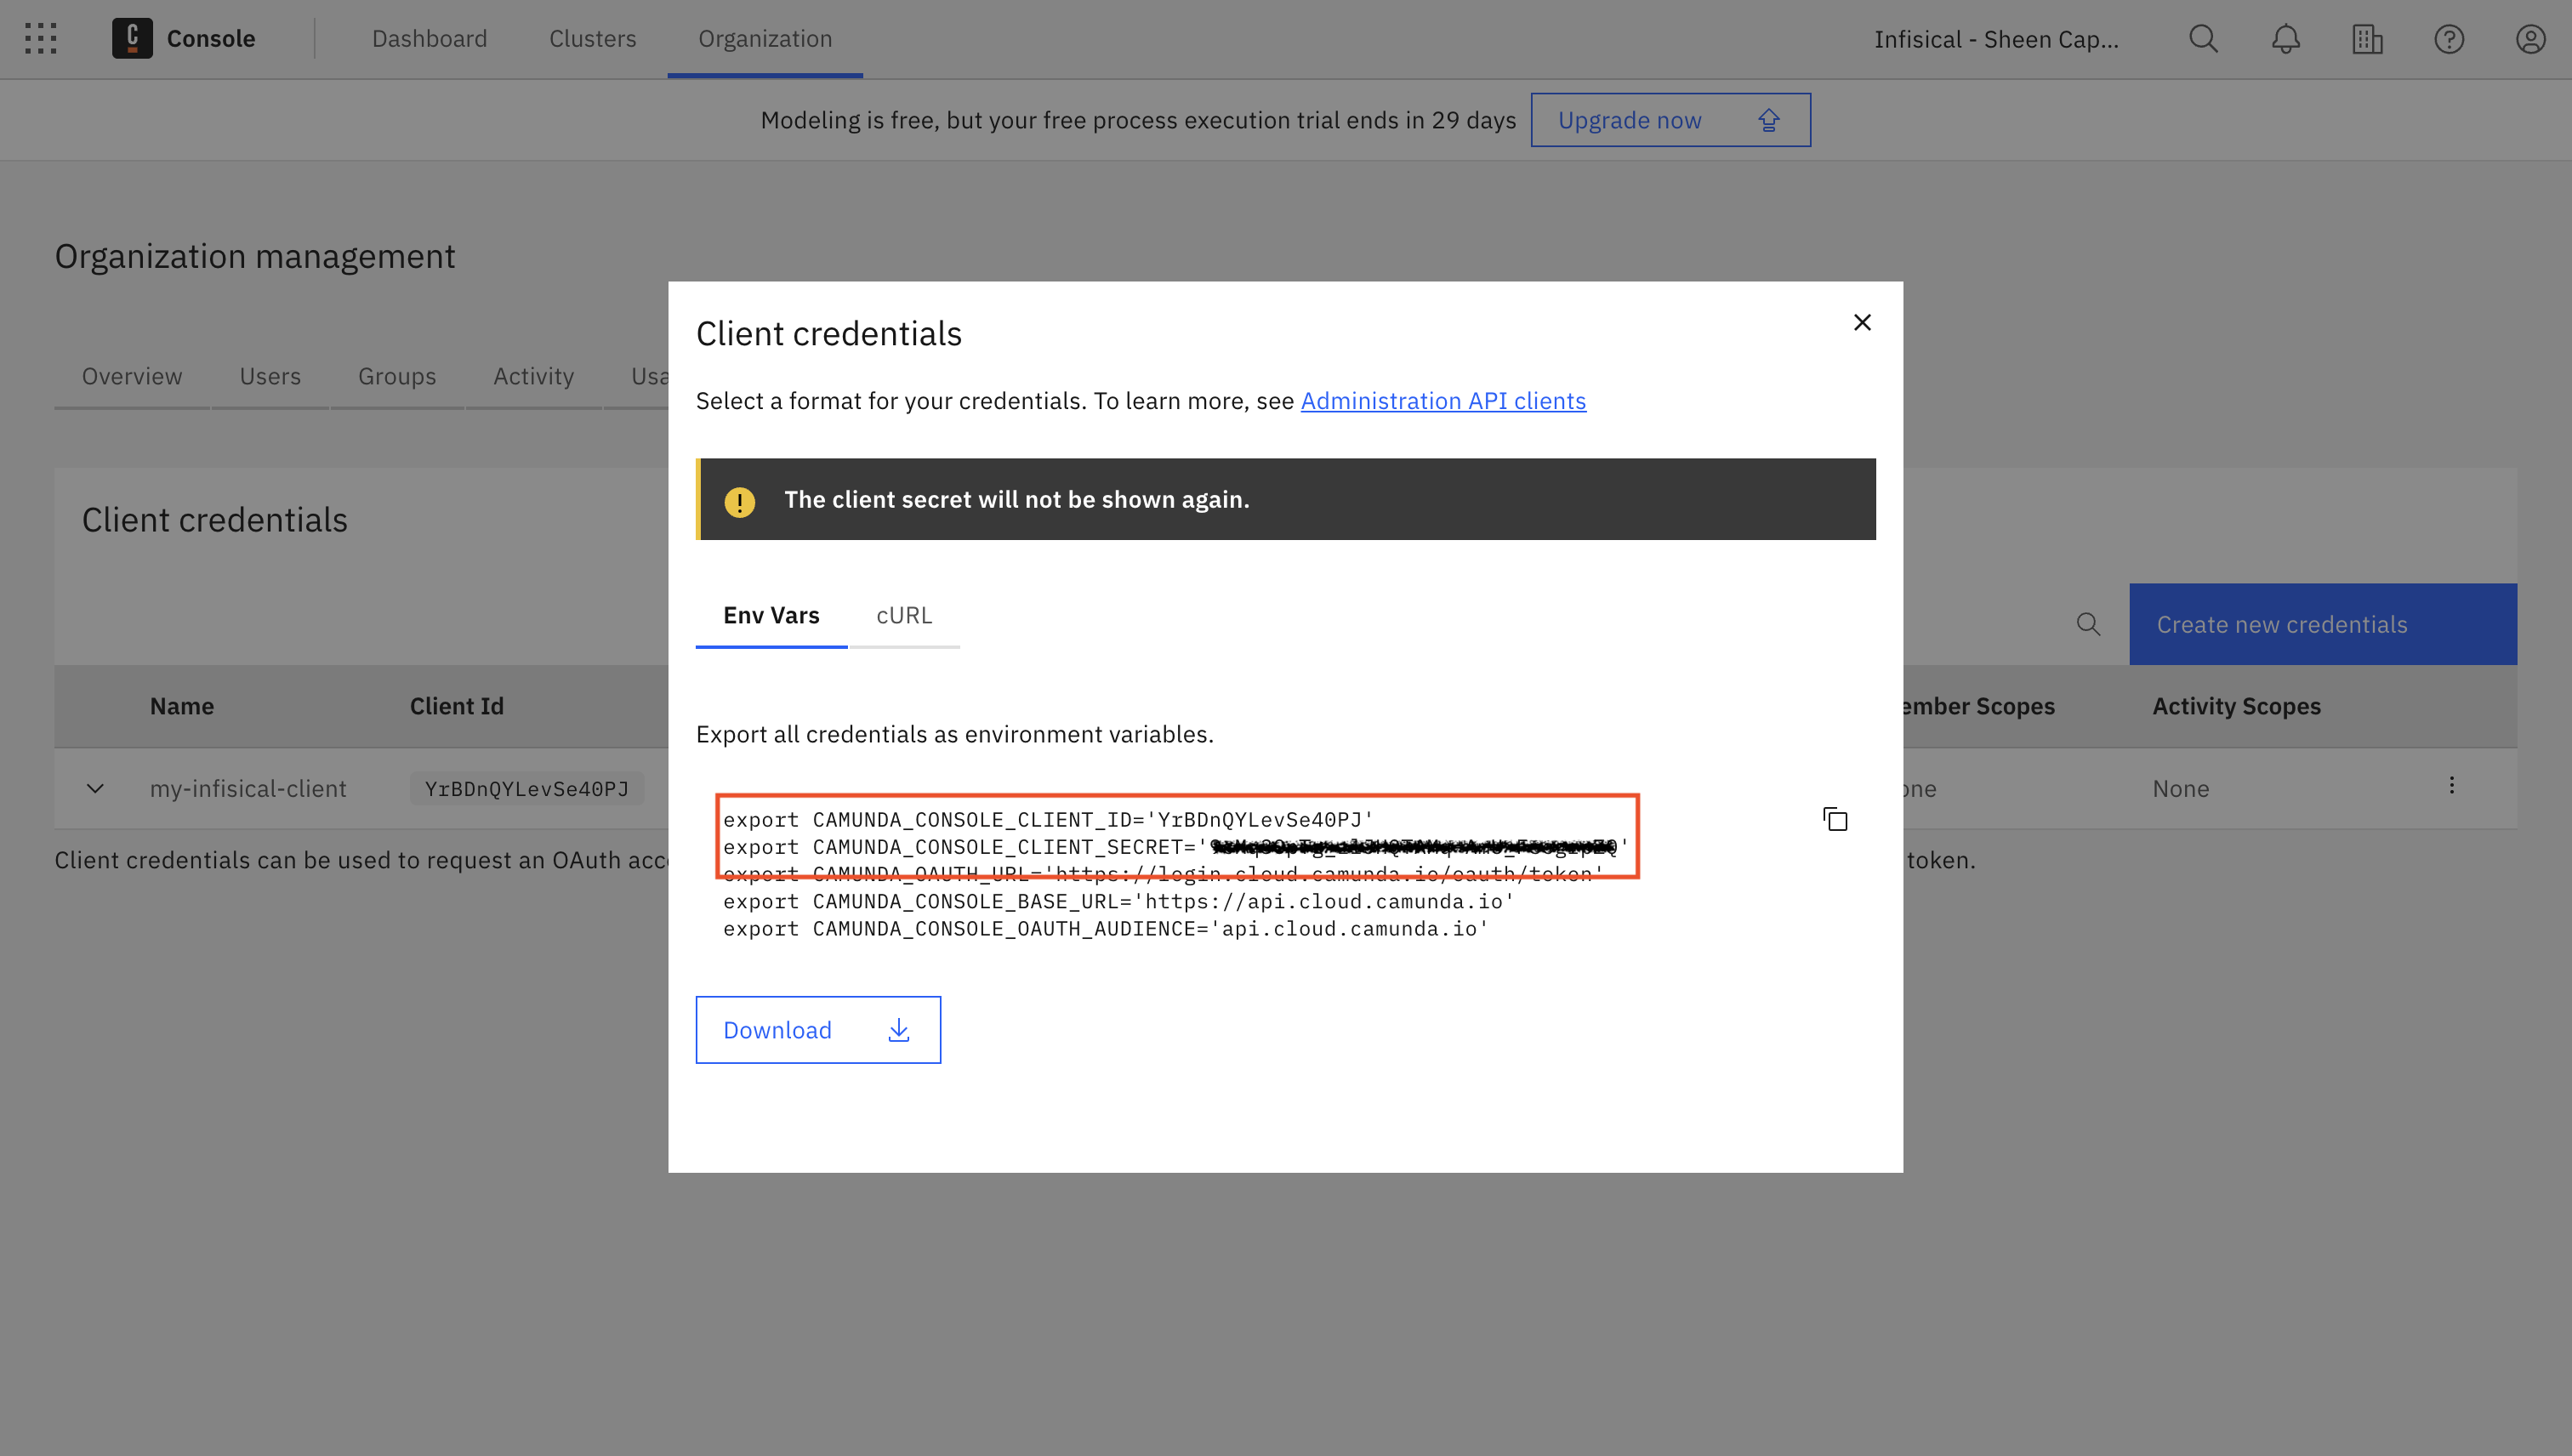
- Client ID (
CAMUNDA_CONSOLE_CLIENT_ID) - Client Secret (
CAMUNDA_CONSOLE_CLIENT_SECRET)
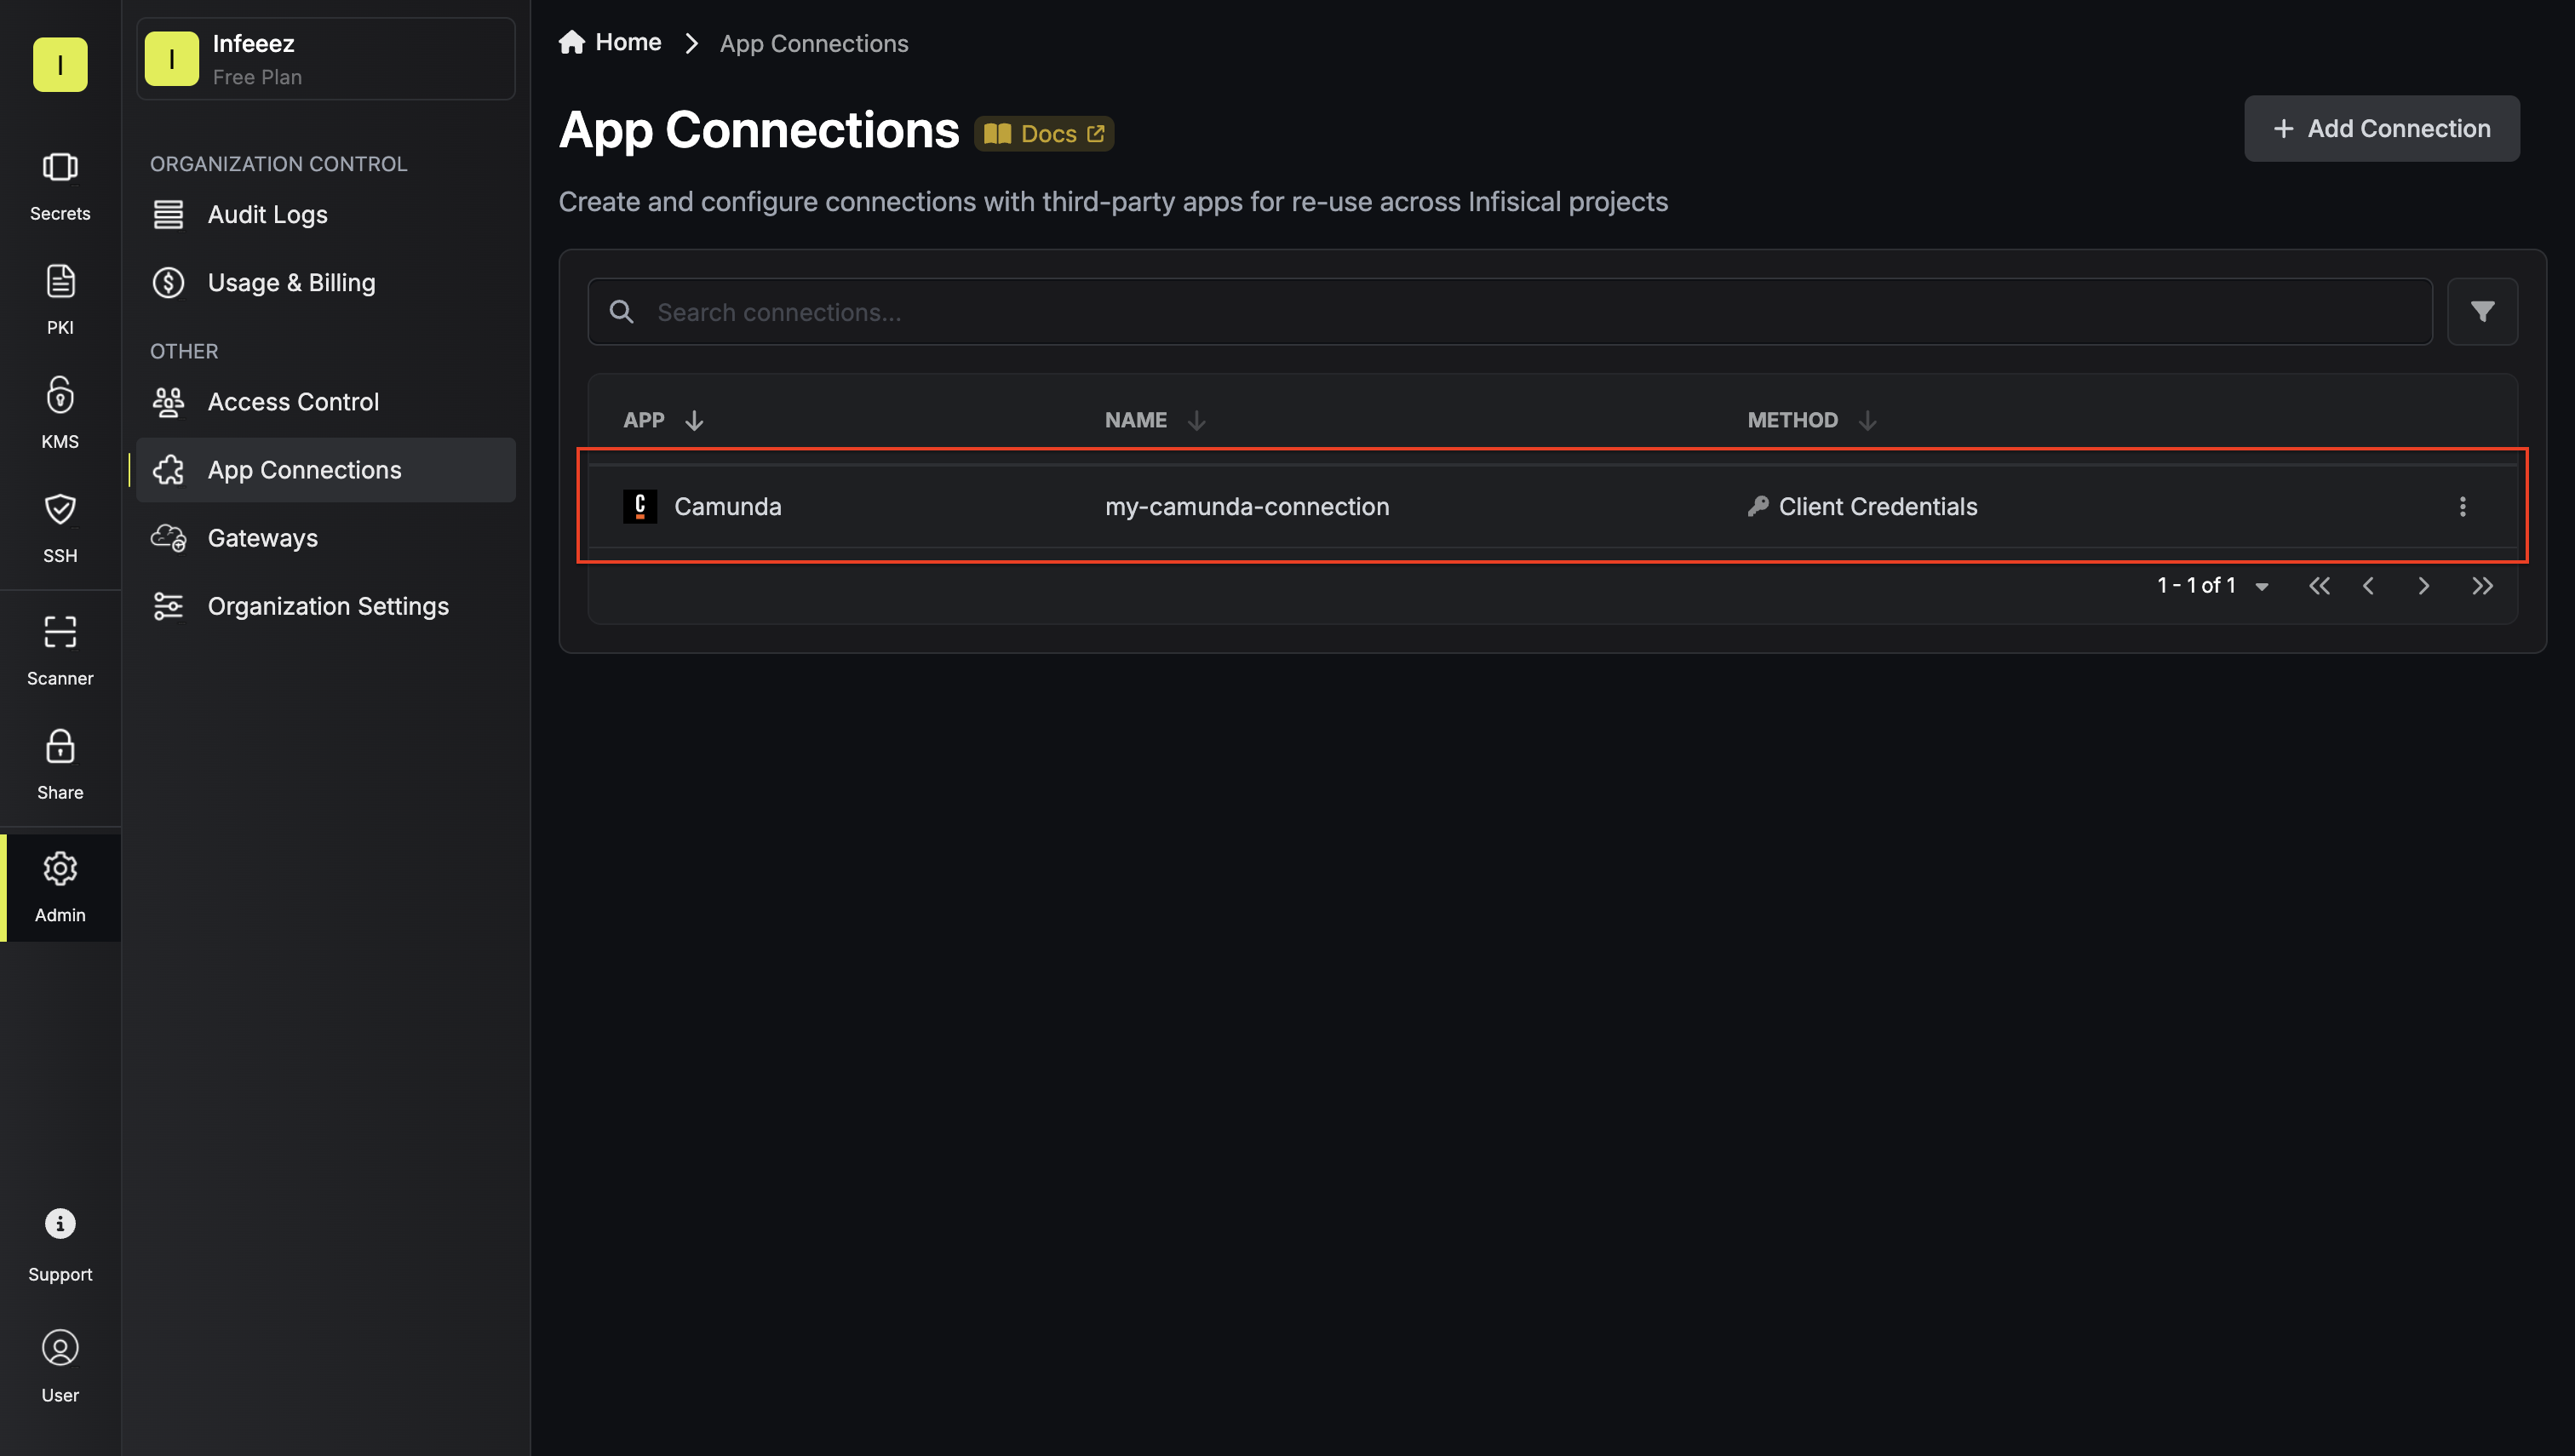
Setup Camunda Connection in Infisical
Navigate to App Connections
Navigate to the Integrations tab in the desired project, then select App Connections. 

Input Credentials
Select the Client Credentials method and enter the Camunda client
credentials you created: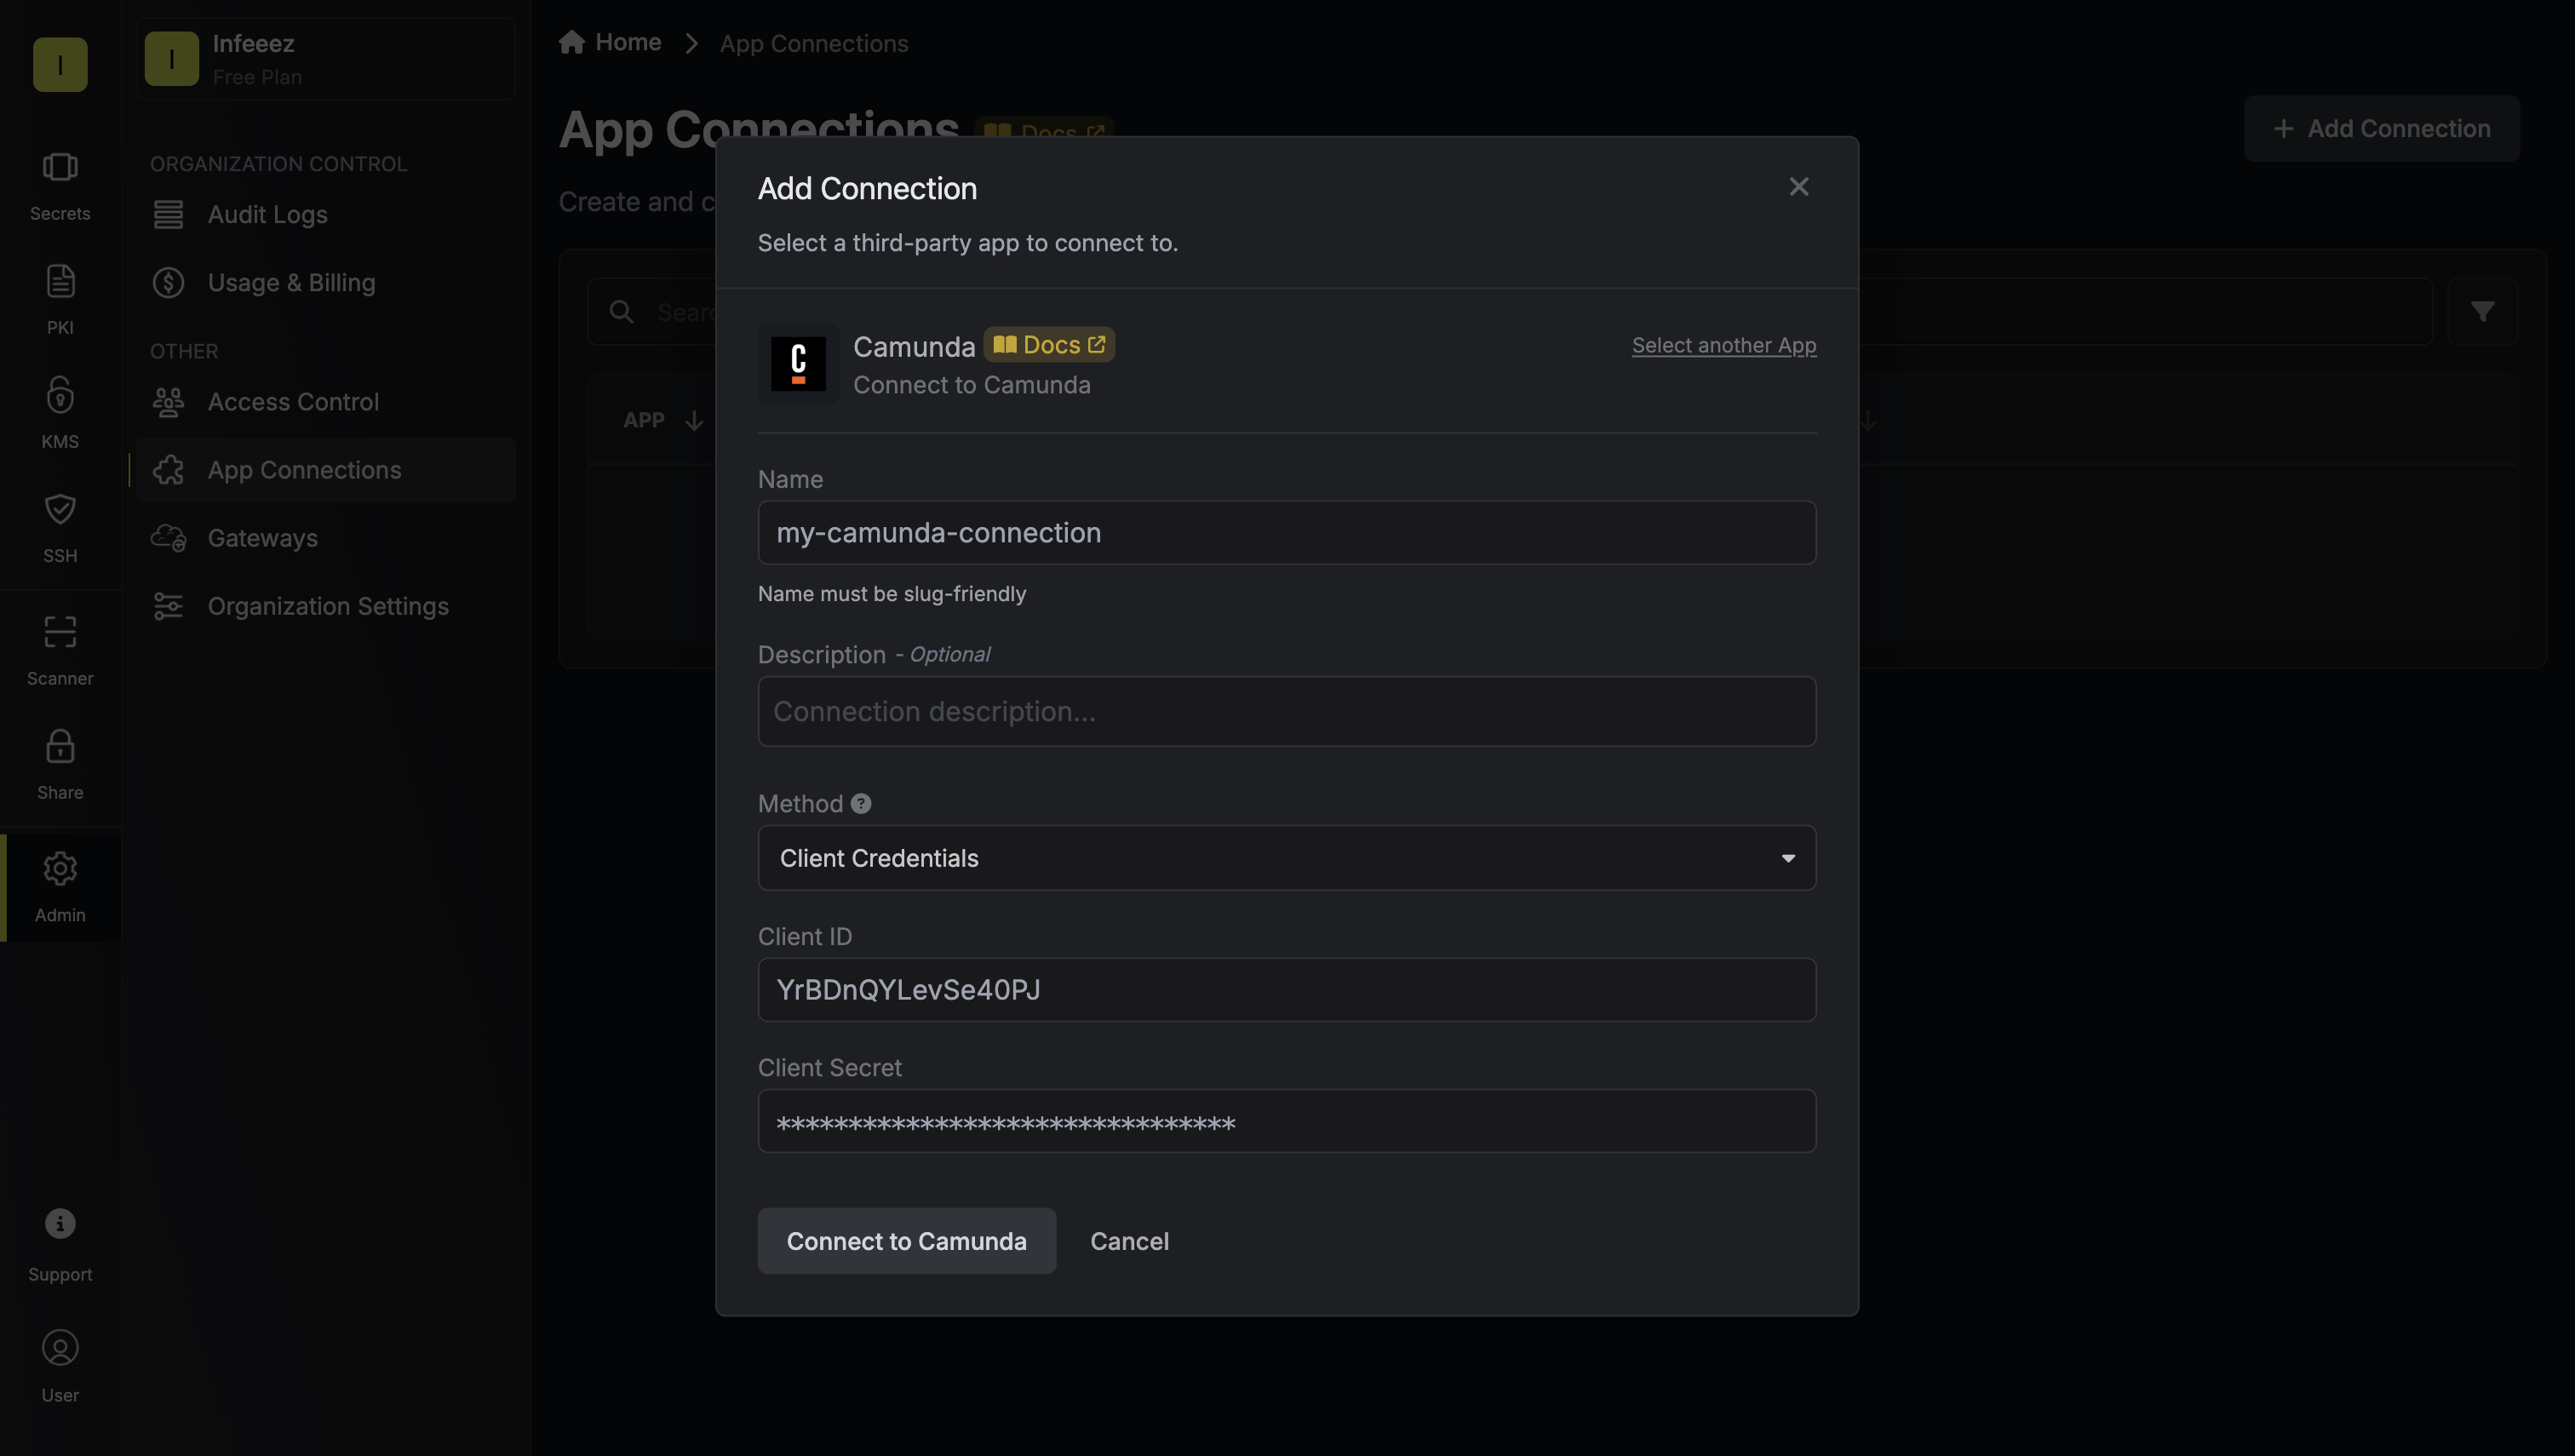
- Client ID: Your
CAMUNDA_CONSOLE_CLIENT_IDvalue - Client Secret: Your
CAMUNDA_CONSOLE_CLIENT_SECRETvalue