- OAuth Method
- Access Token Method
The OAuth method provides secure authentication through GitLab’s OAuth flow.
Oauth Method is only supported in Self-Hosted mode.
Self-Hosted Instance Setup
Self-Hosted Instance Setup
Using the GitLab Connection with OAuth on a self-hosted instance of Infisical requires configuring an OAuth application in GitLab and registering your instance with it.Prerequisites:
- A GitLab account with existing projects
- Self-hosted Infisical instance
Create an OAuth application in GitLab
Navigate to your user Settings > Applications to create a new GitLab application.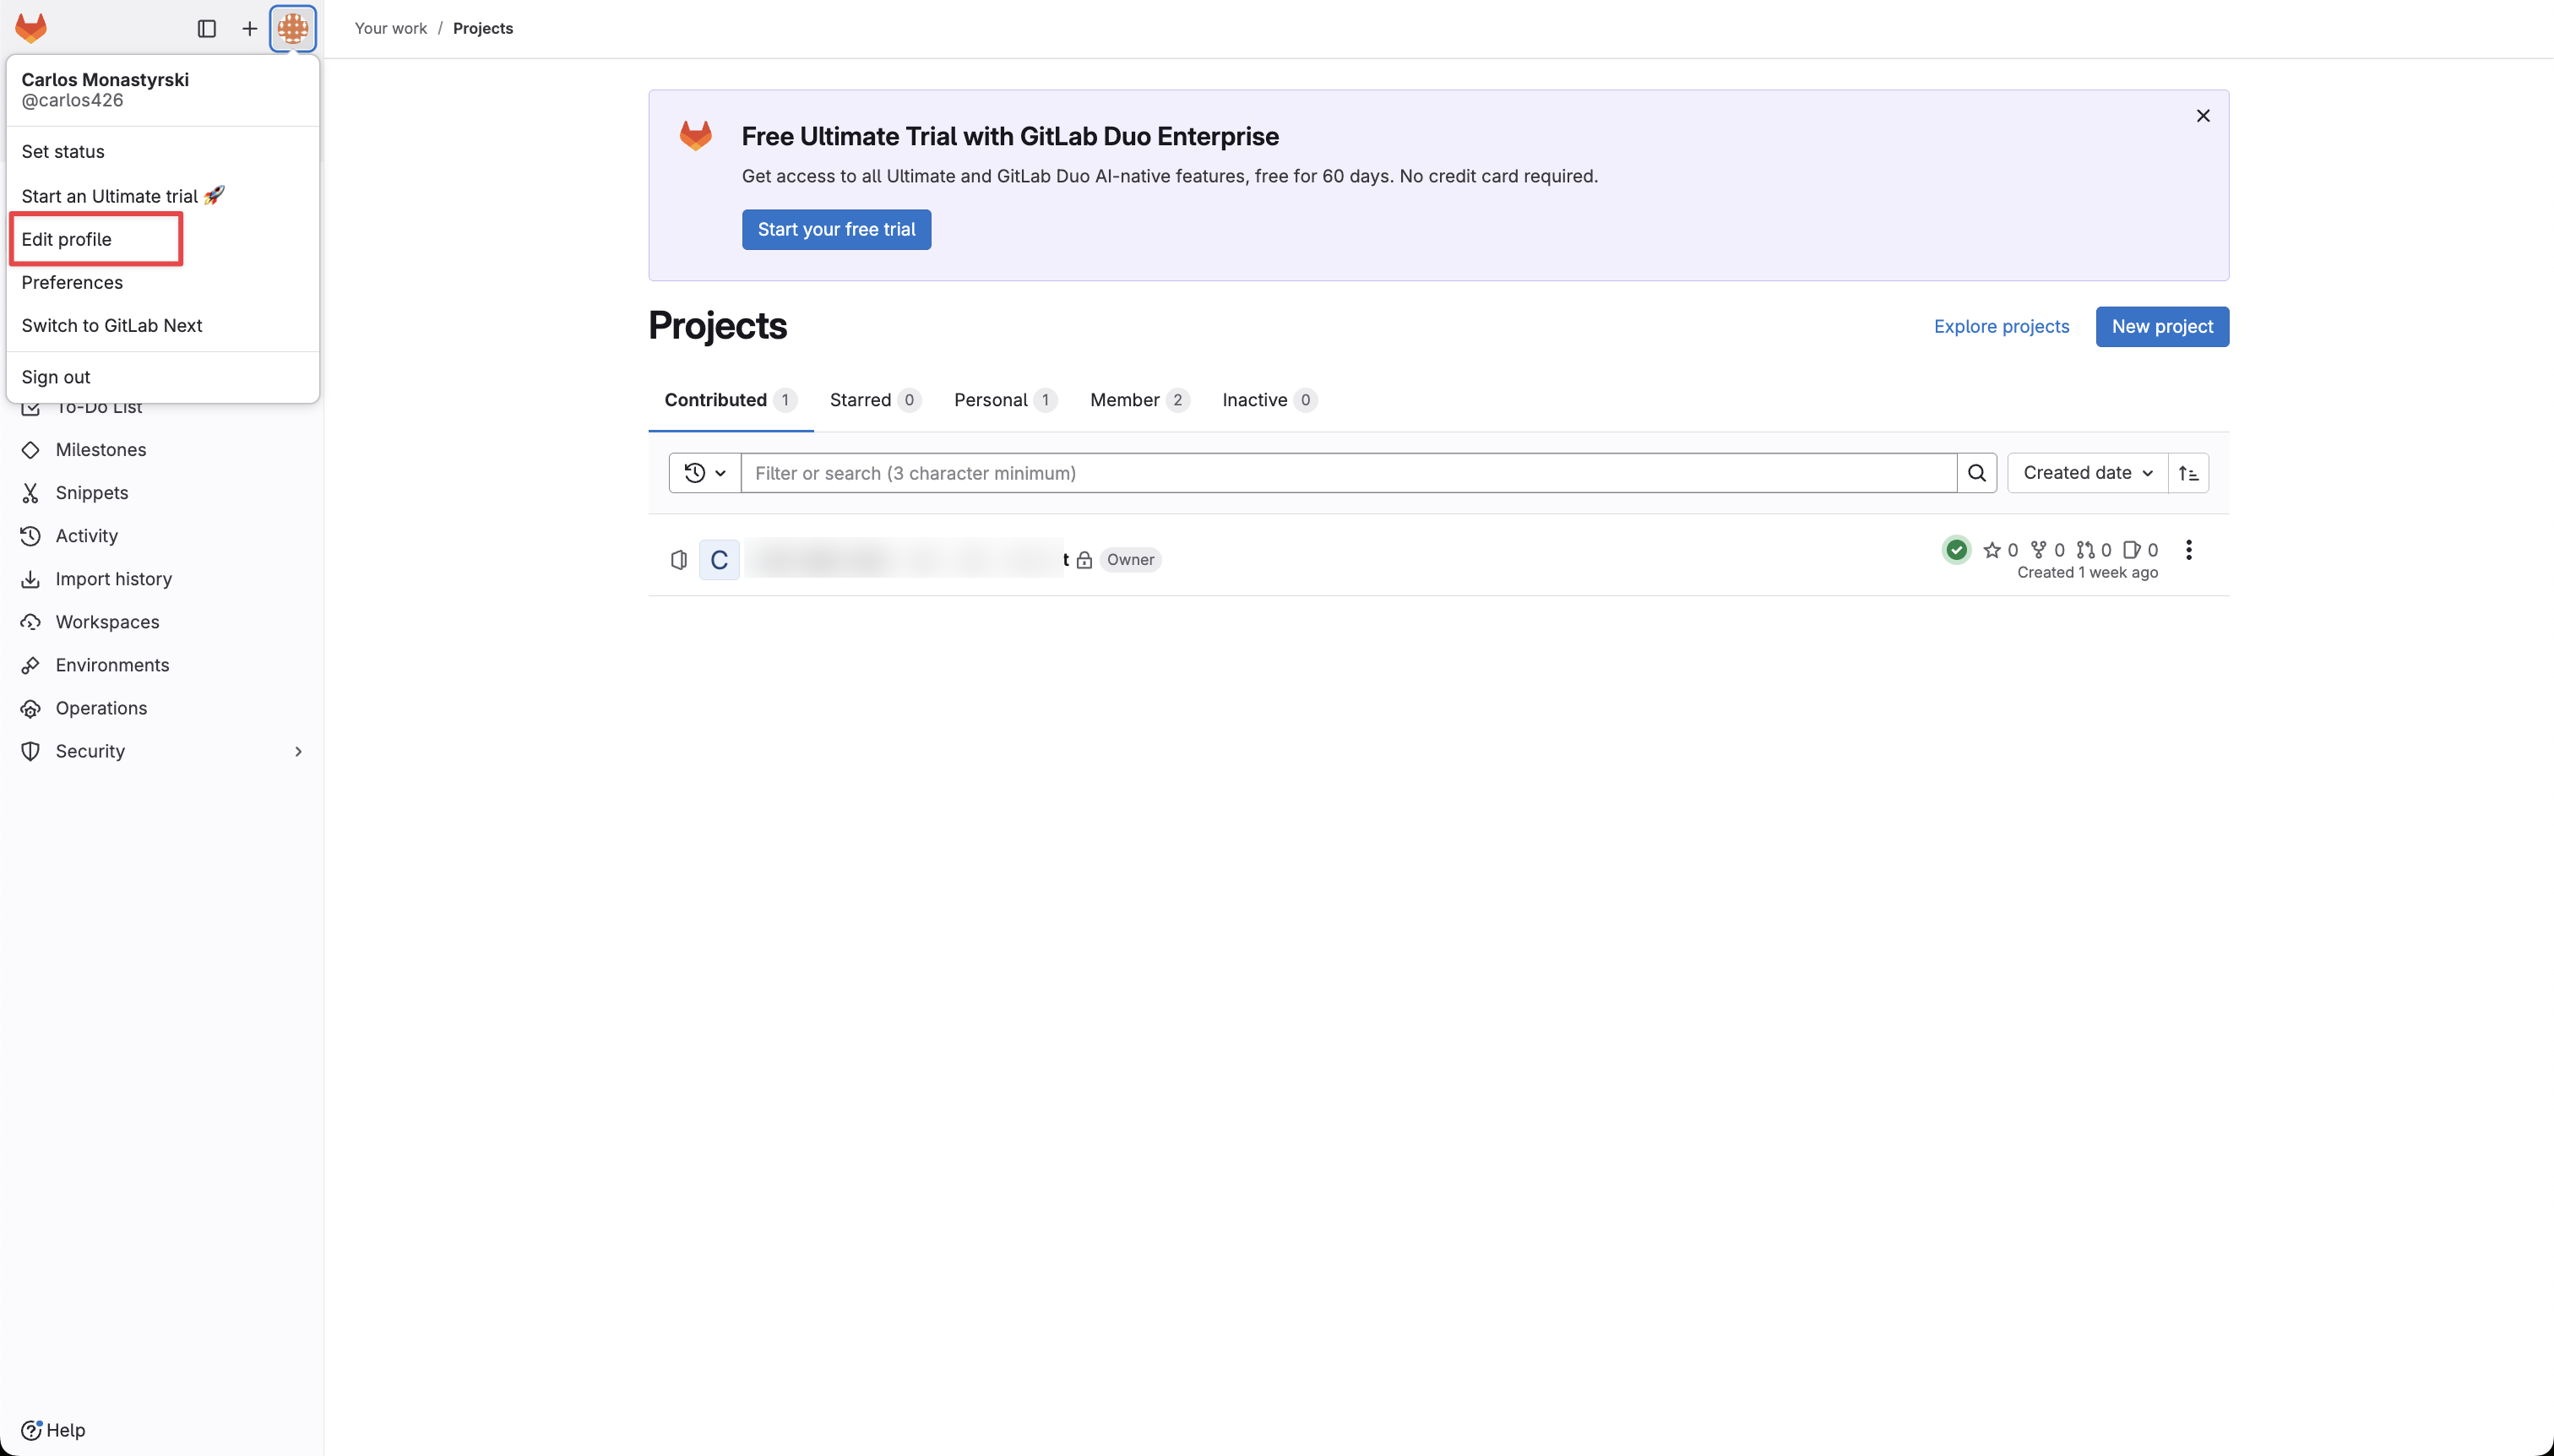
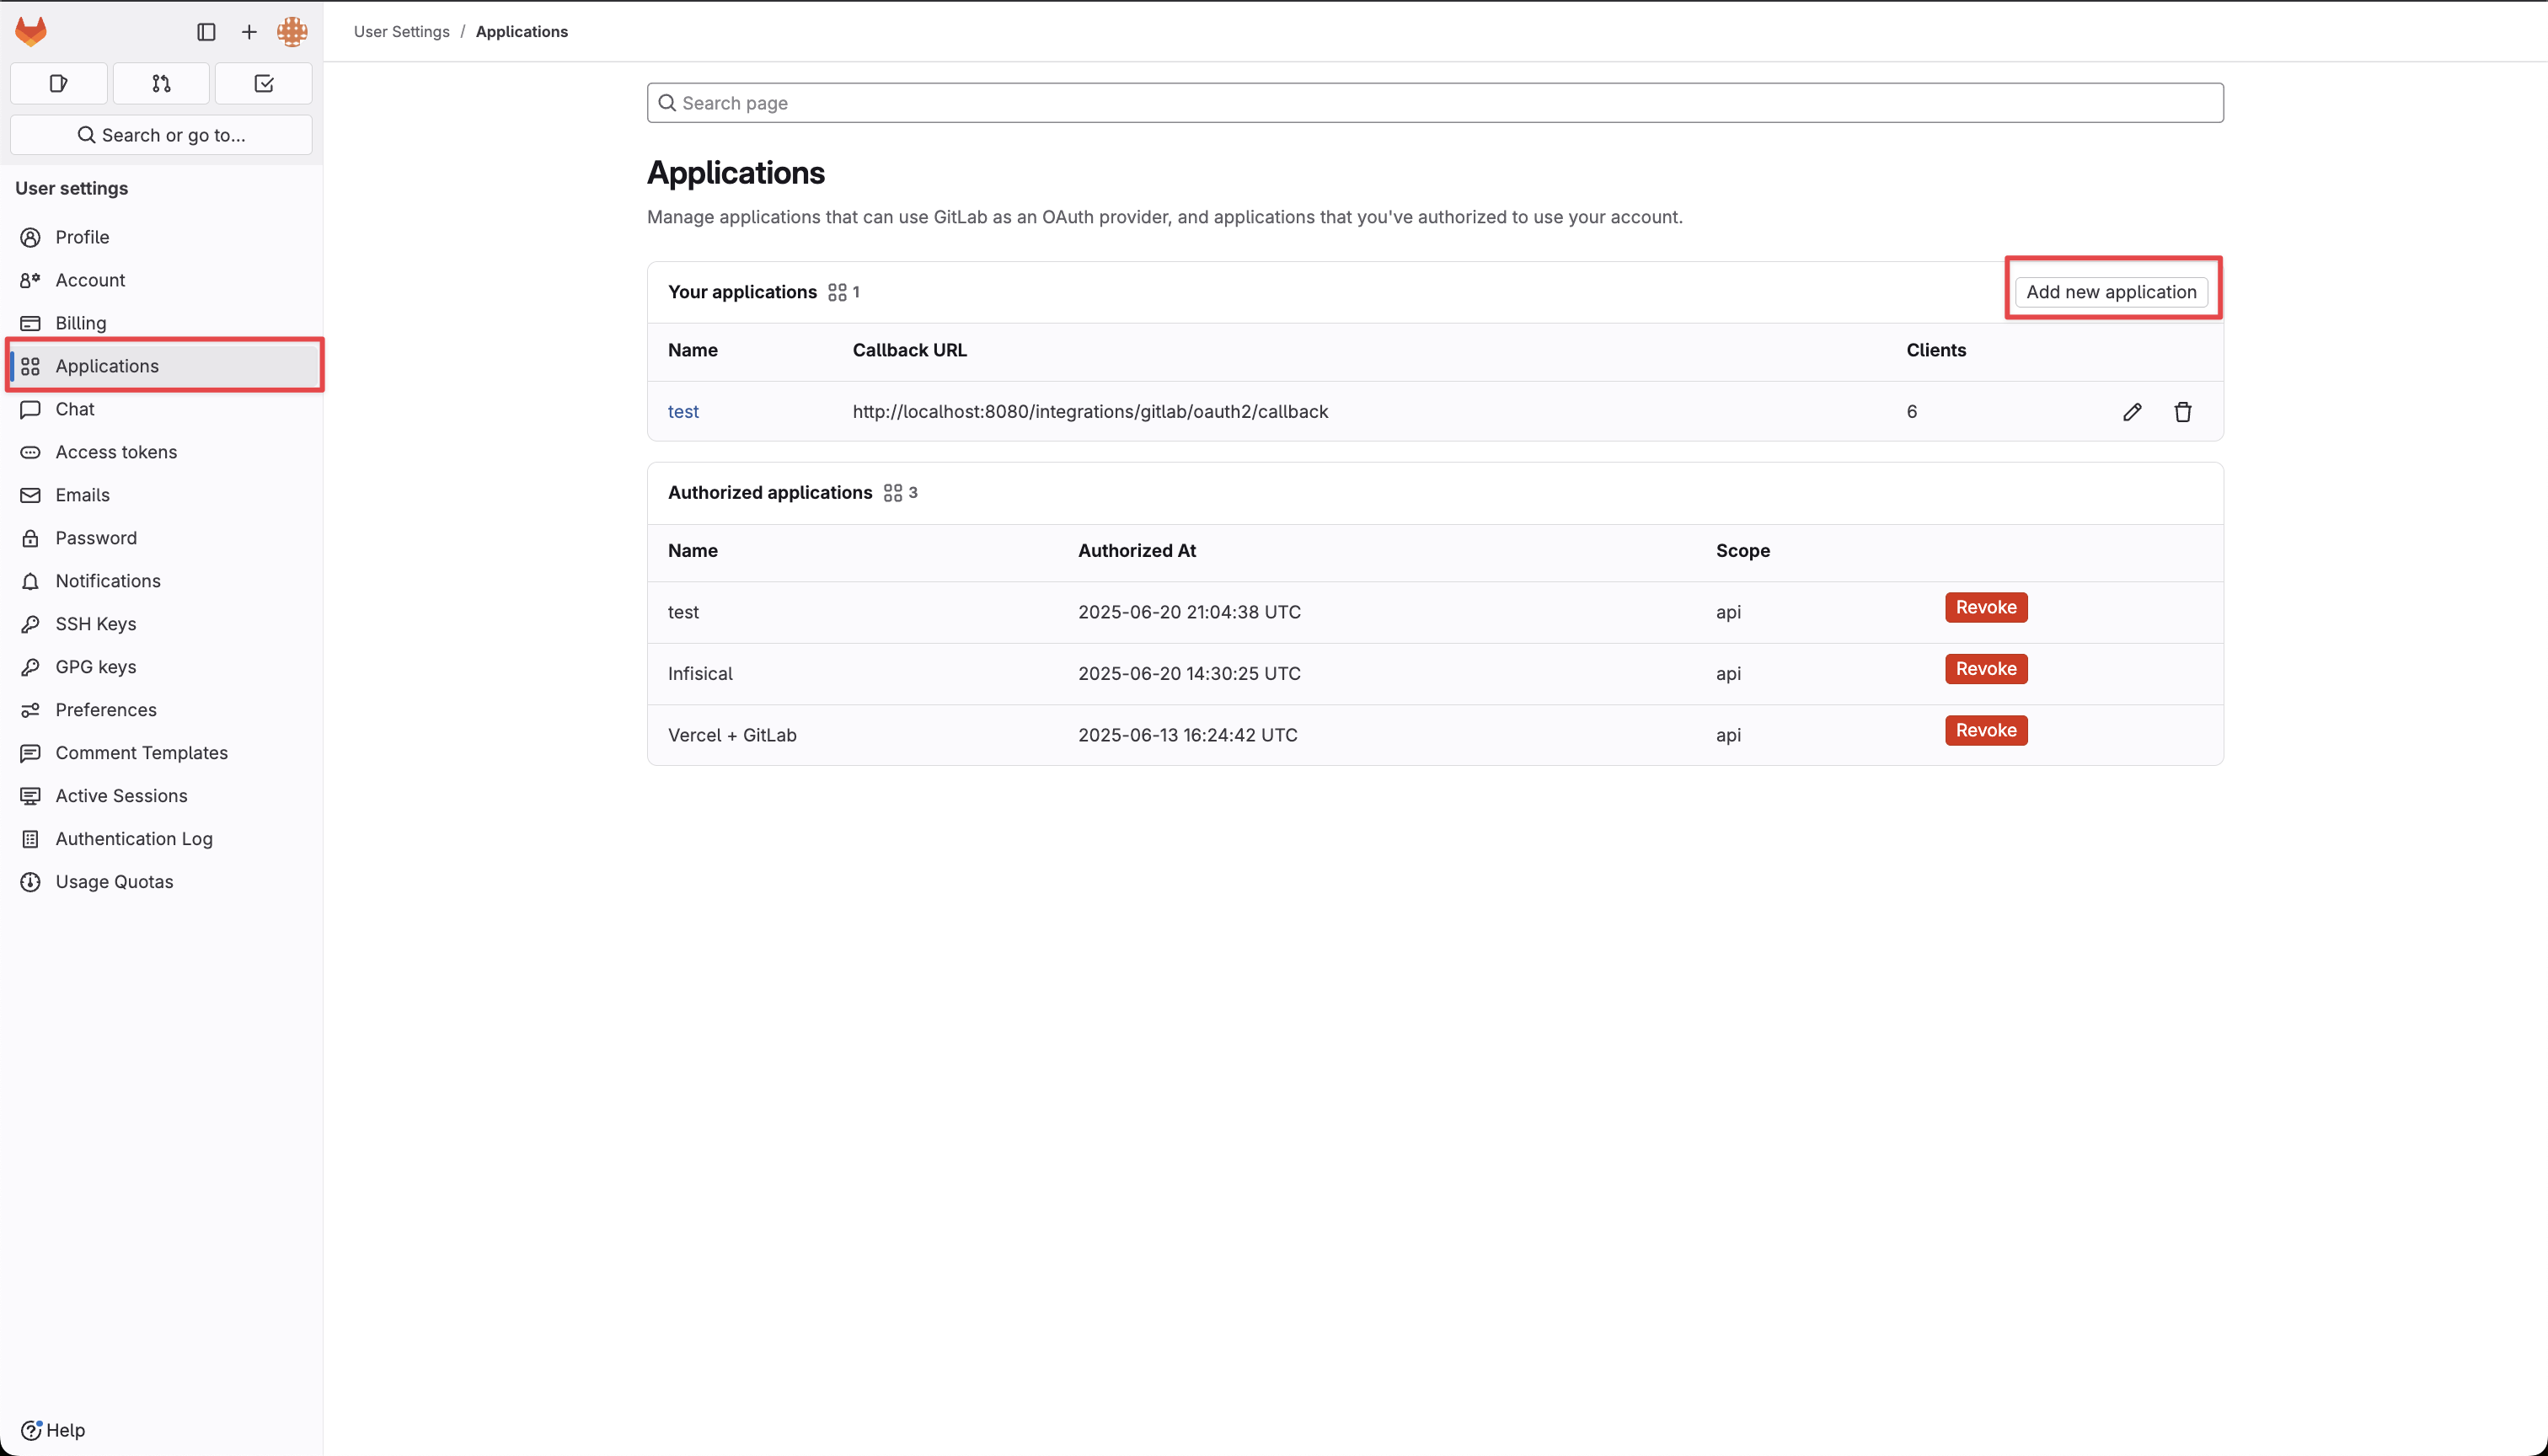 Create the application. As part of the form, set the Redirect URI to
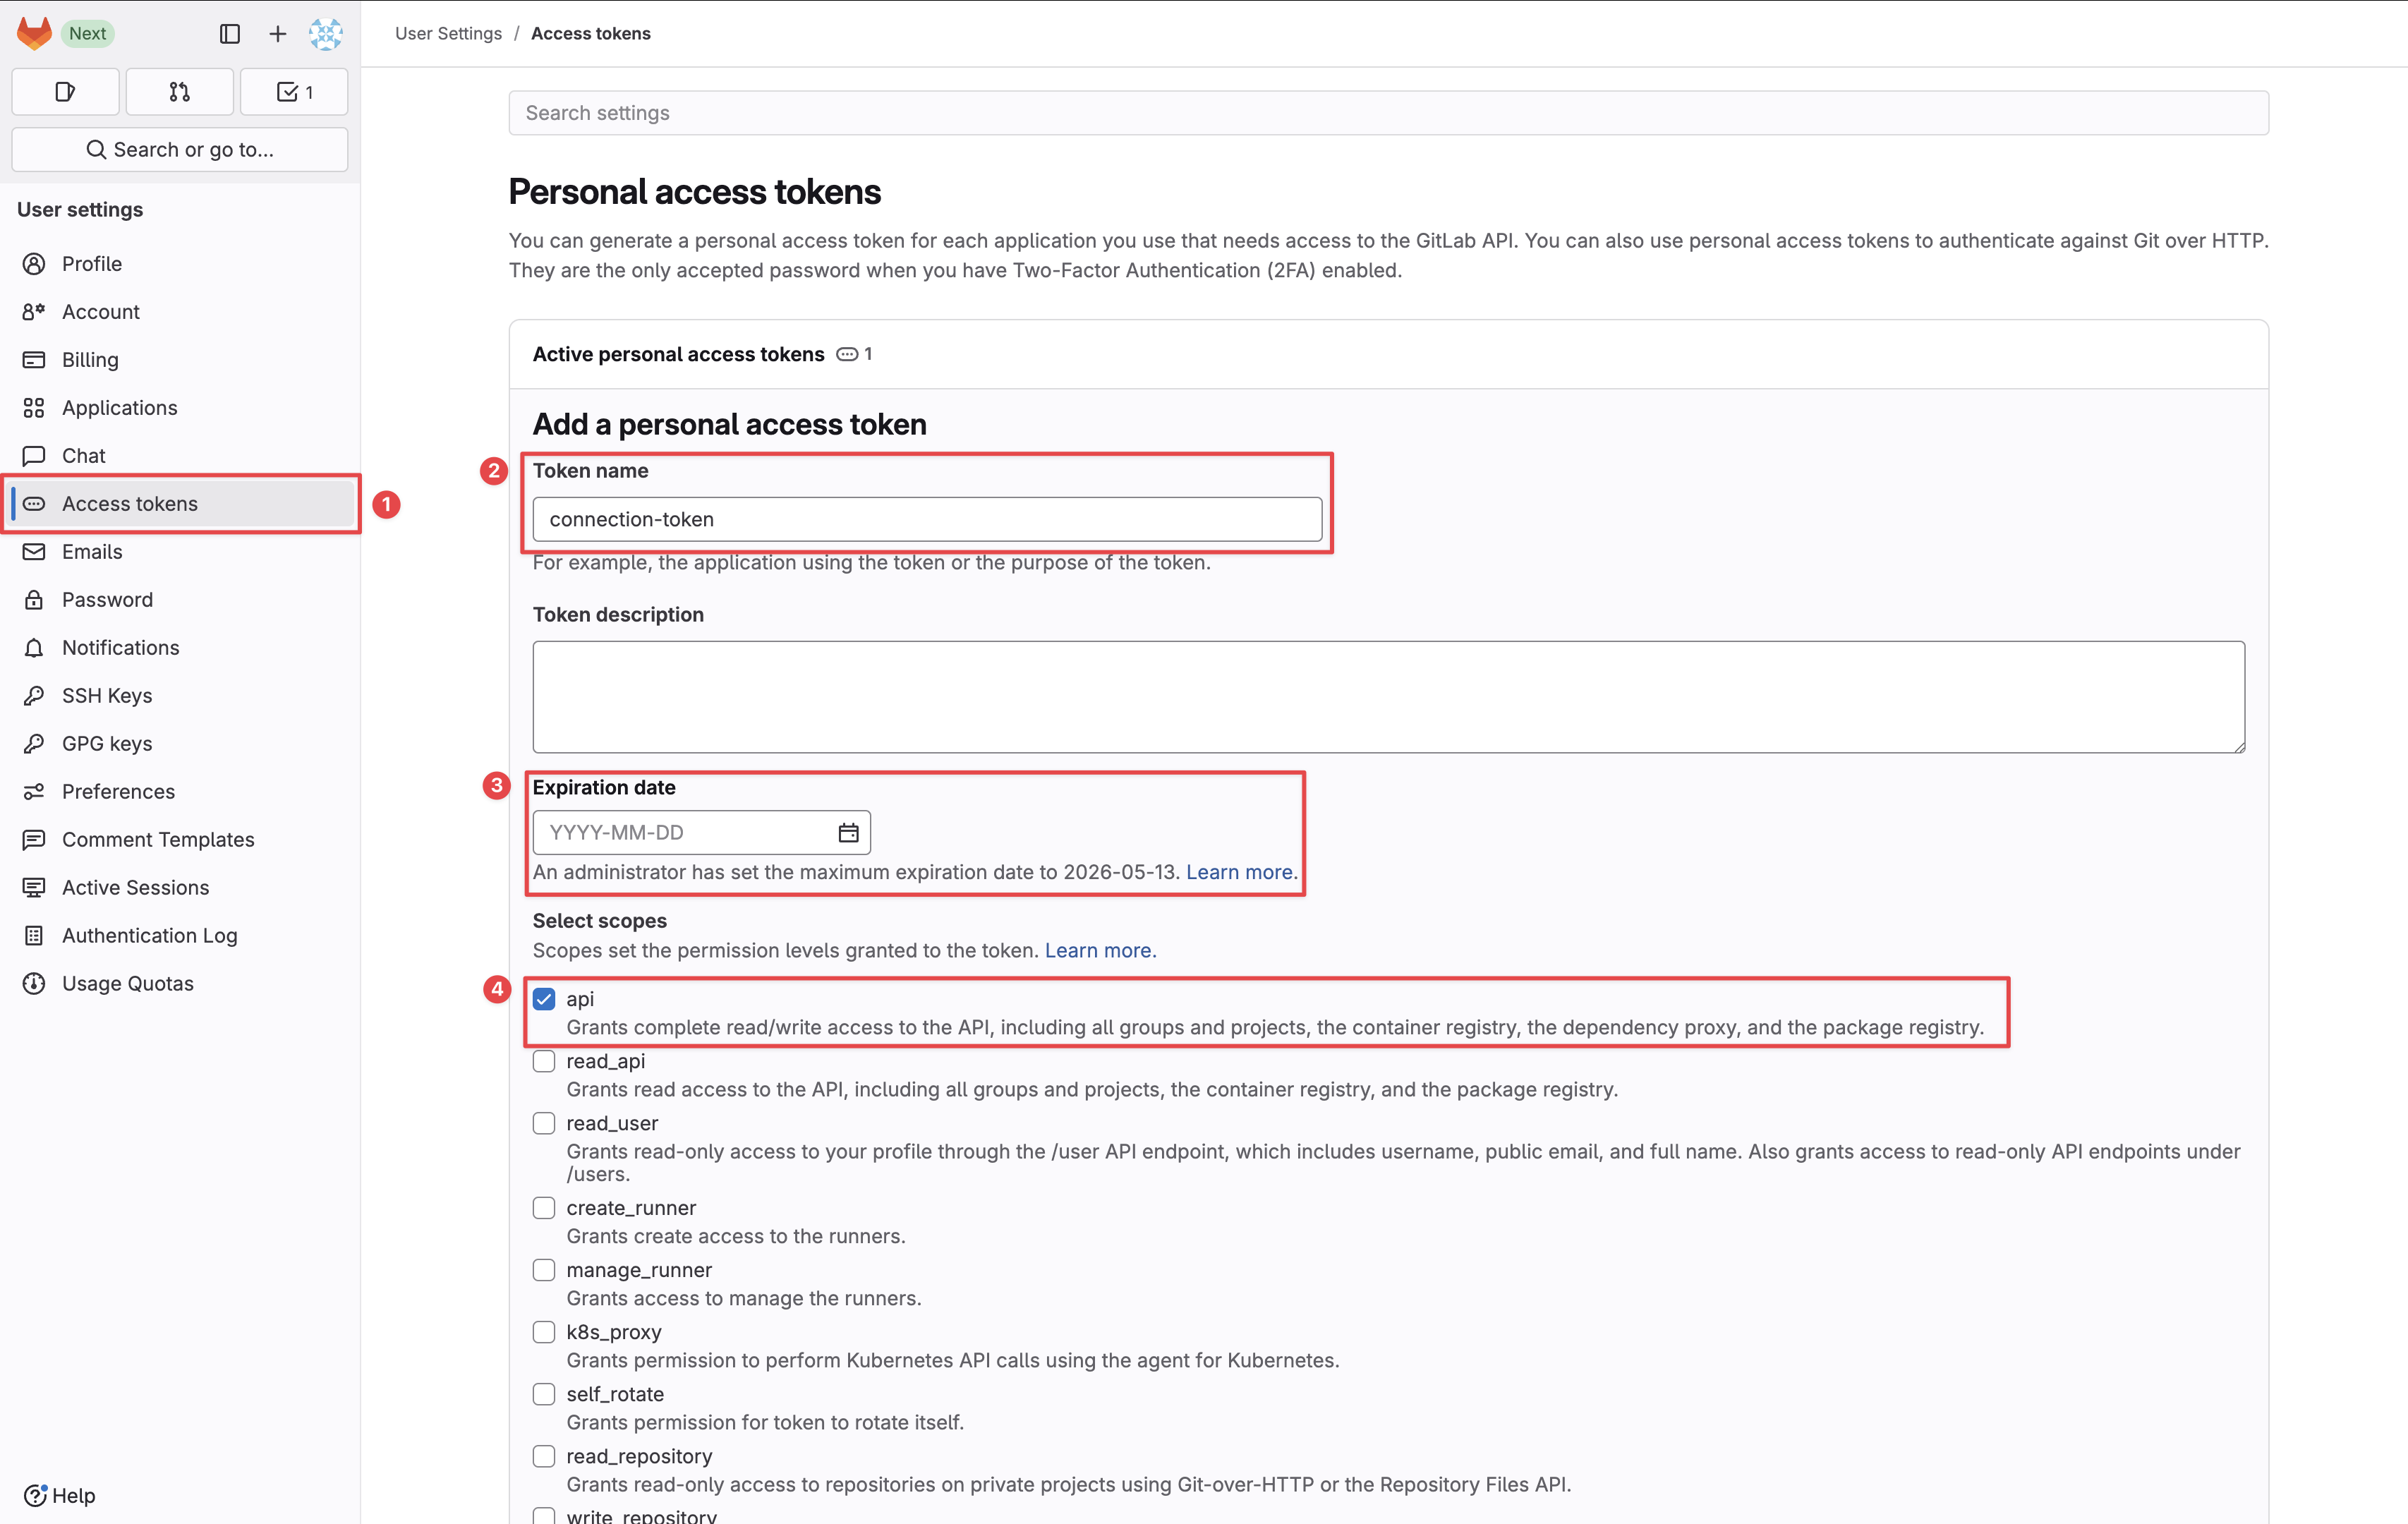
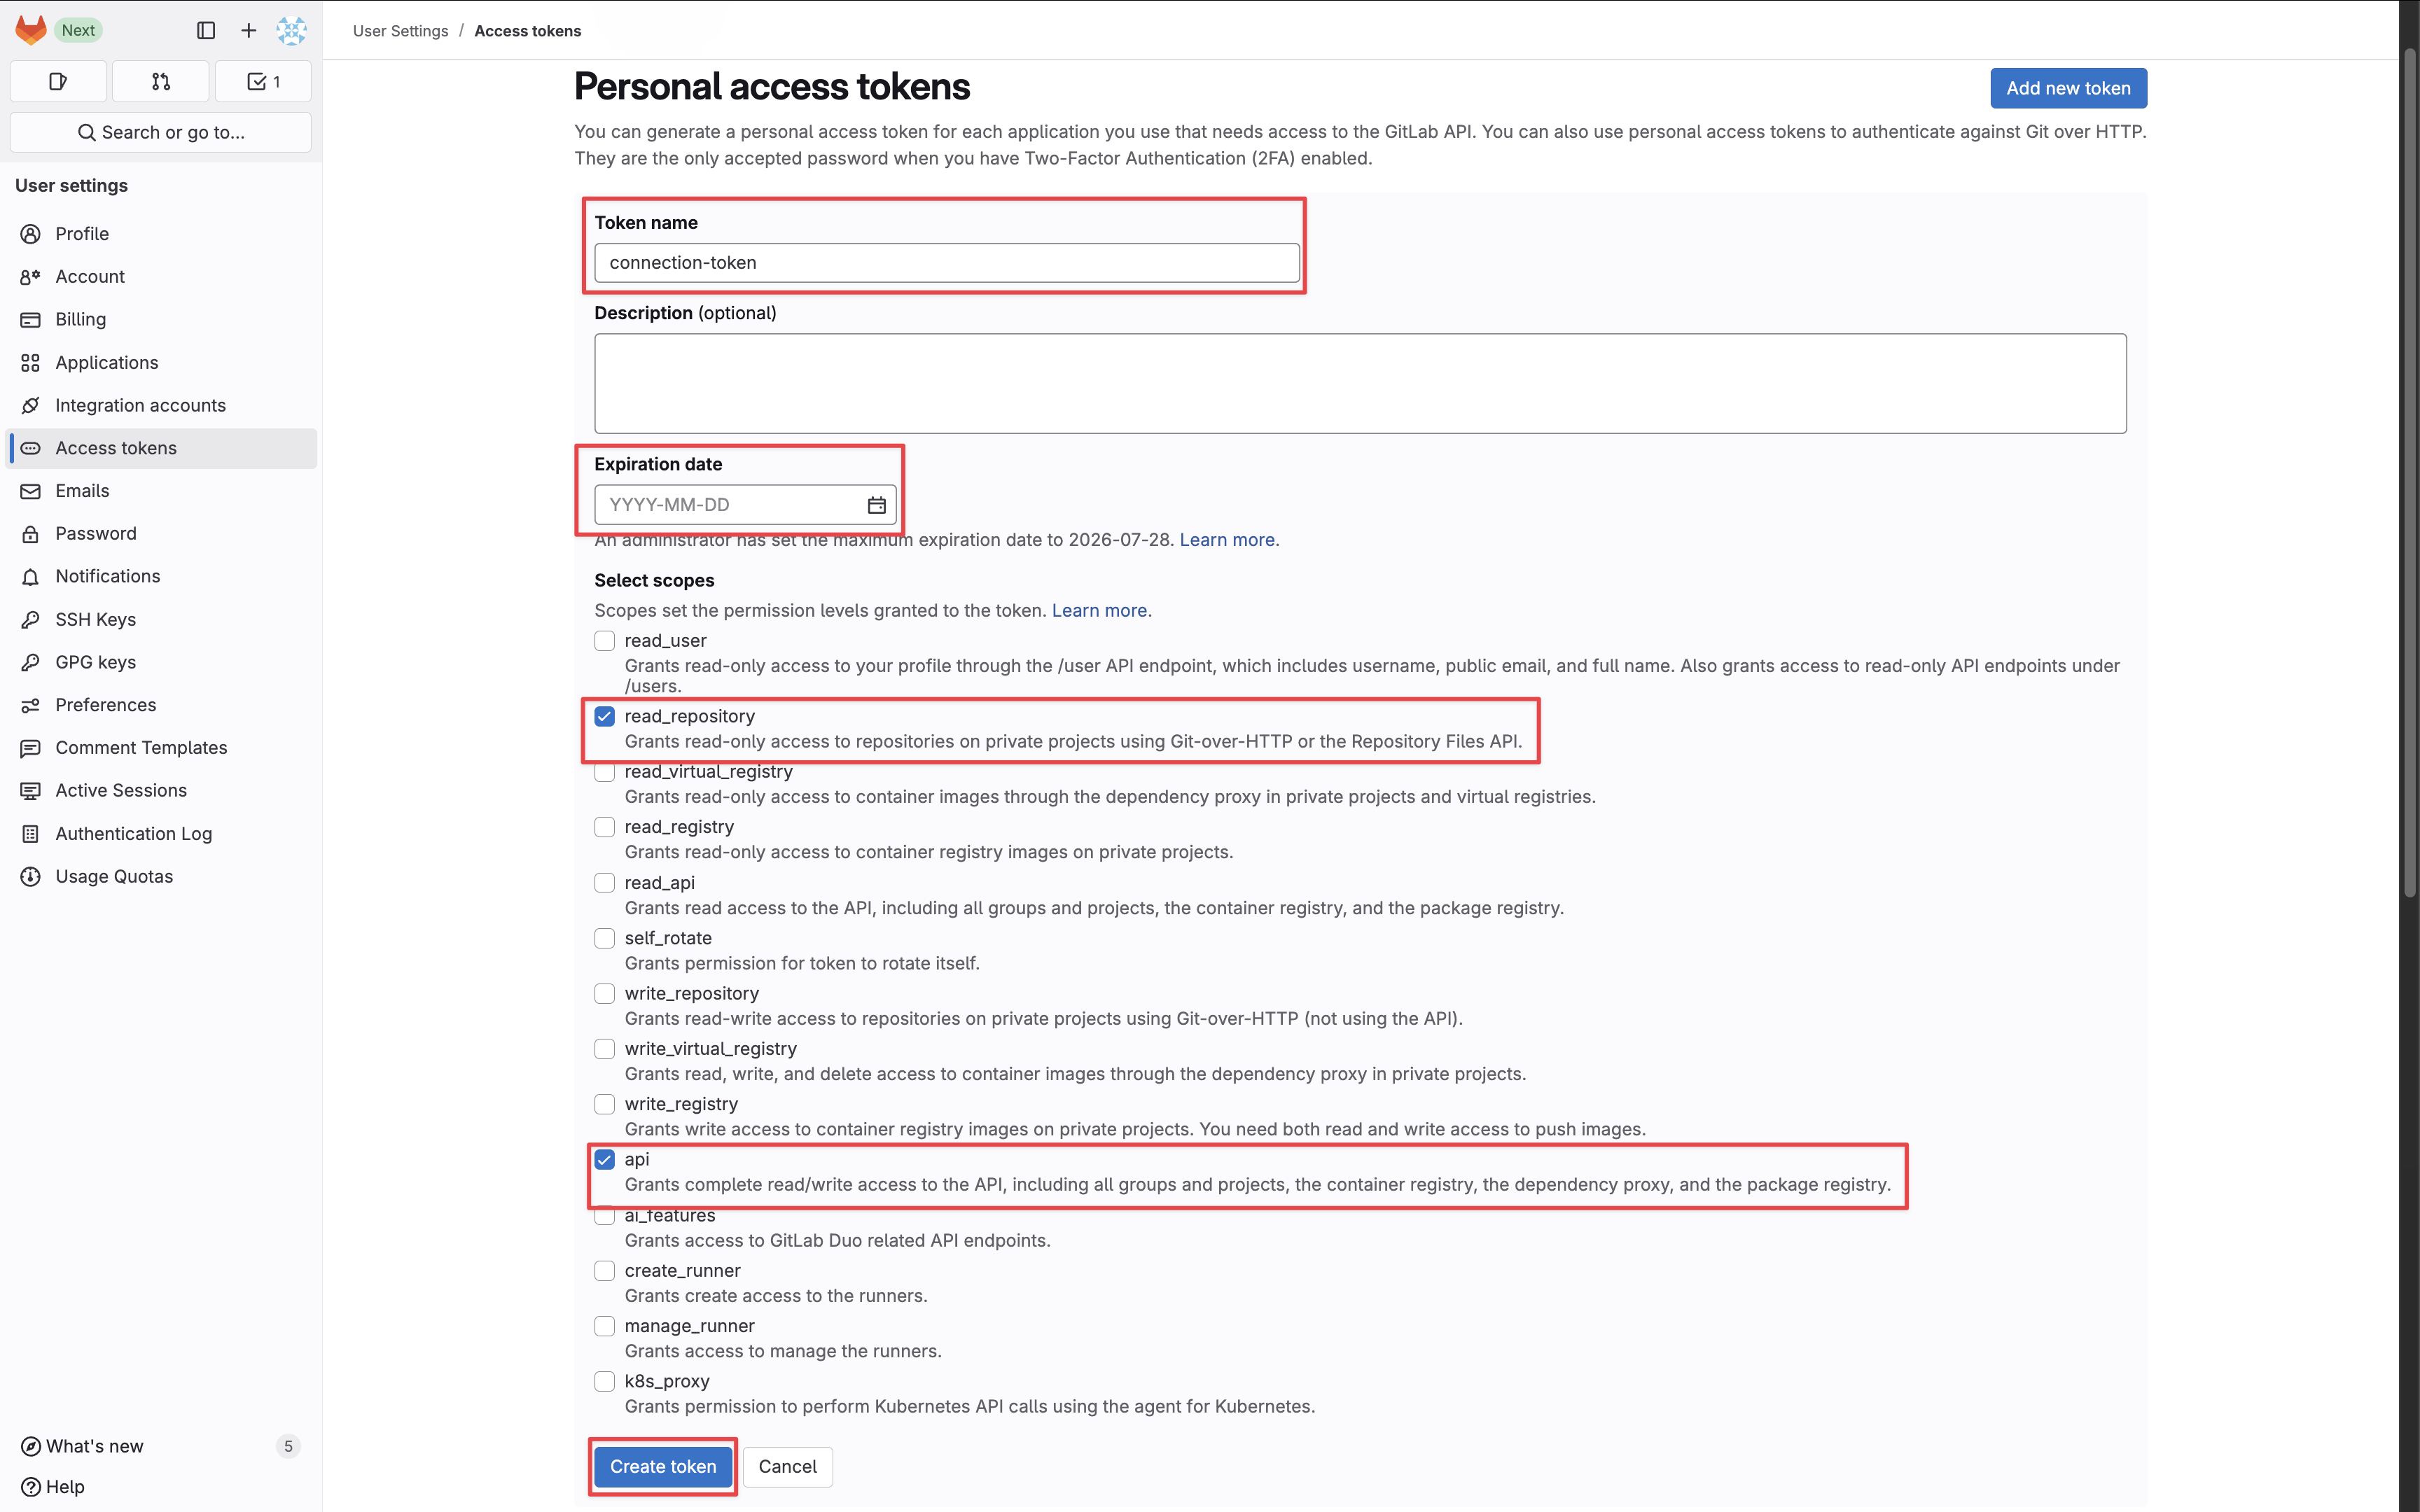
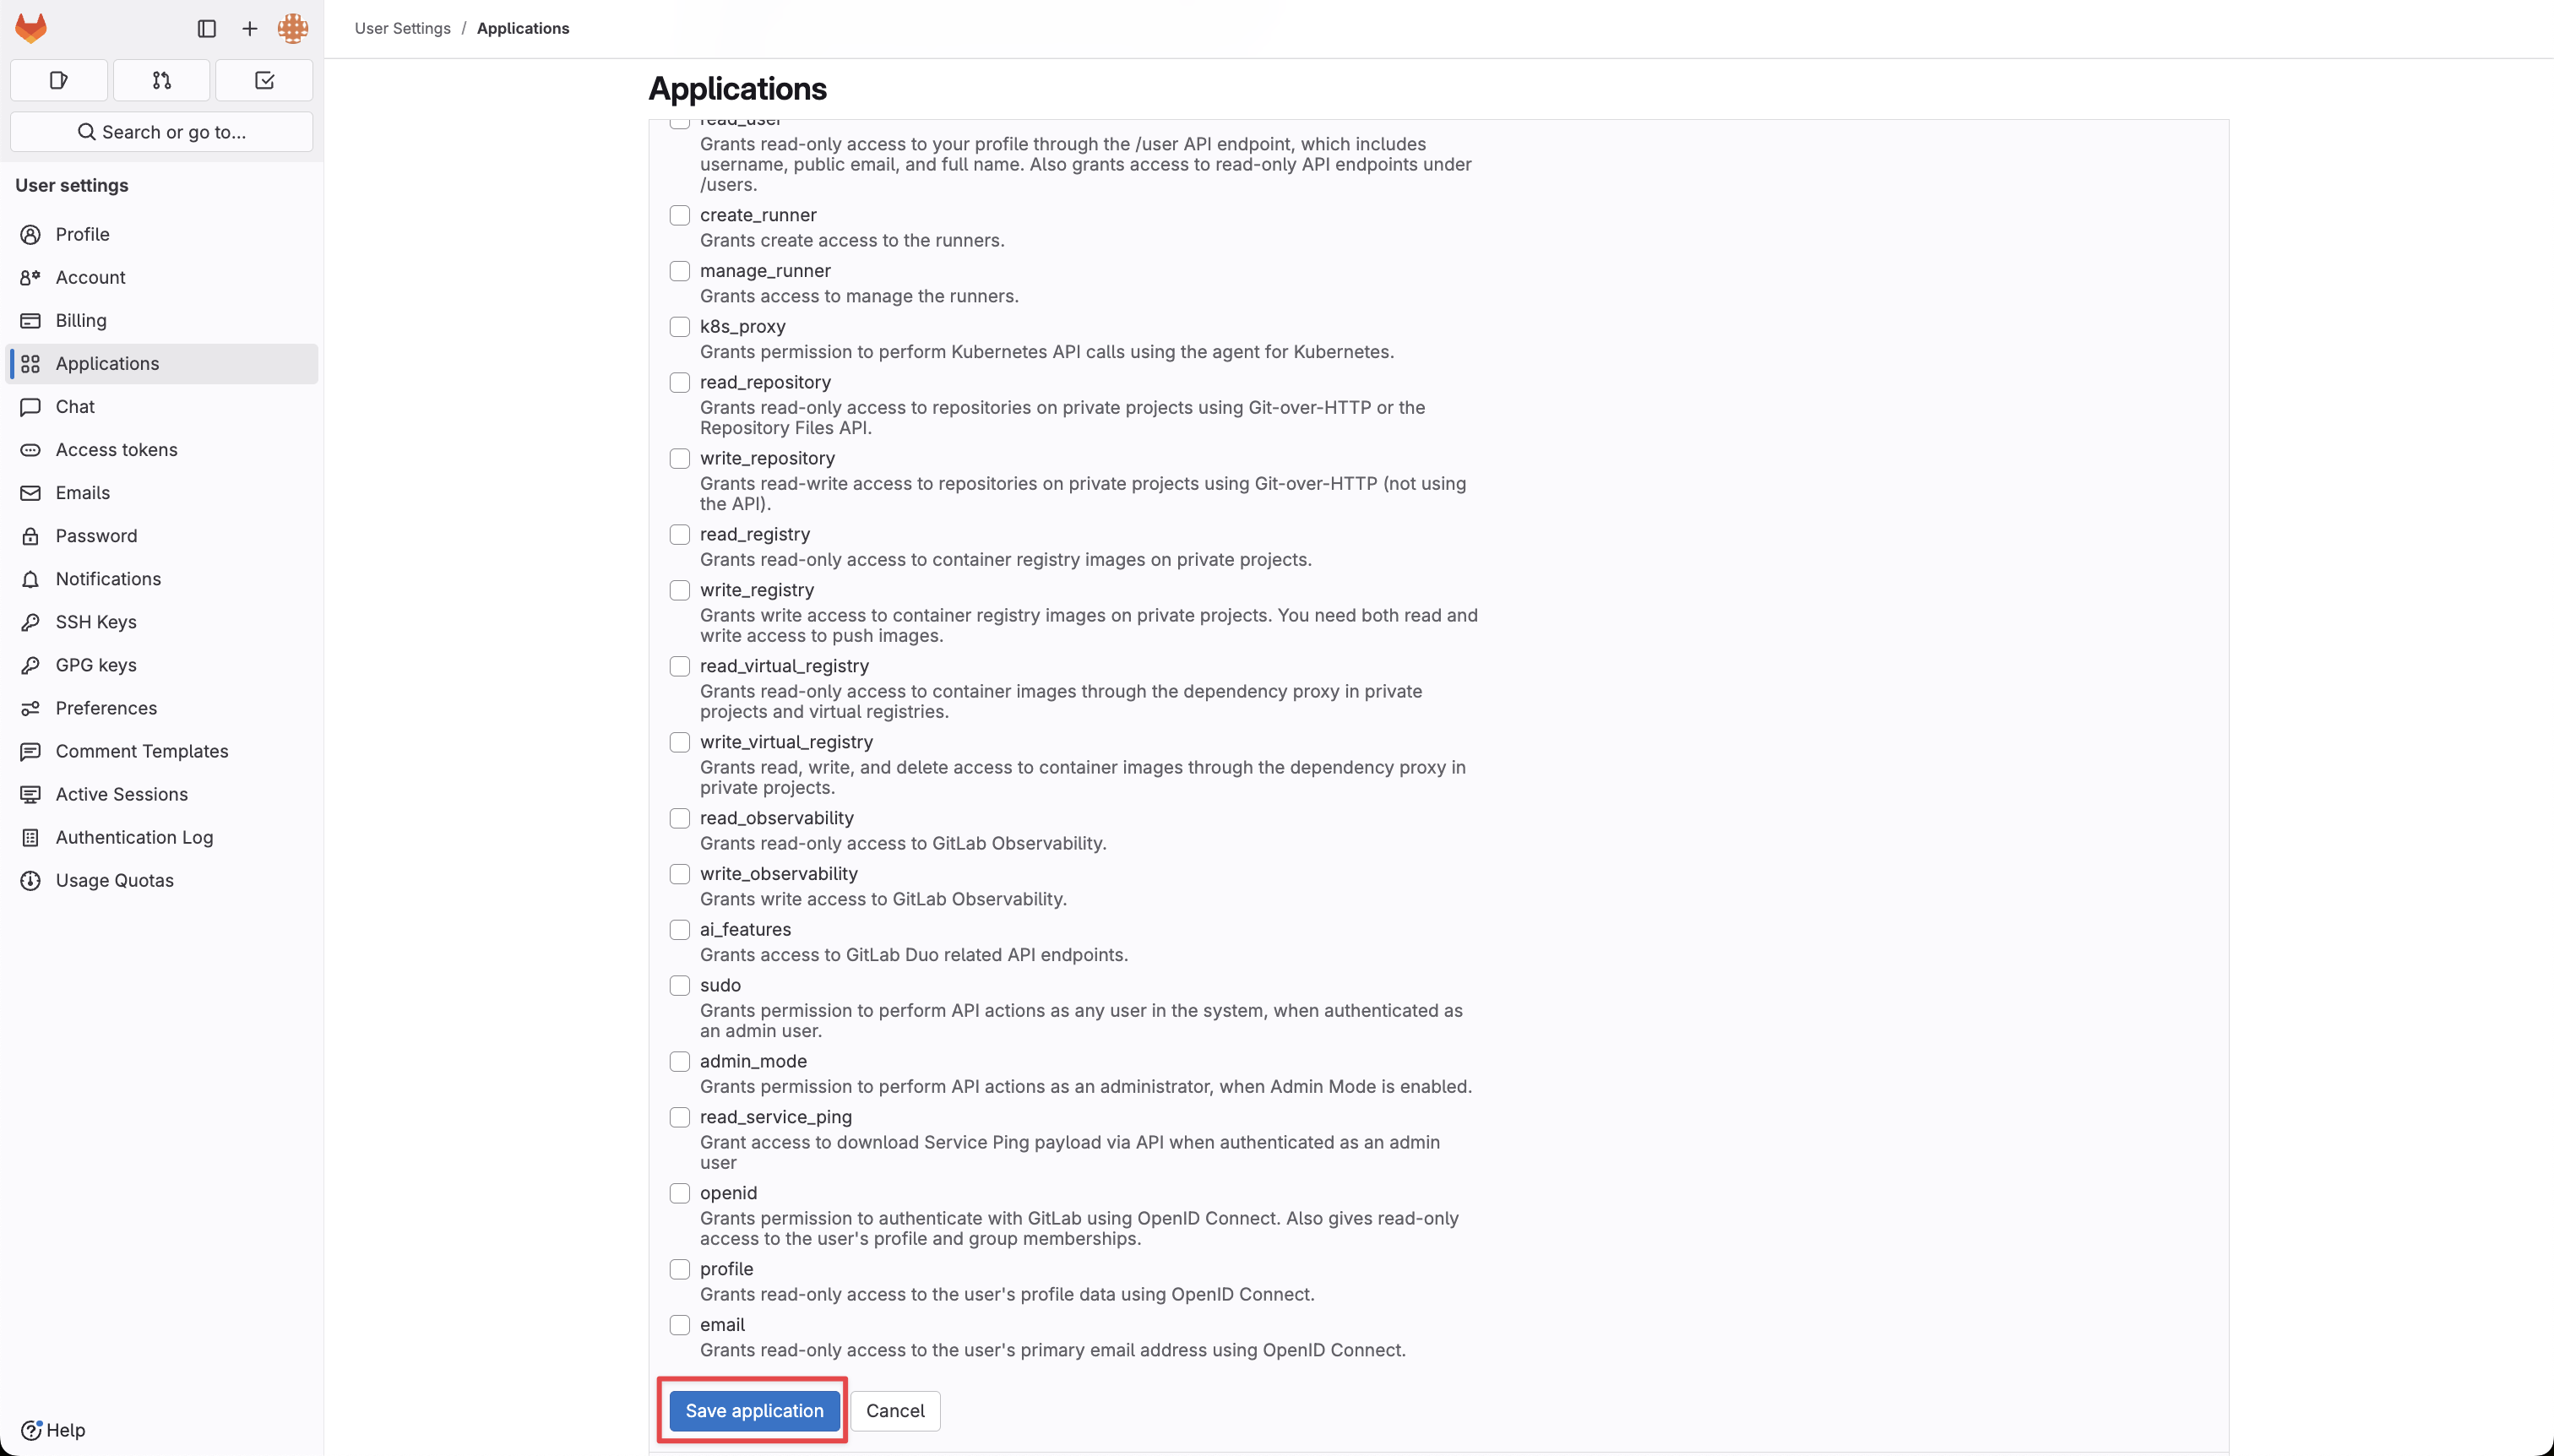
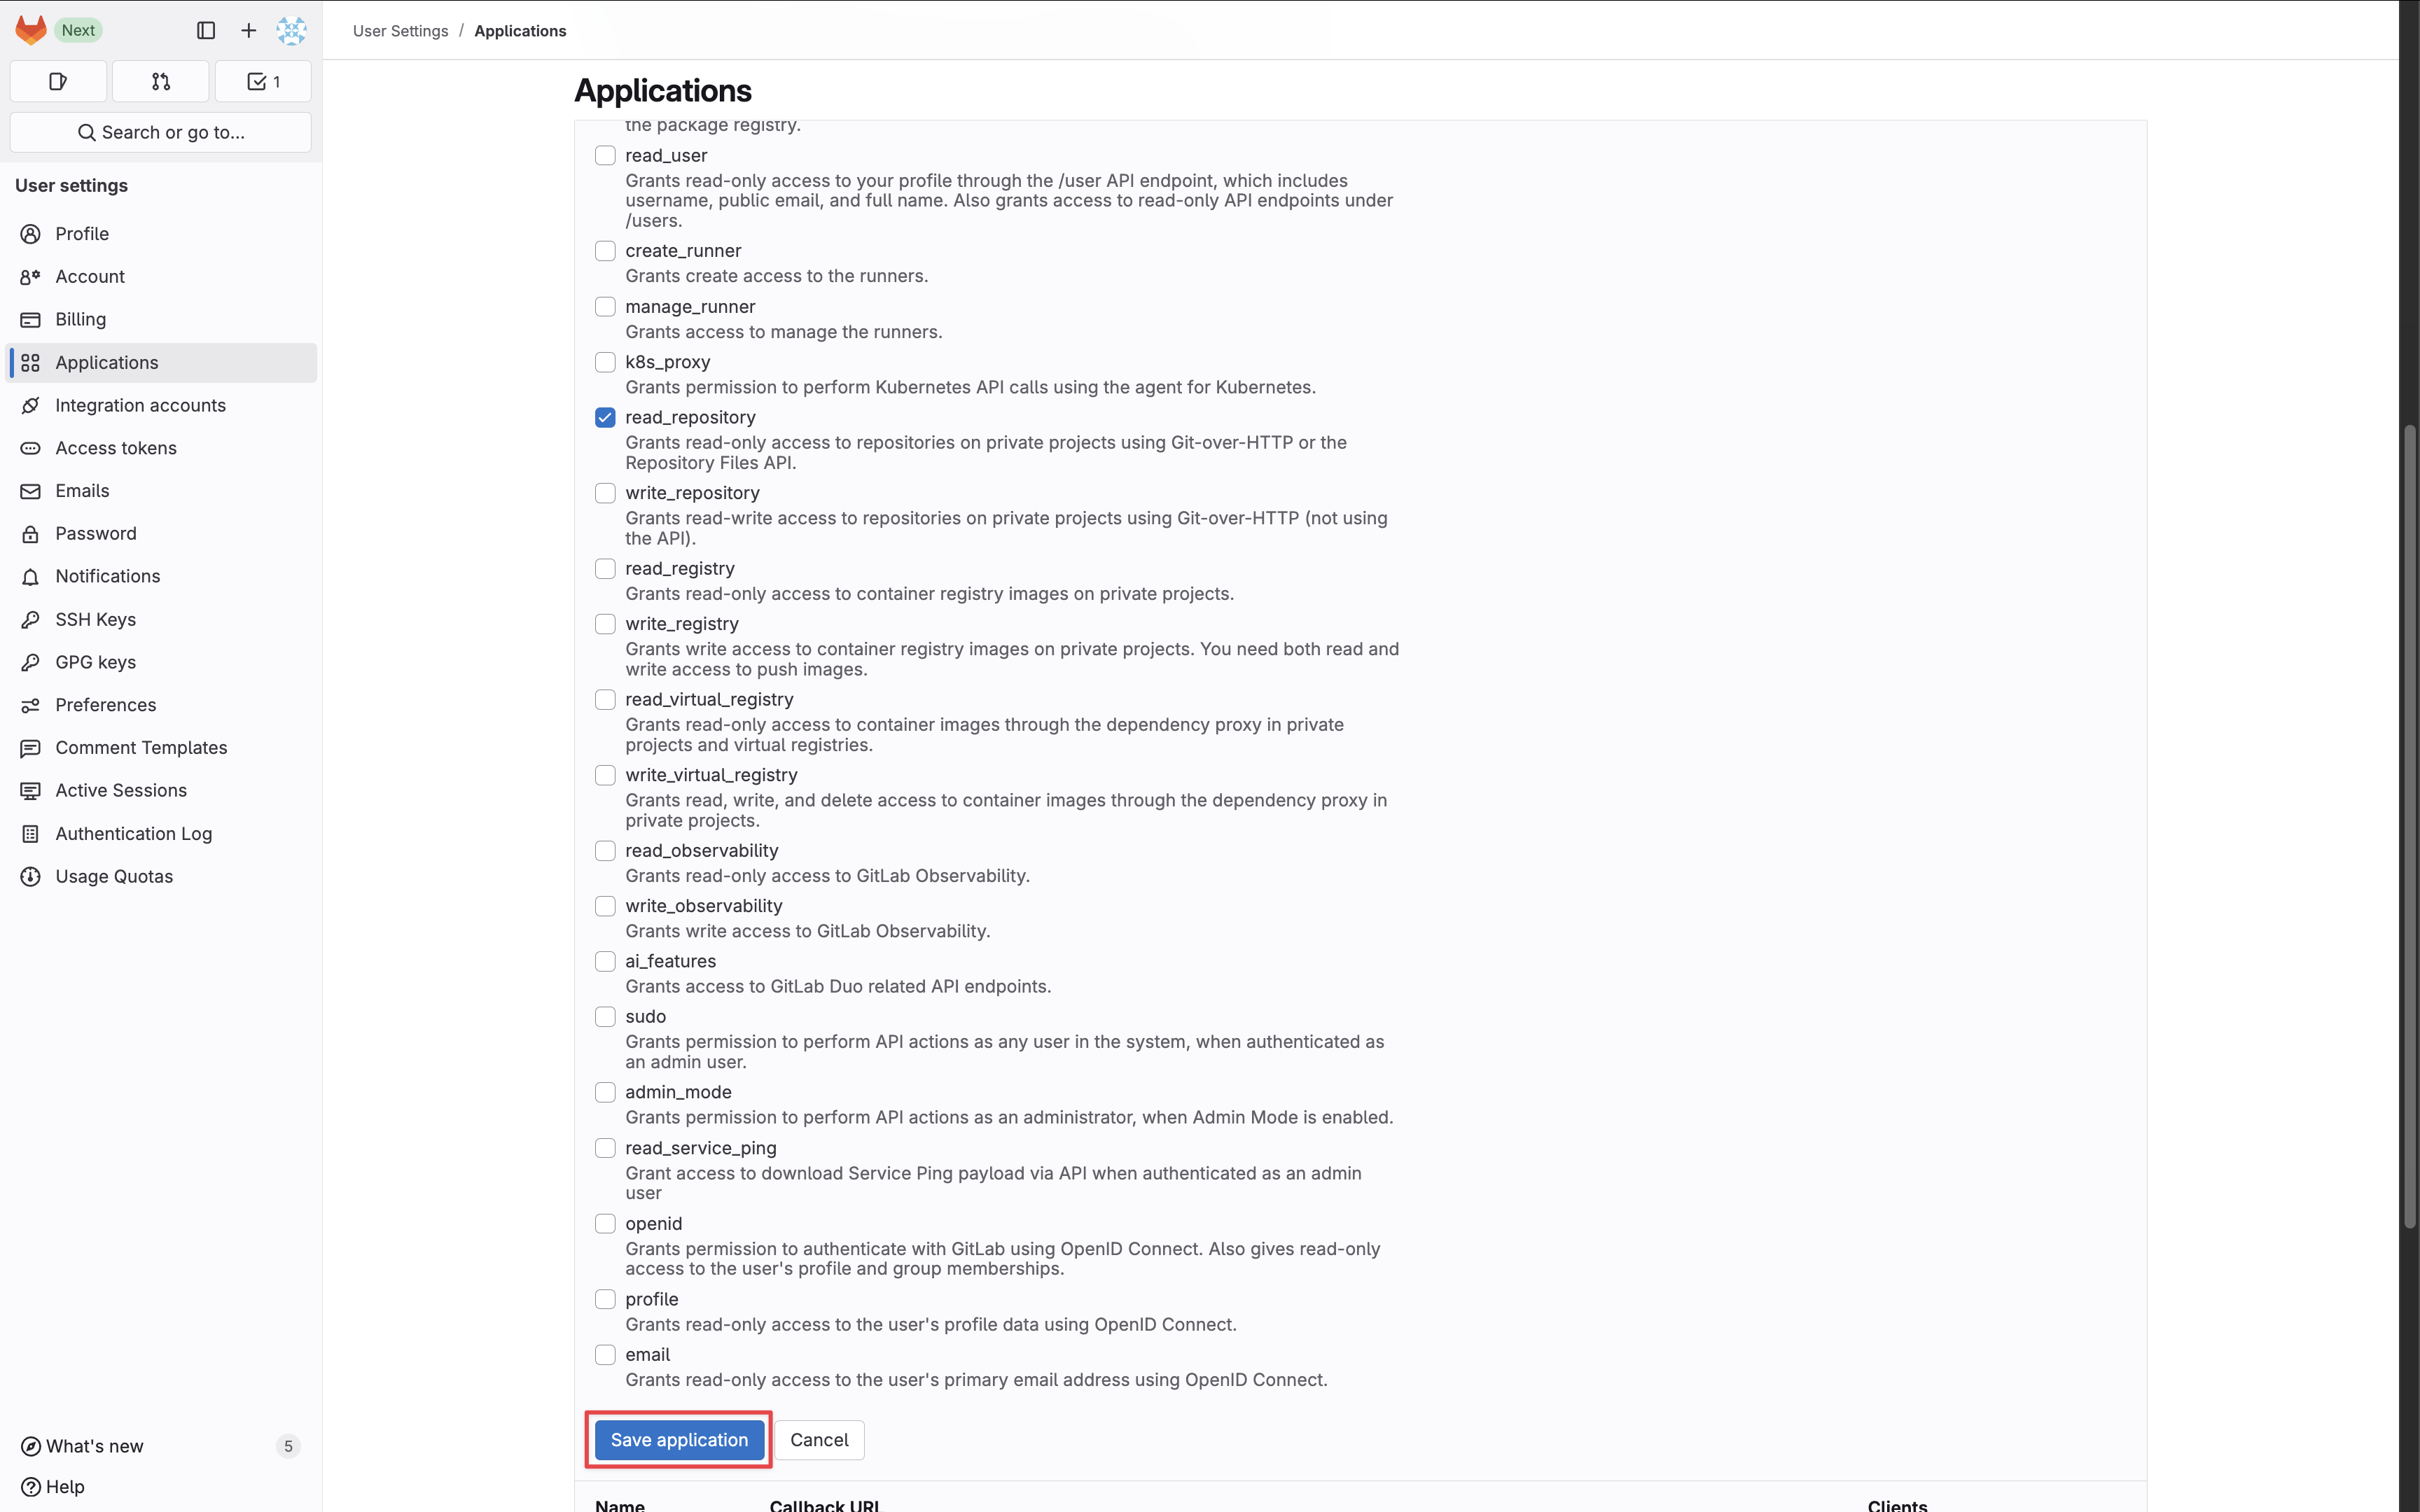
Create the application. As part of the form, set the Redirect URI to https://your-domain.com/organization/app-connections/gitlab/oauth/callback.Depending on your use case, add one or more of the following scopes to your application:- Secret Sync
- Secret Scanning
For Secret Syncs, your application will require the 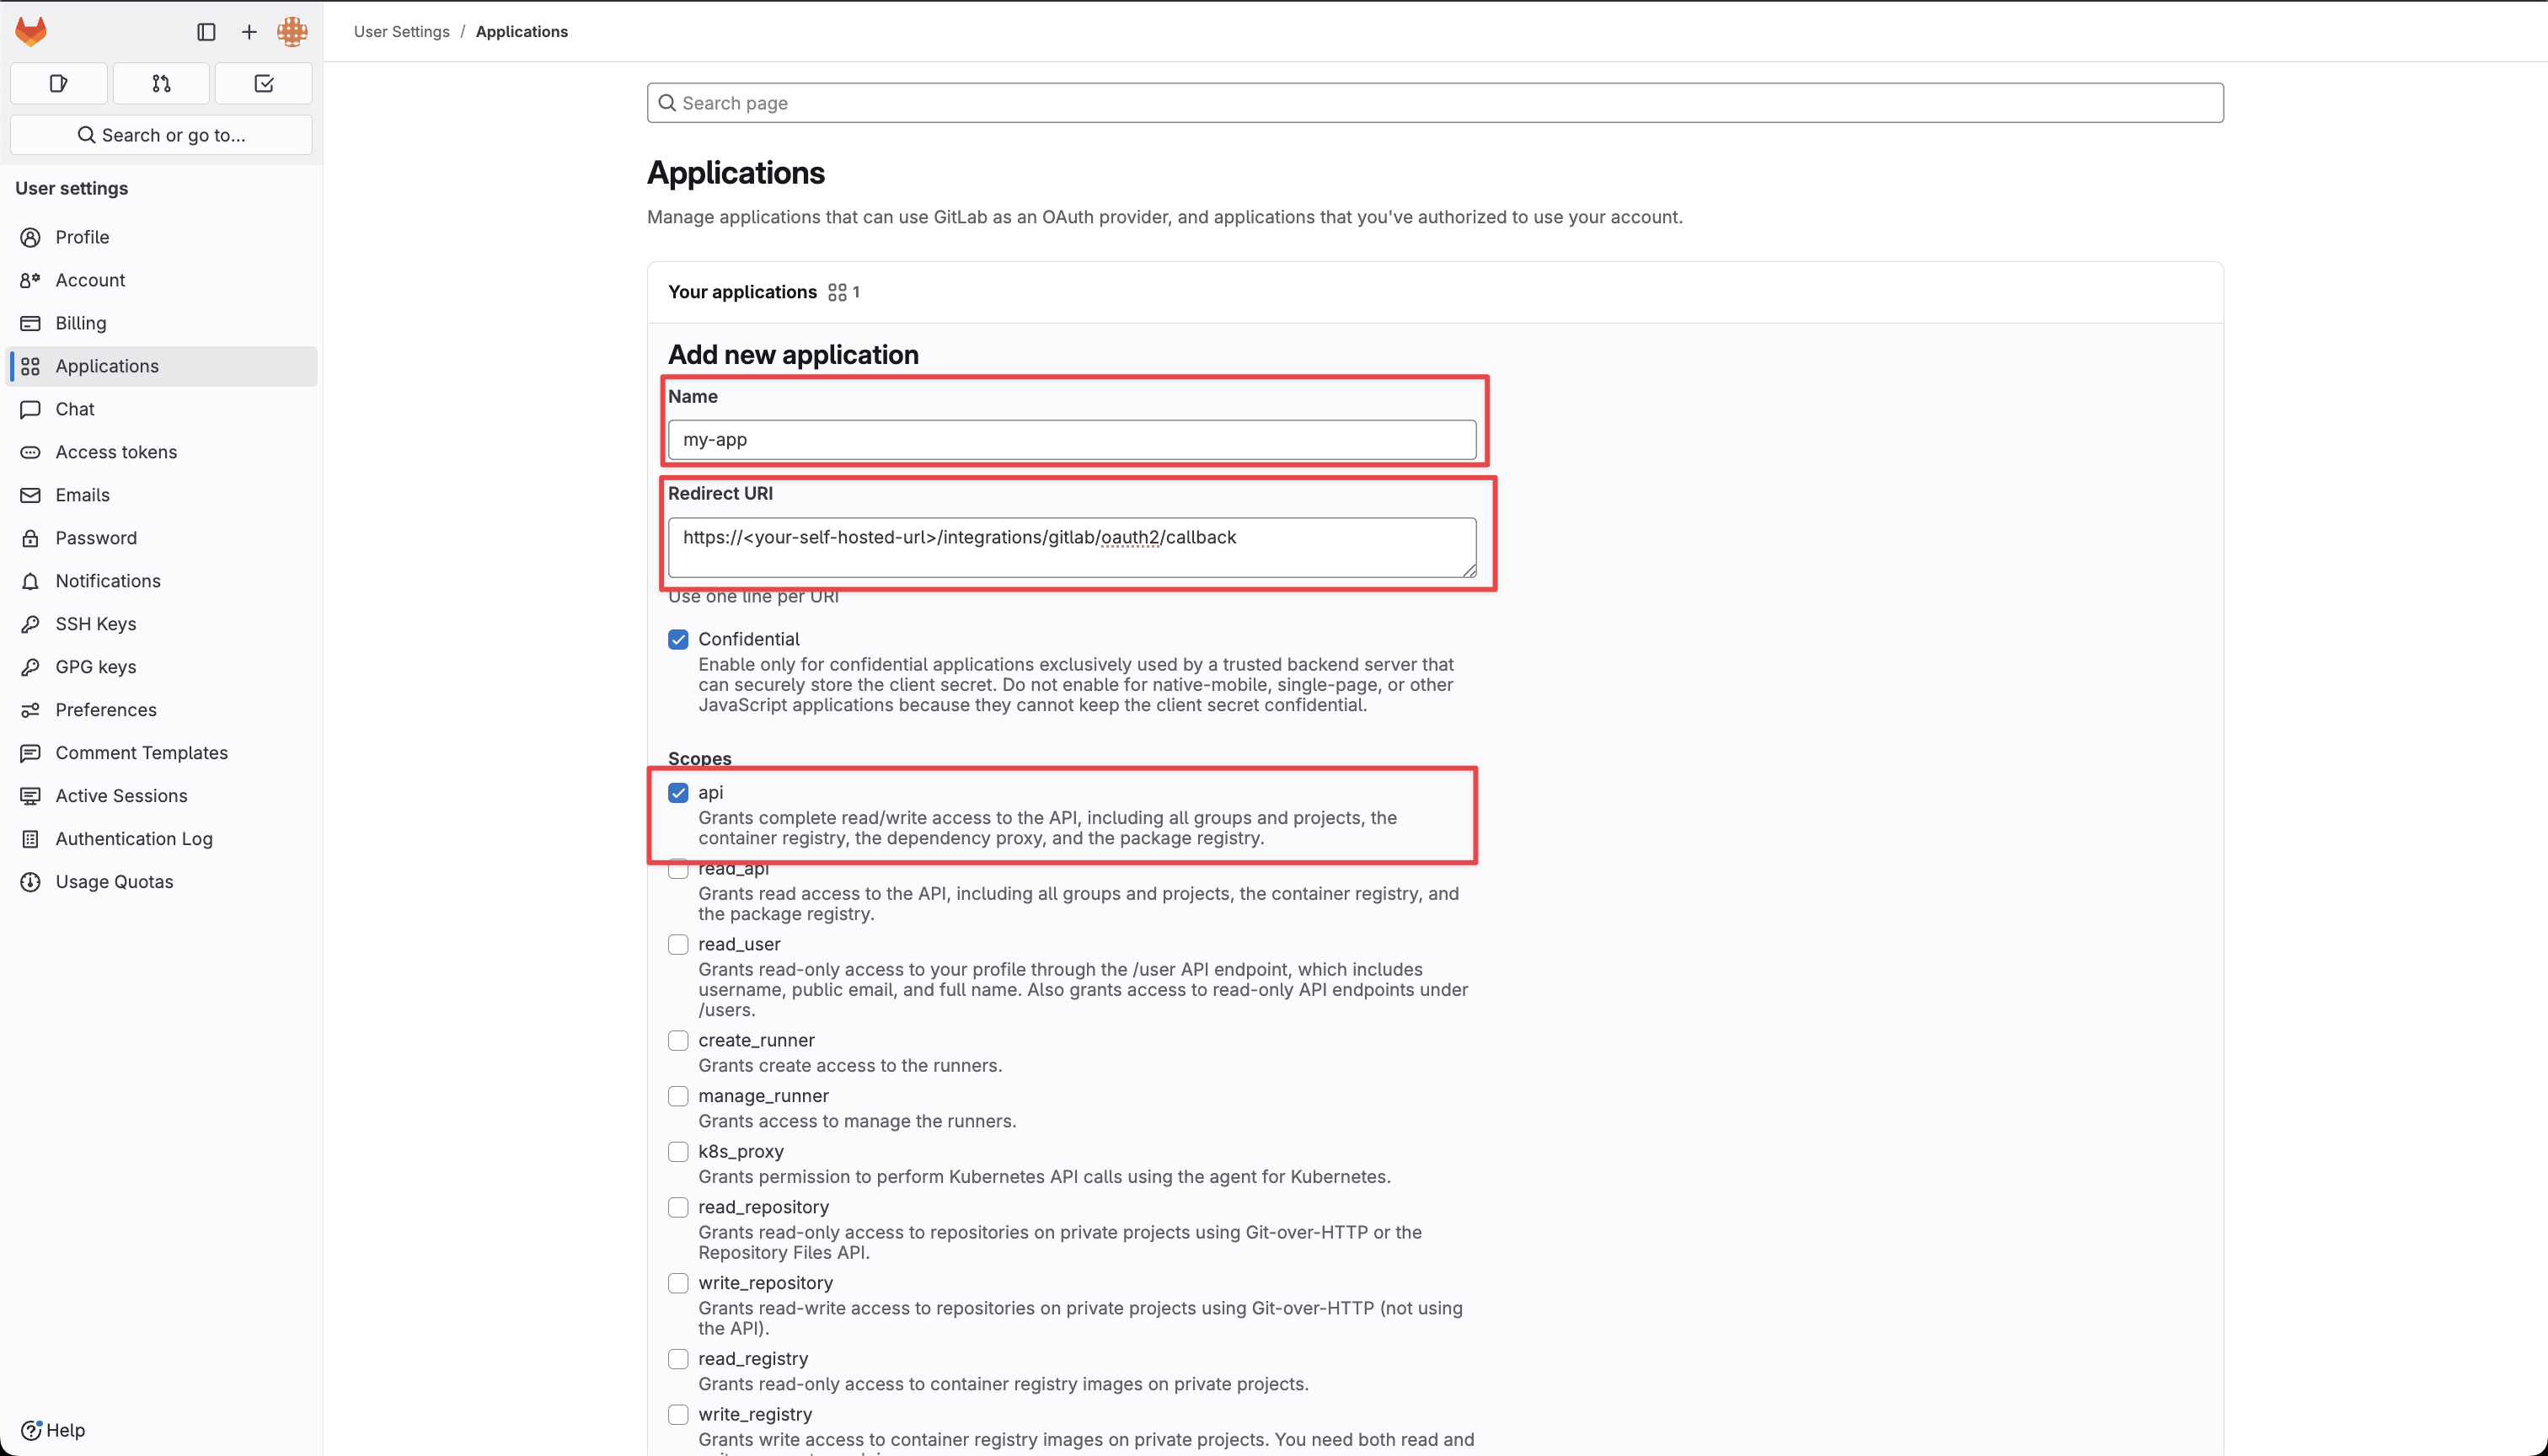
api scope: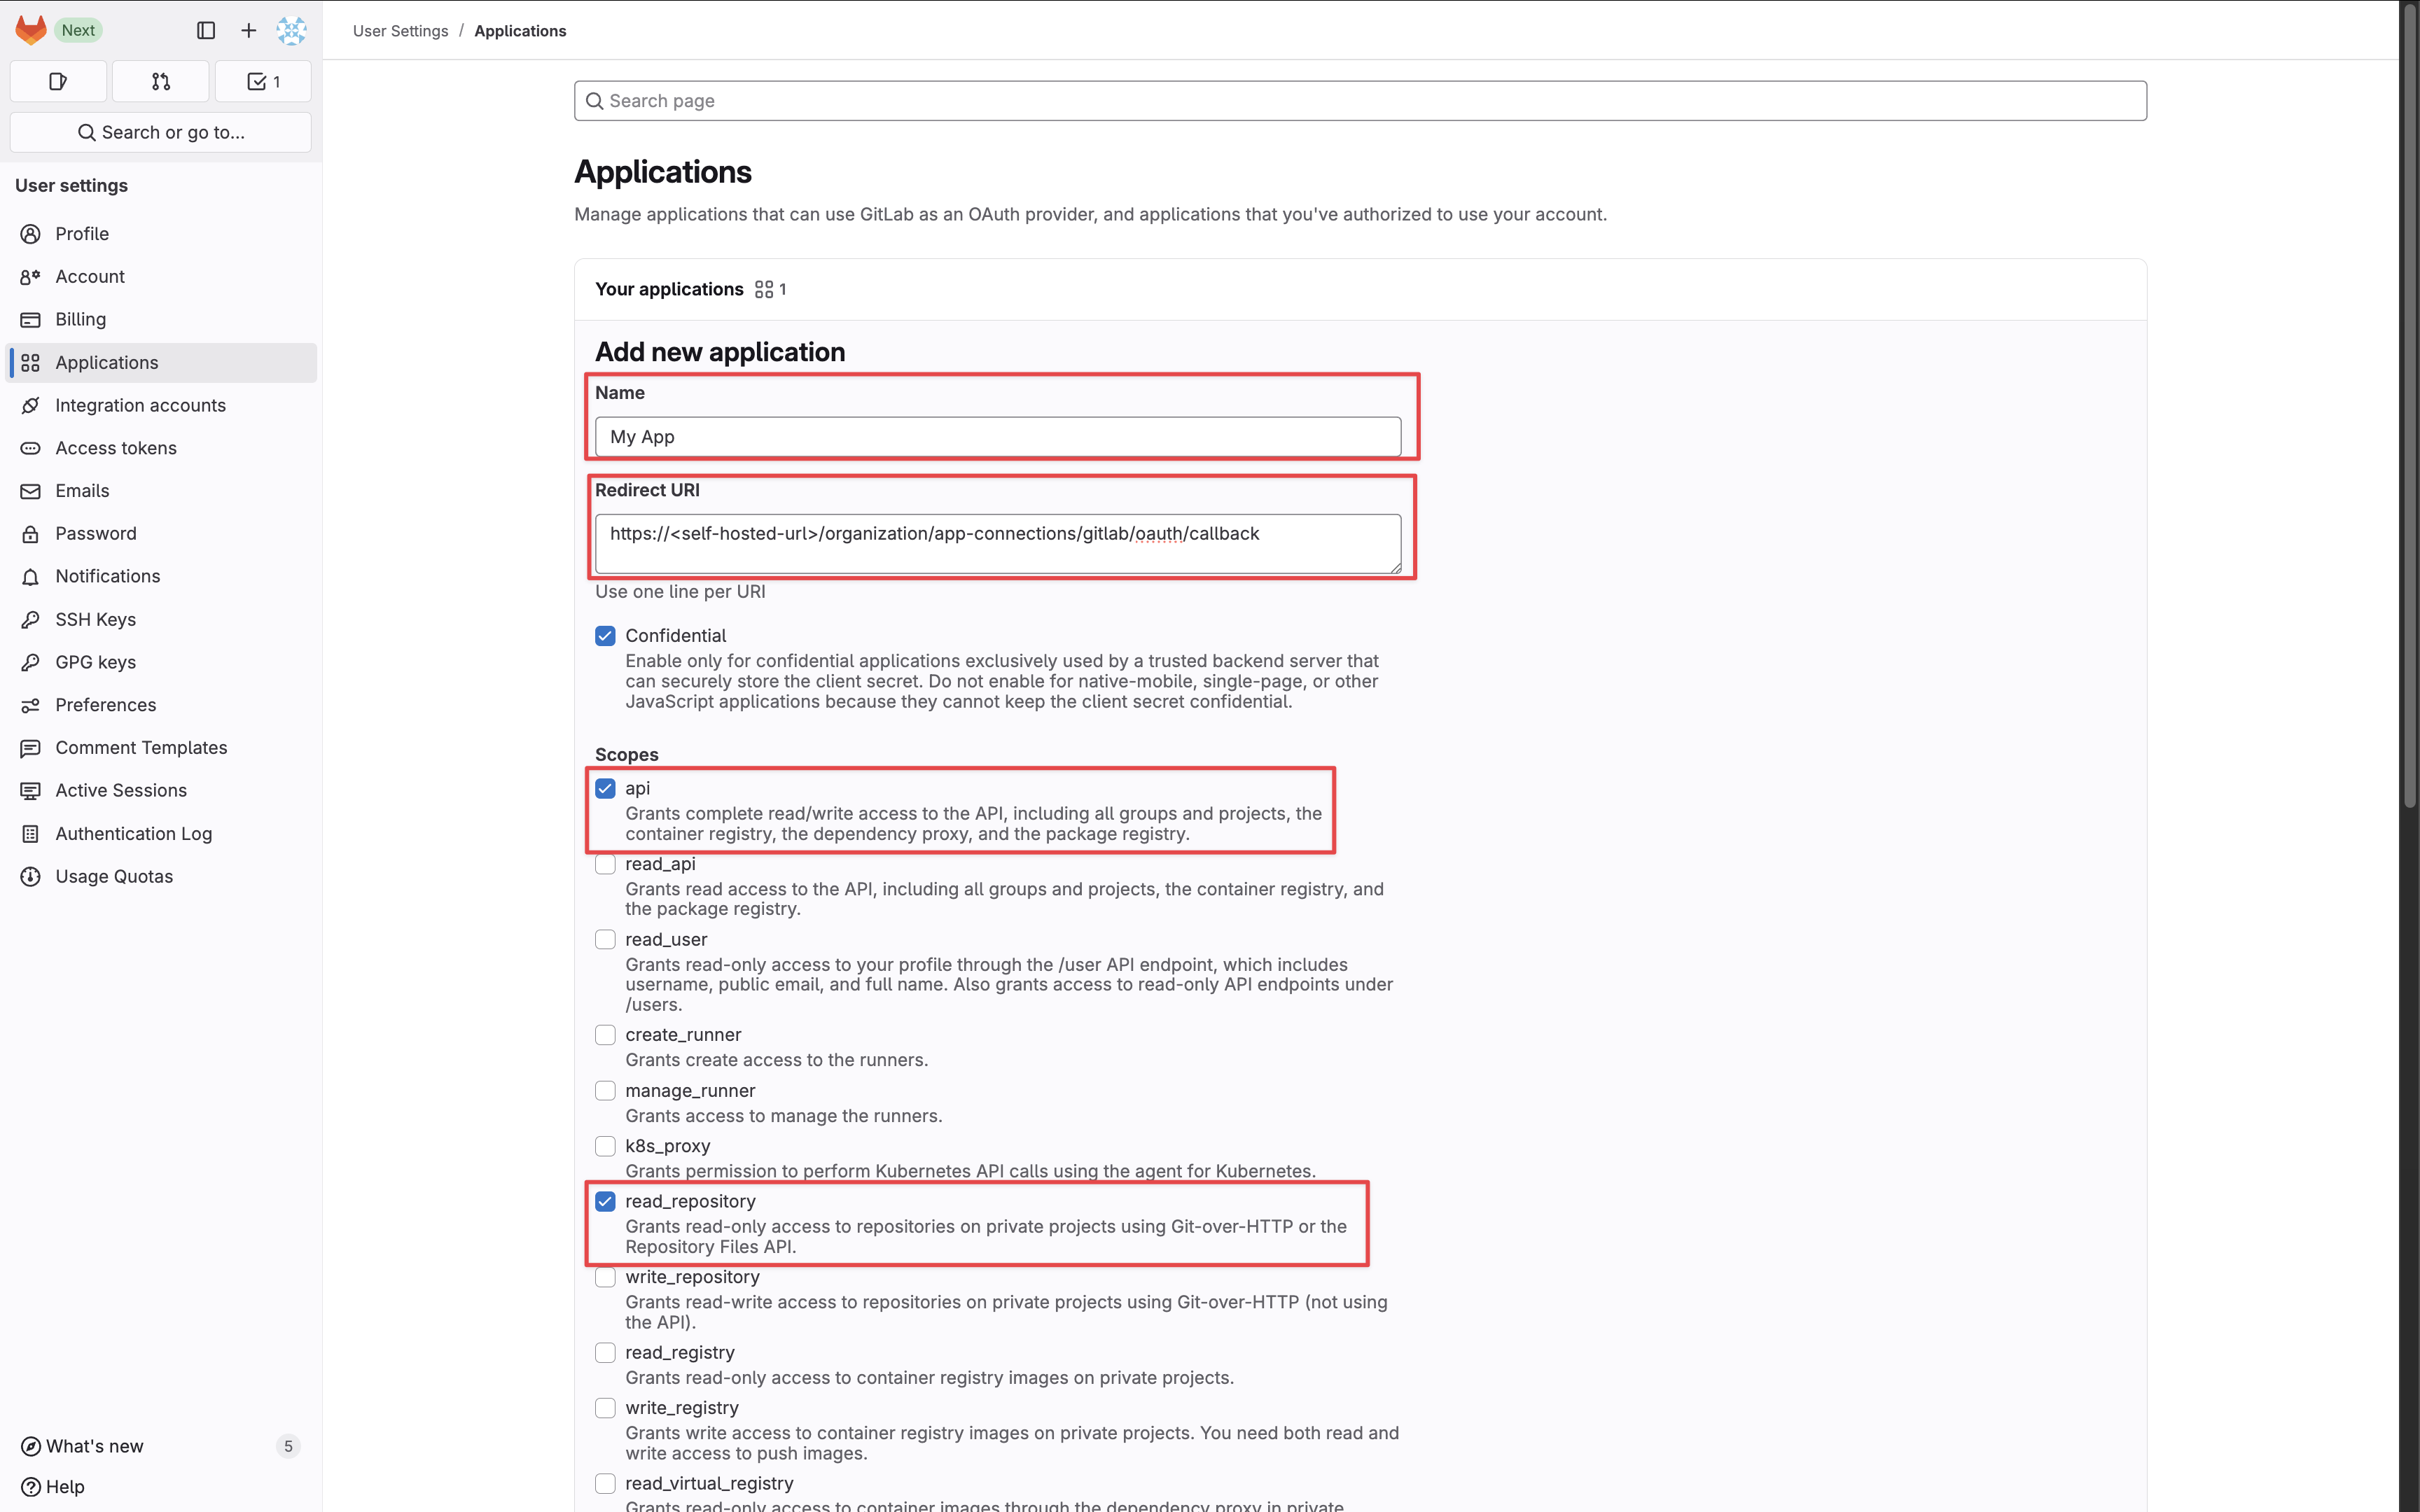
If you have a GitLab group, you can create an OAuth application under it in your group Settings > Applications.
Add your GitLab OAuth application credentials to Infisical
Obtain the Application ID and Secret for your GitLab OAuth application.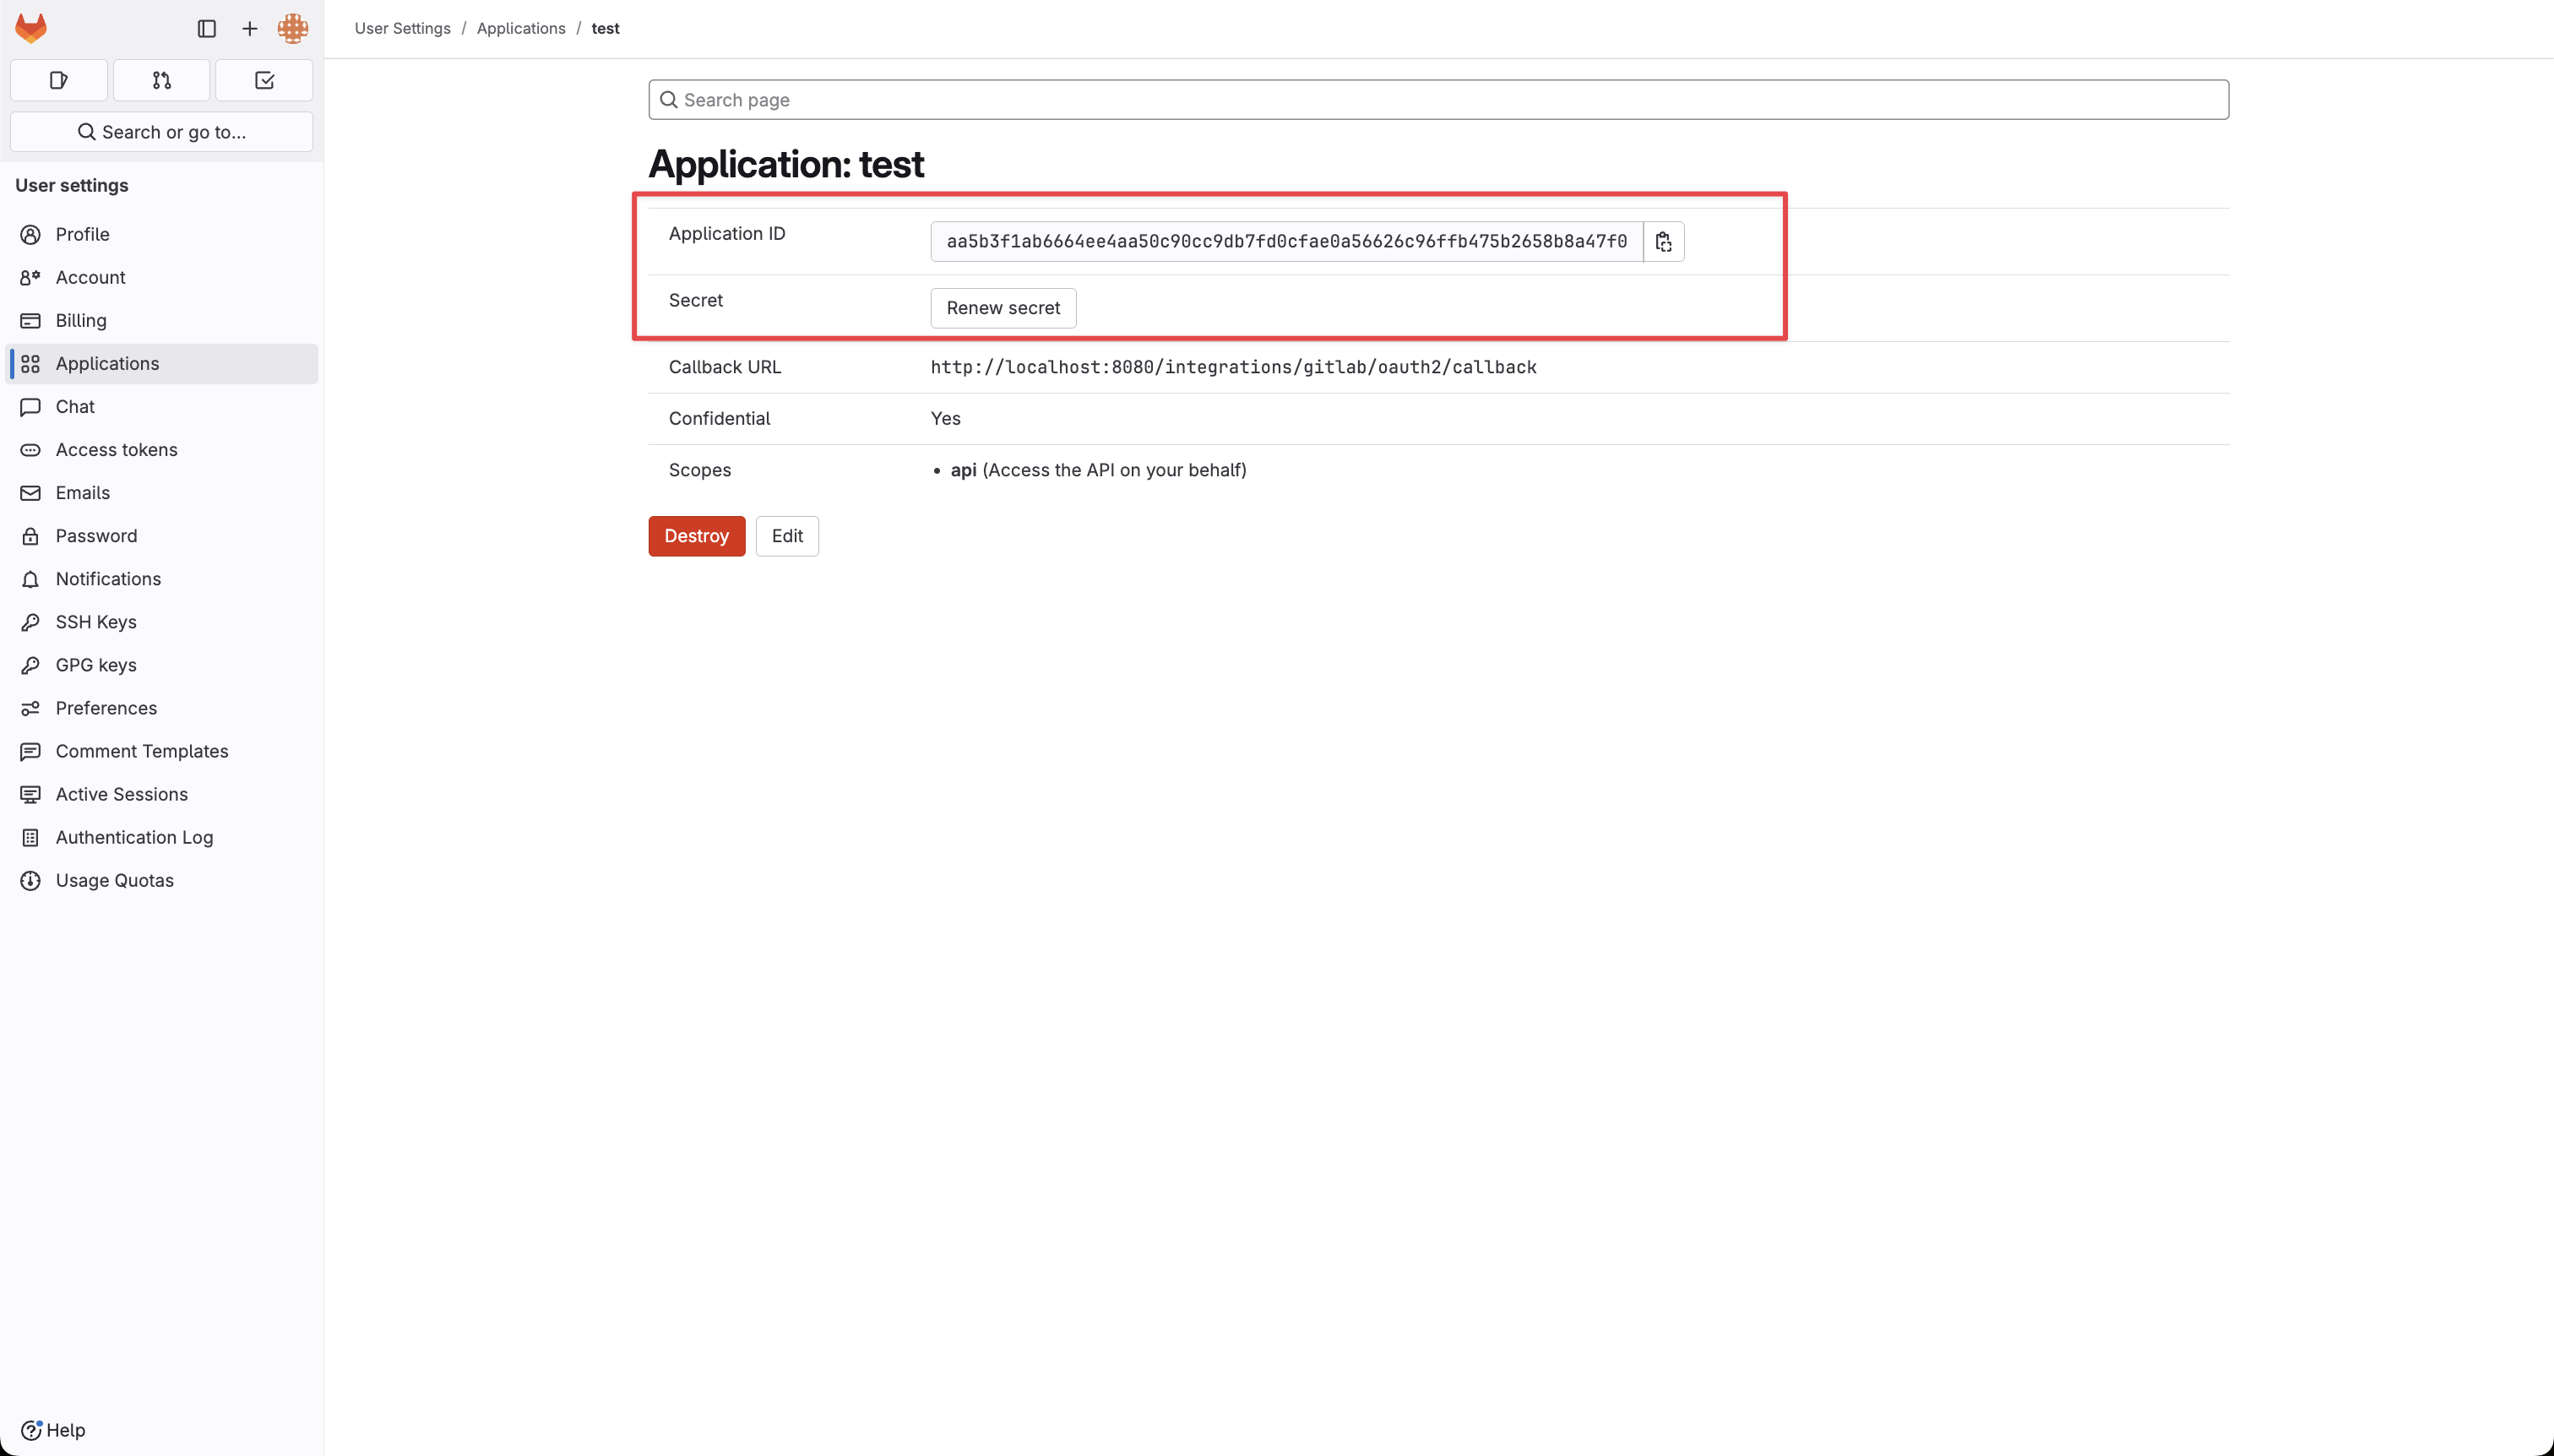 Back in your Infisical instance, add two new environment variables for the credentials of your GitLab OAuth application:
Back in your Infisical instance, add two new environment variables for the credentials of your GitLab OAuth application:INF_APP_CONNECTION_GITLAB_OAUTH_CLIENT_ID: The Application ID of your GitLab OAuth application.INF_APP_CONNECTION_GITLAB_OAUTH_CLIENT_SECRET: The Secret of your GitLab OAuth application.
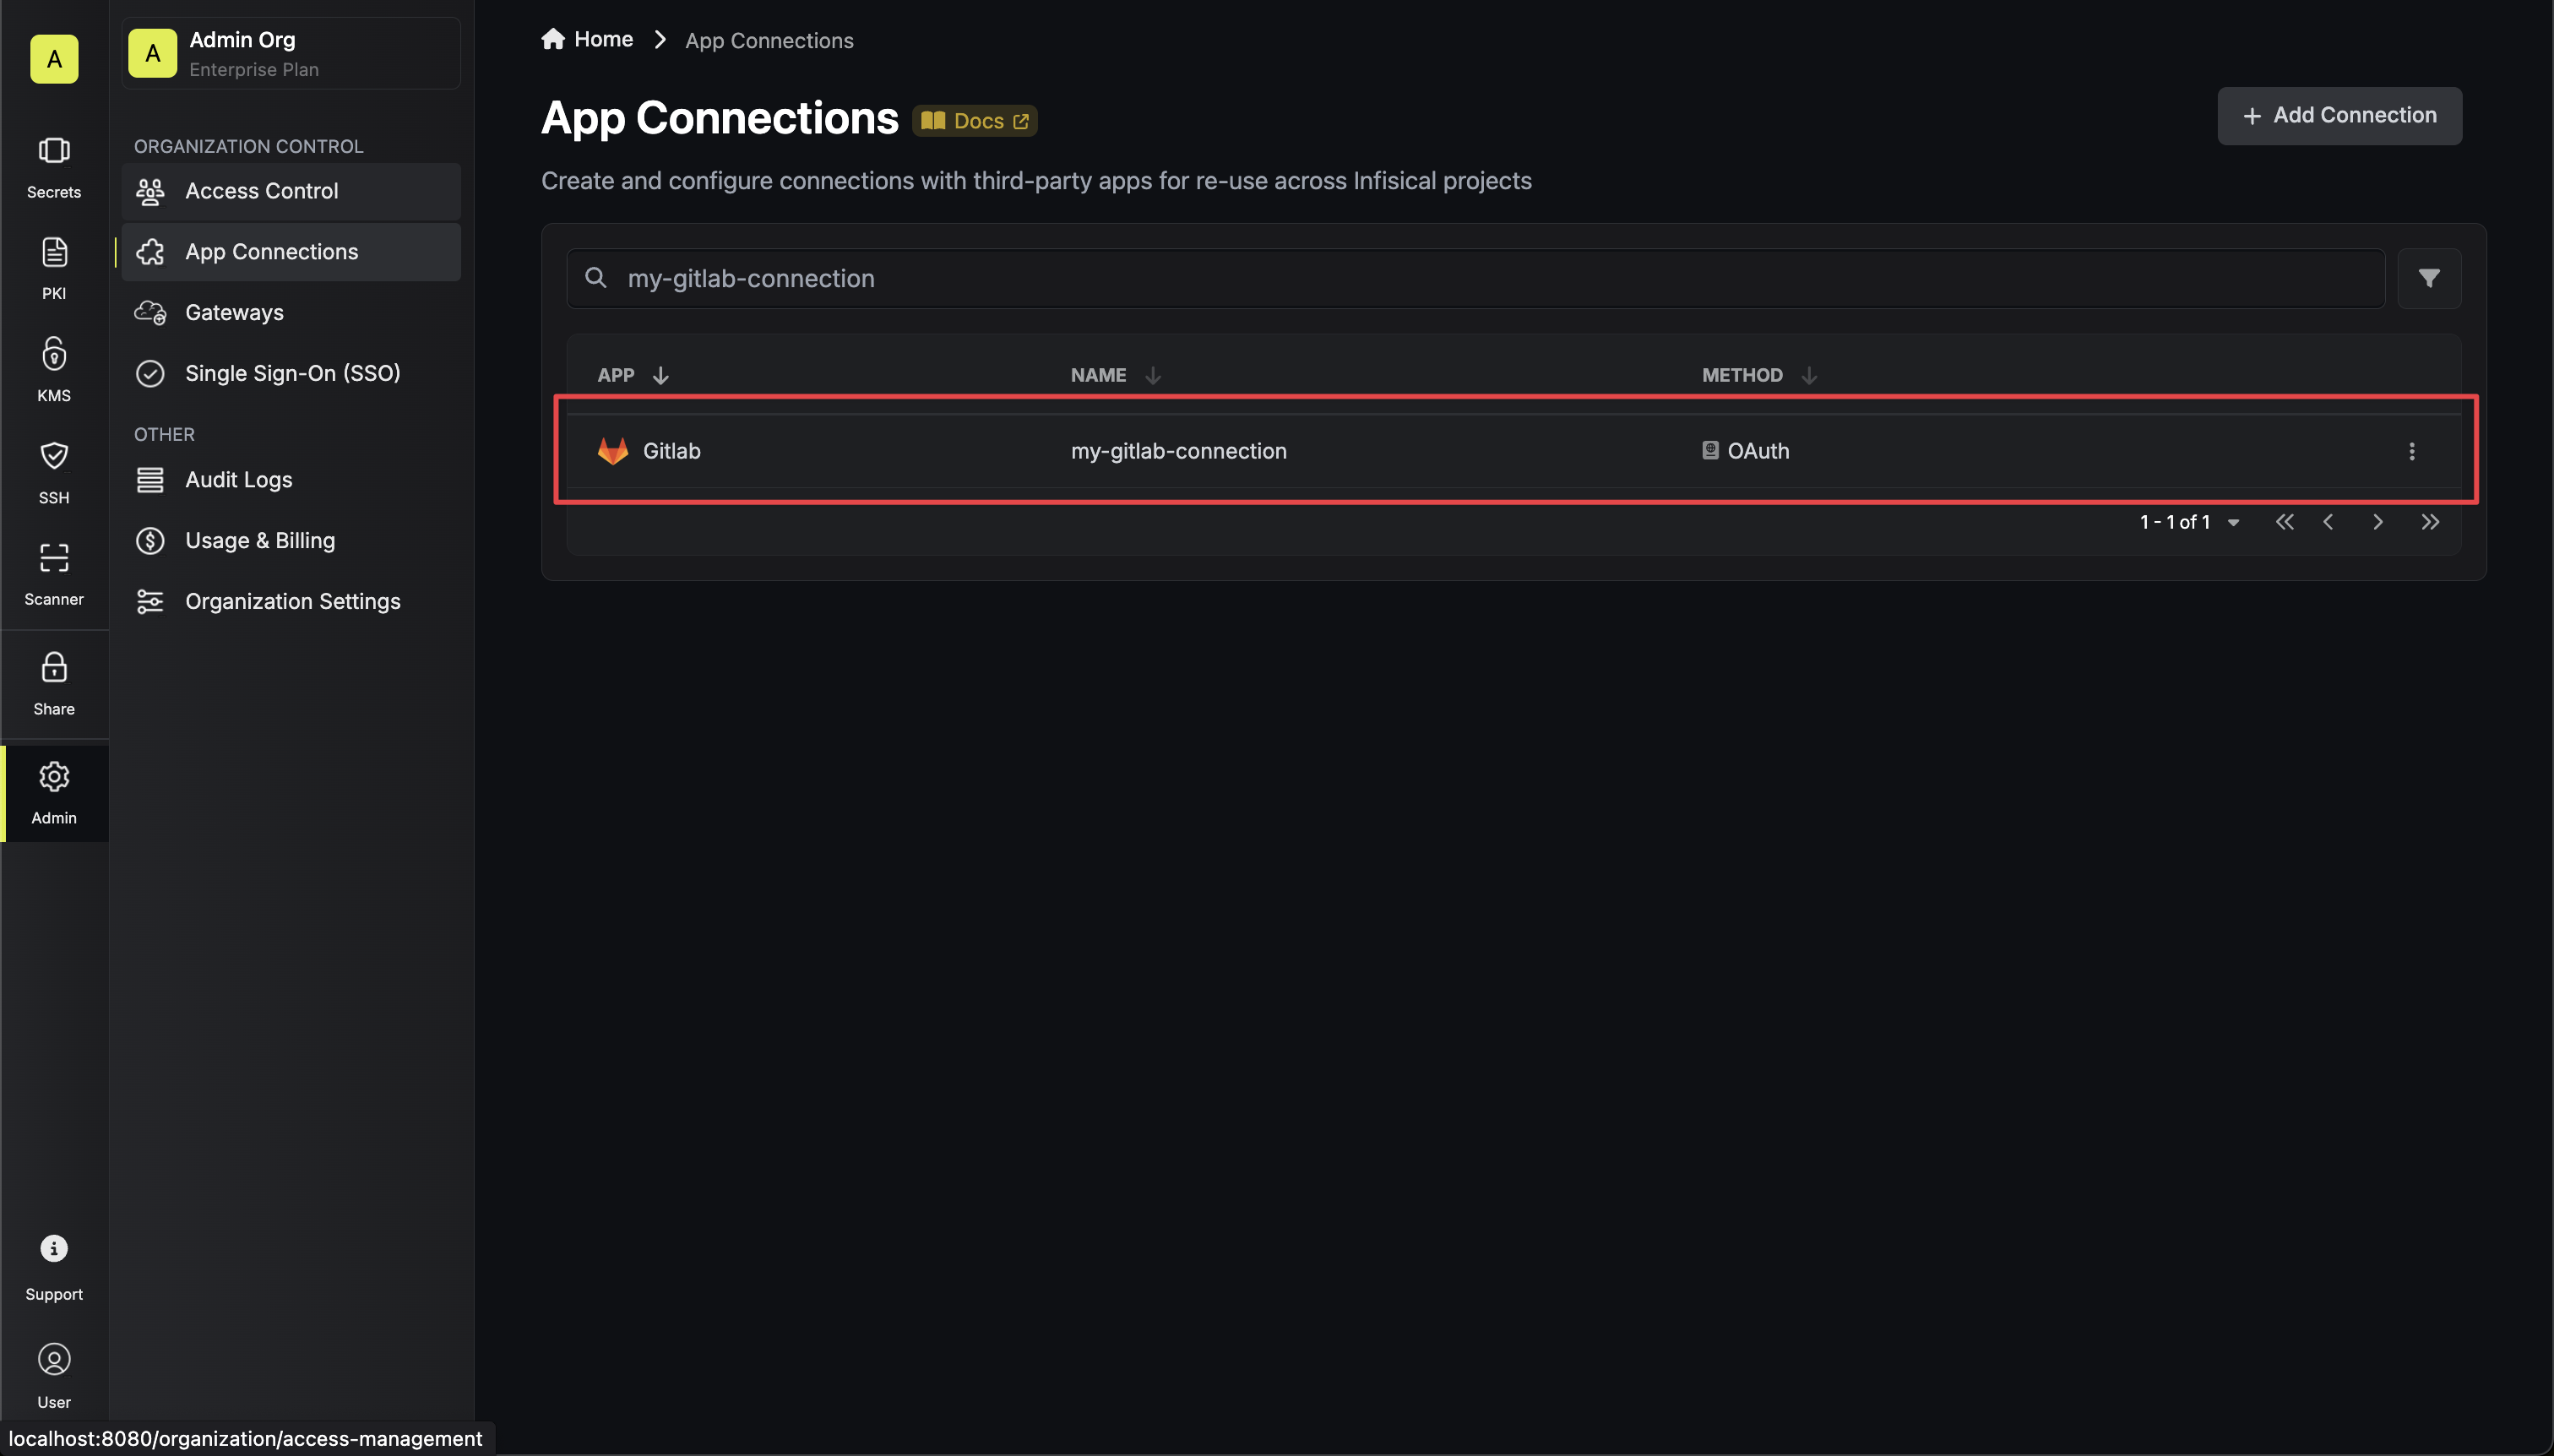
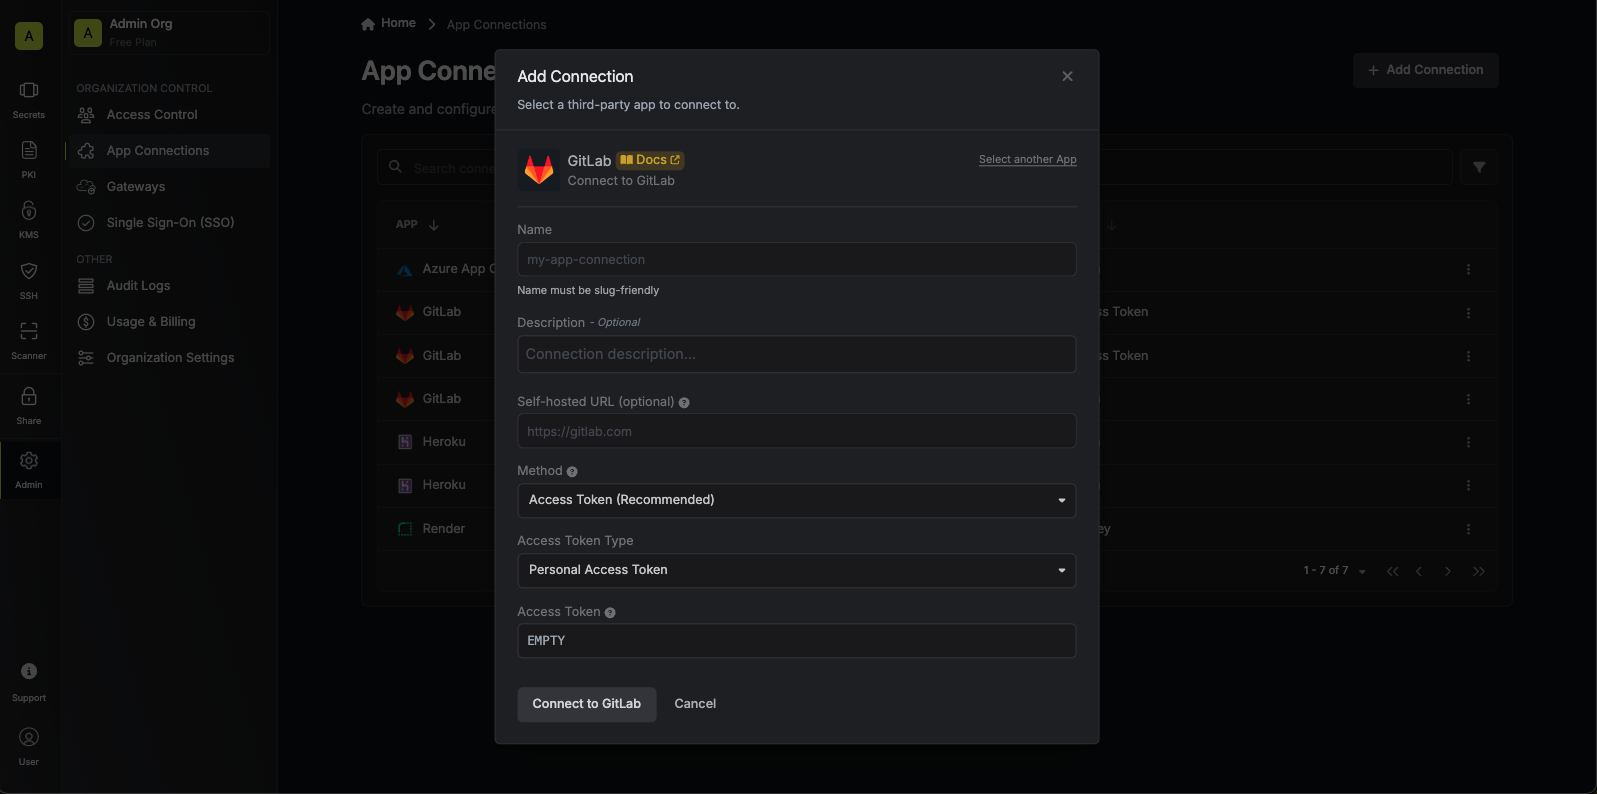
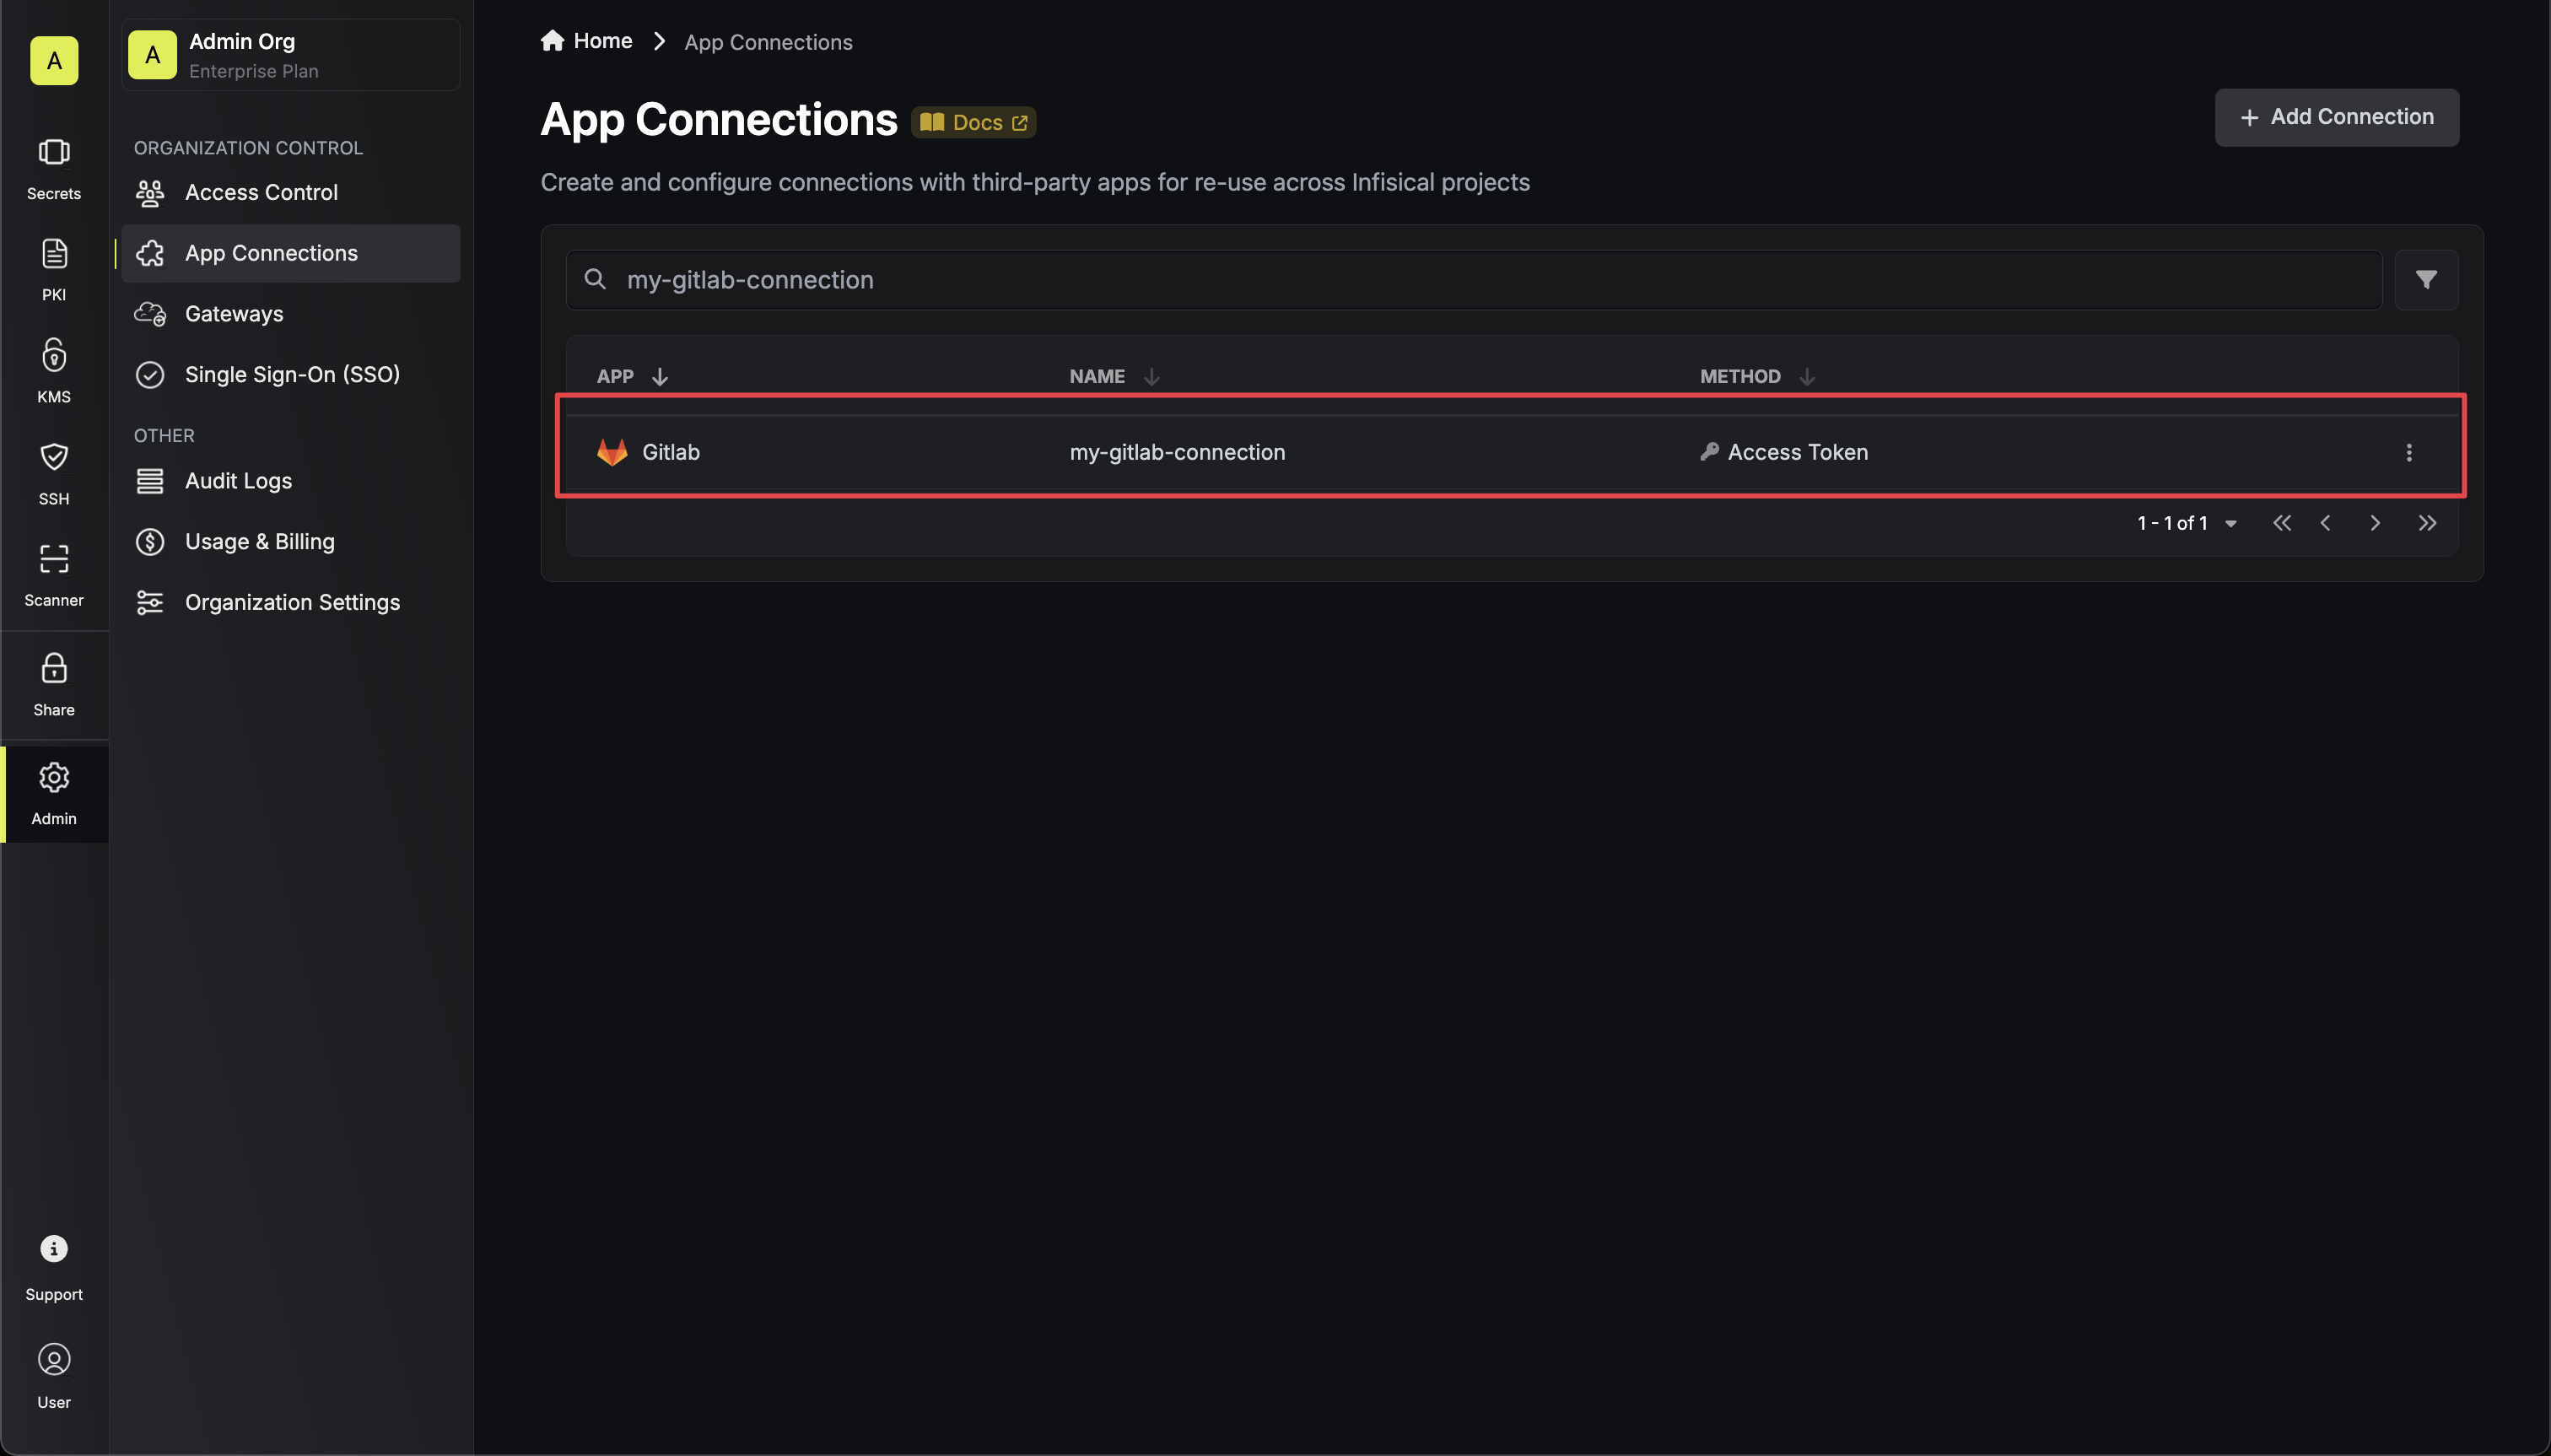
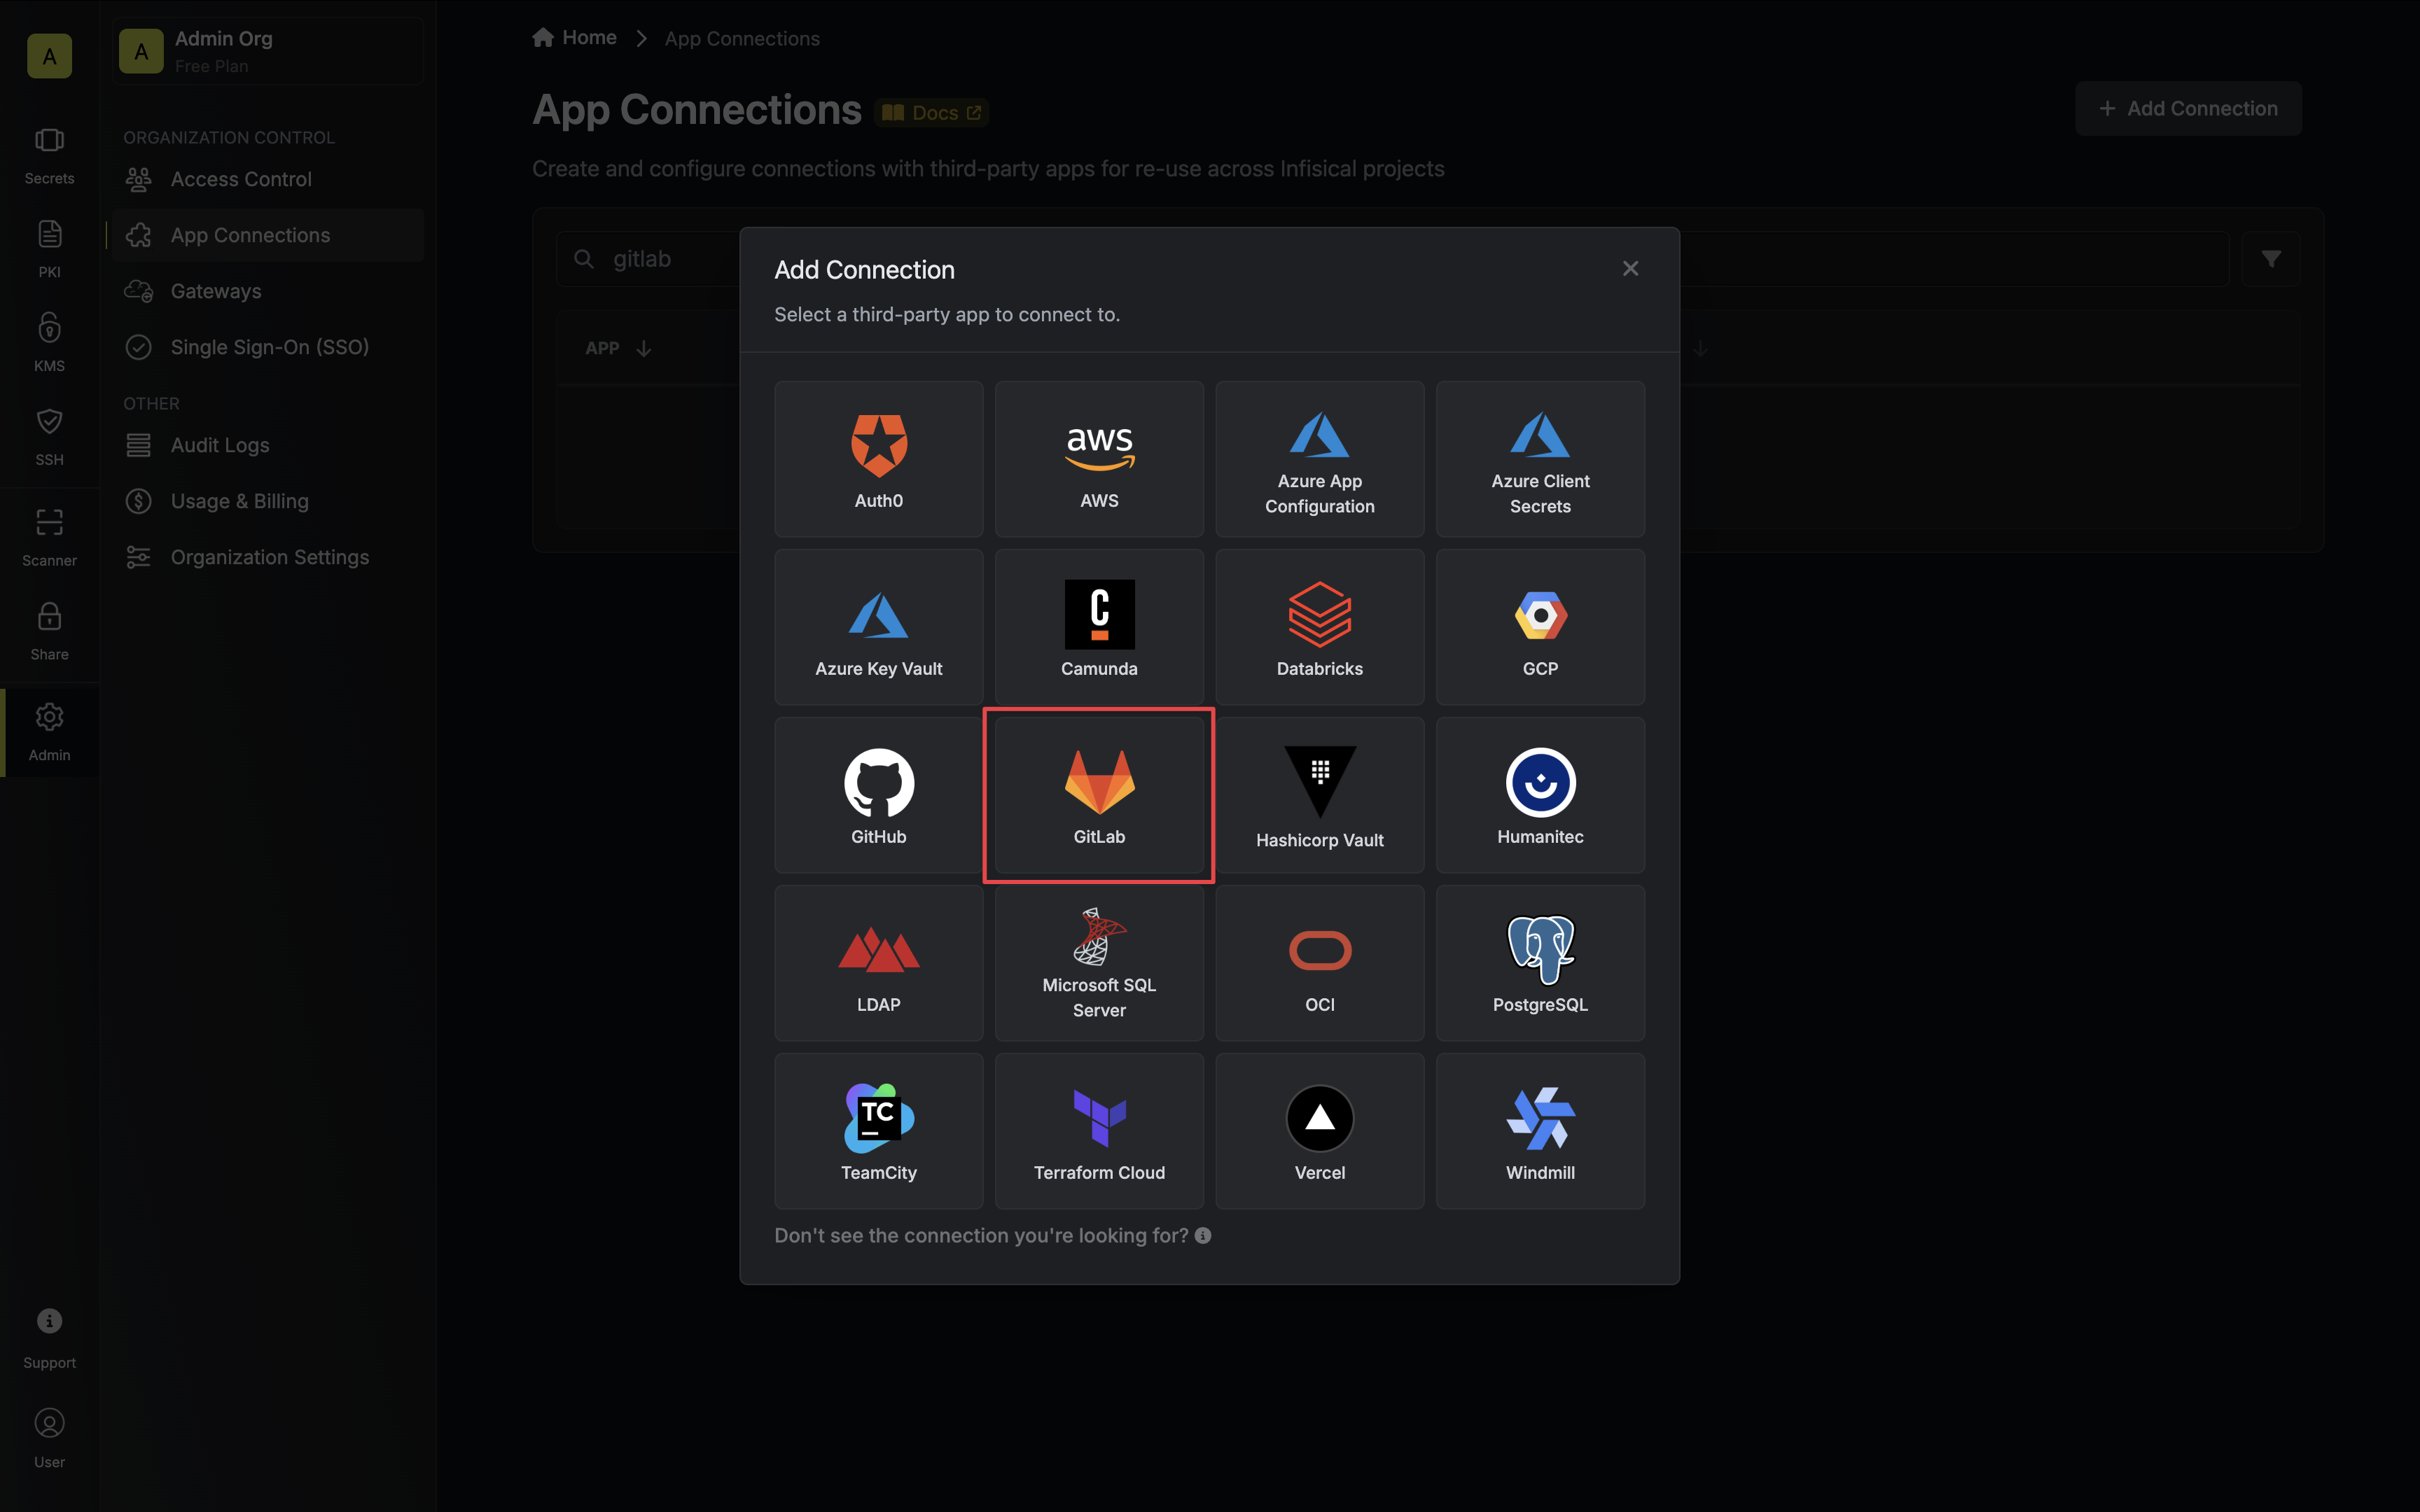
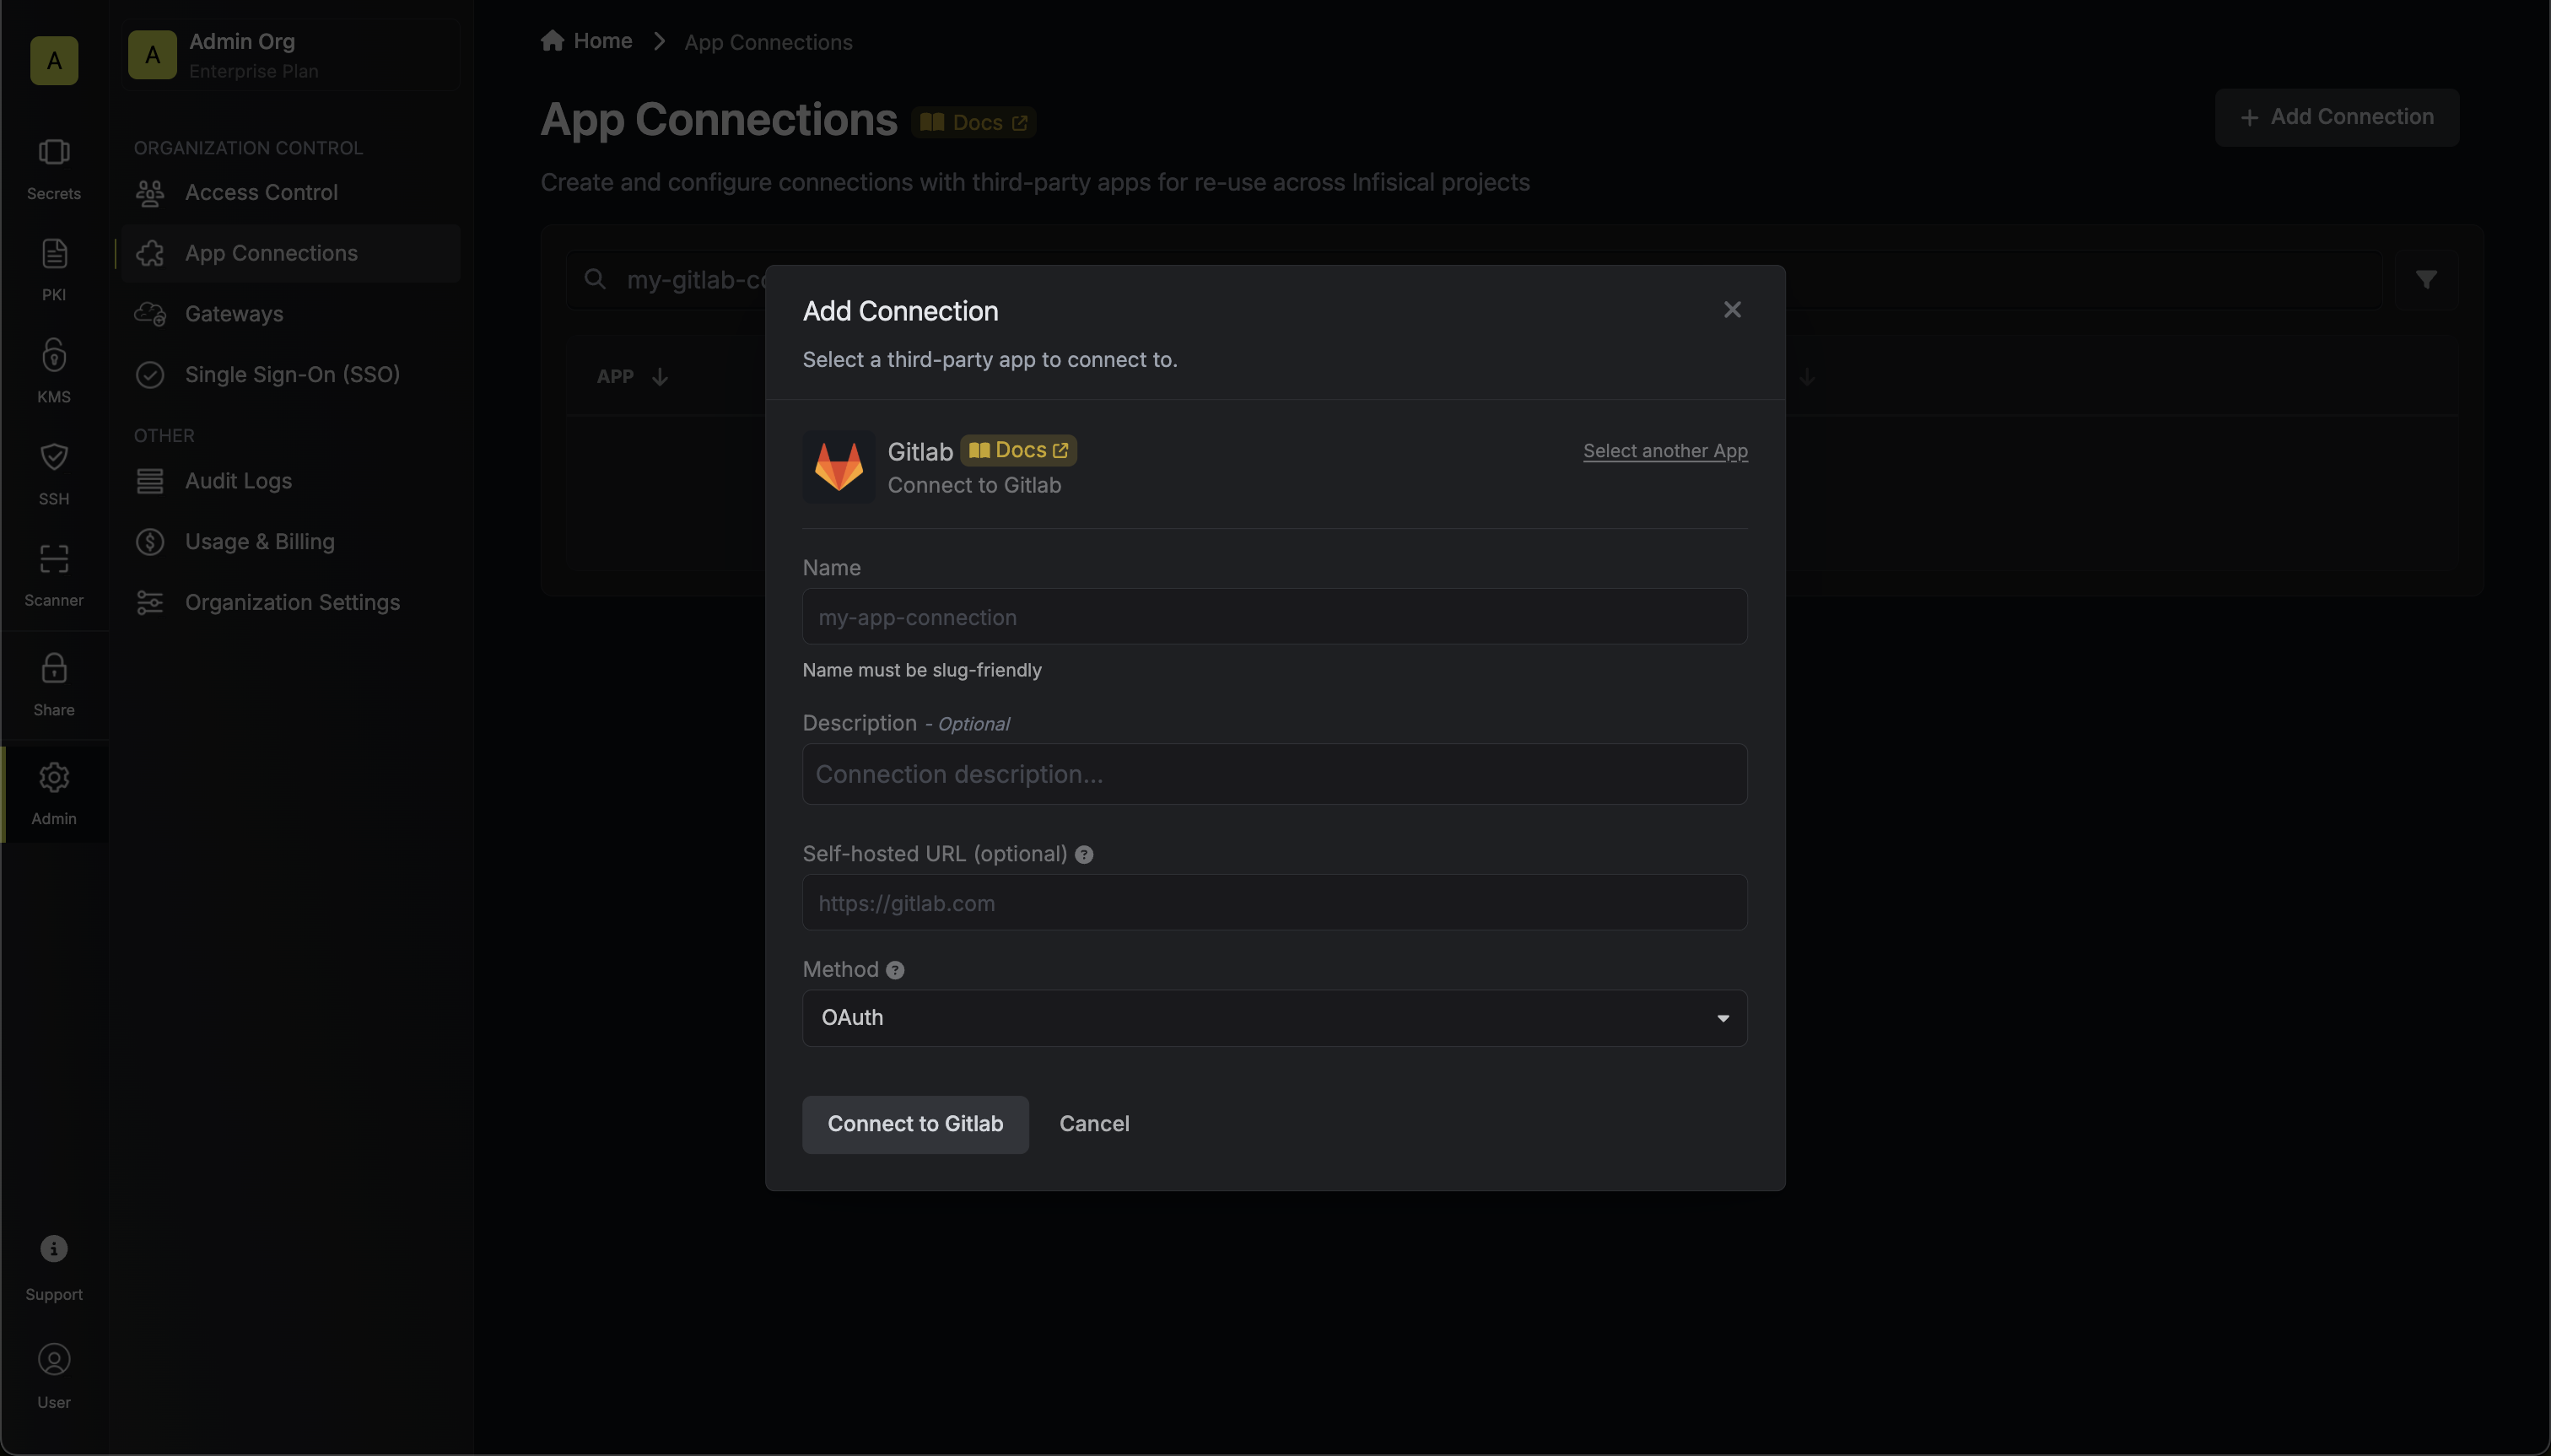
Setup GitLab OAuth Connection in Infisical
Navigate to App Connections
Navigate to the Integrations tab in the desired project, then select App Connections.
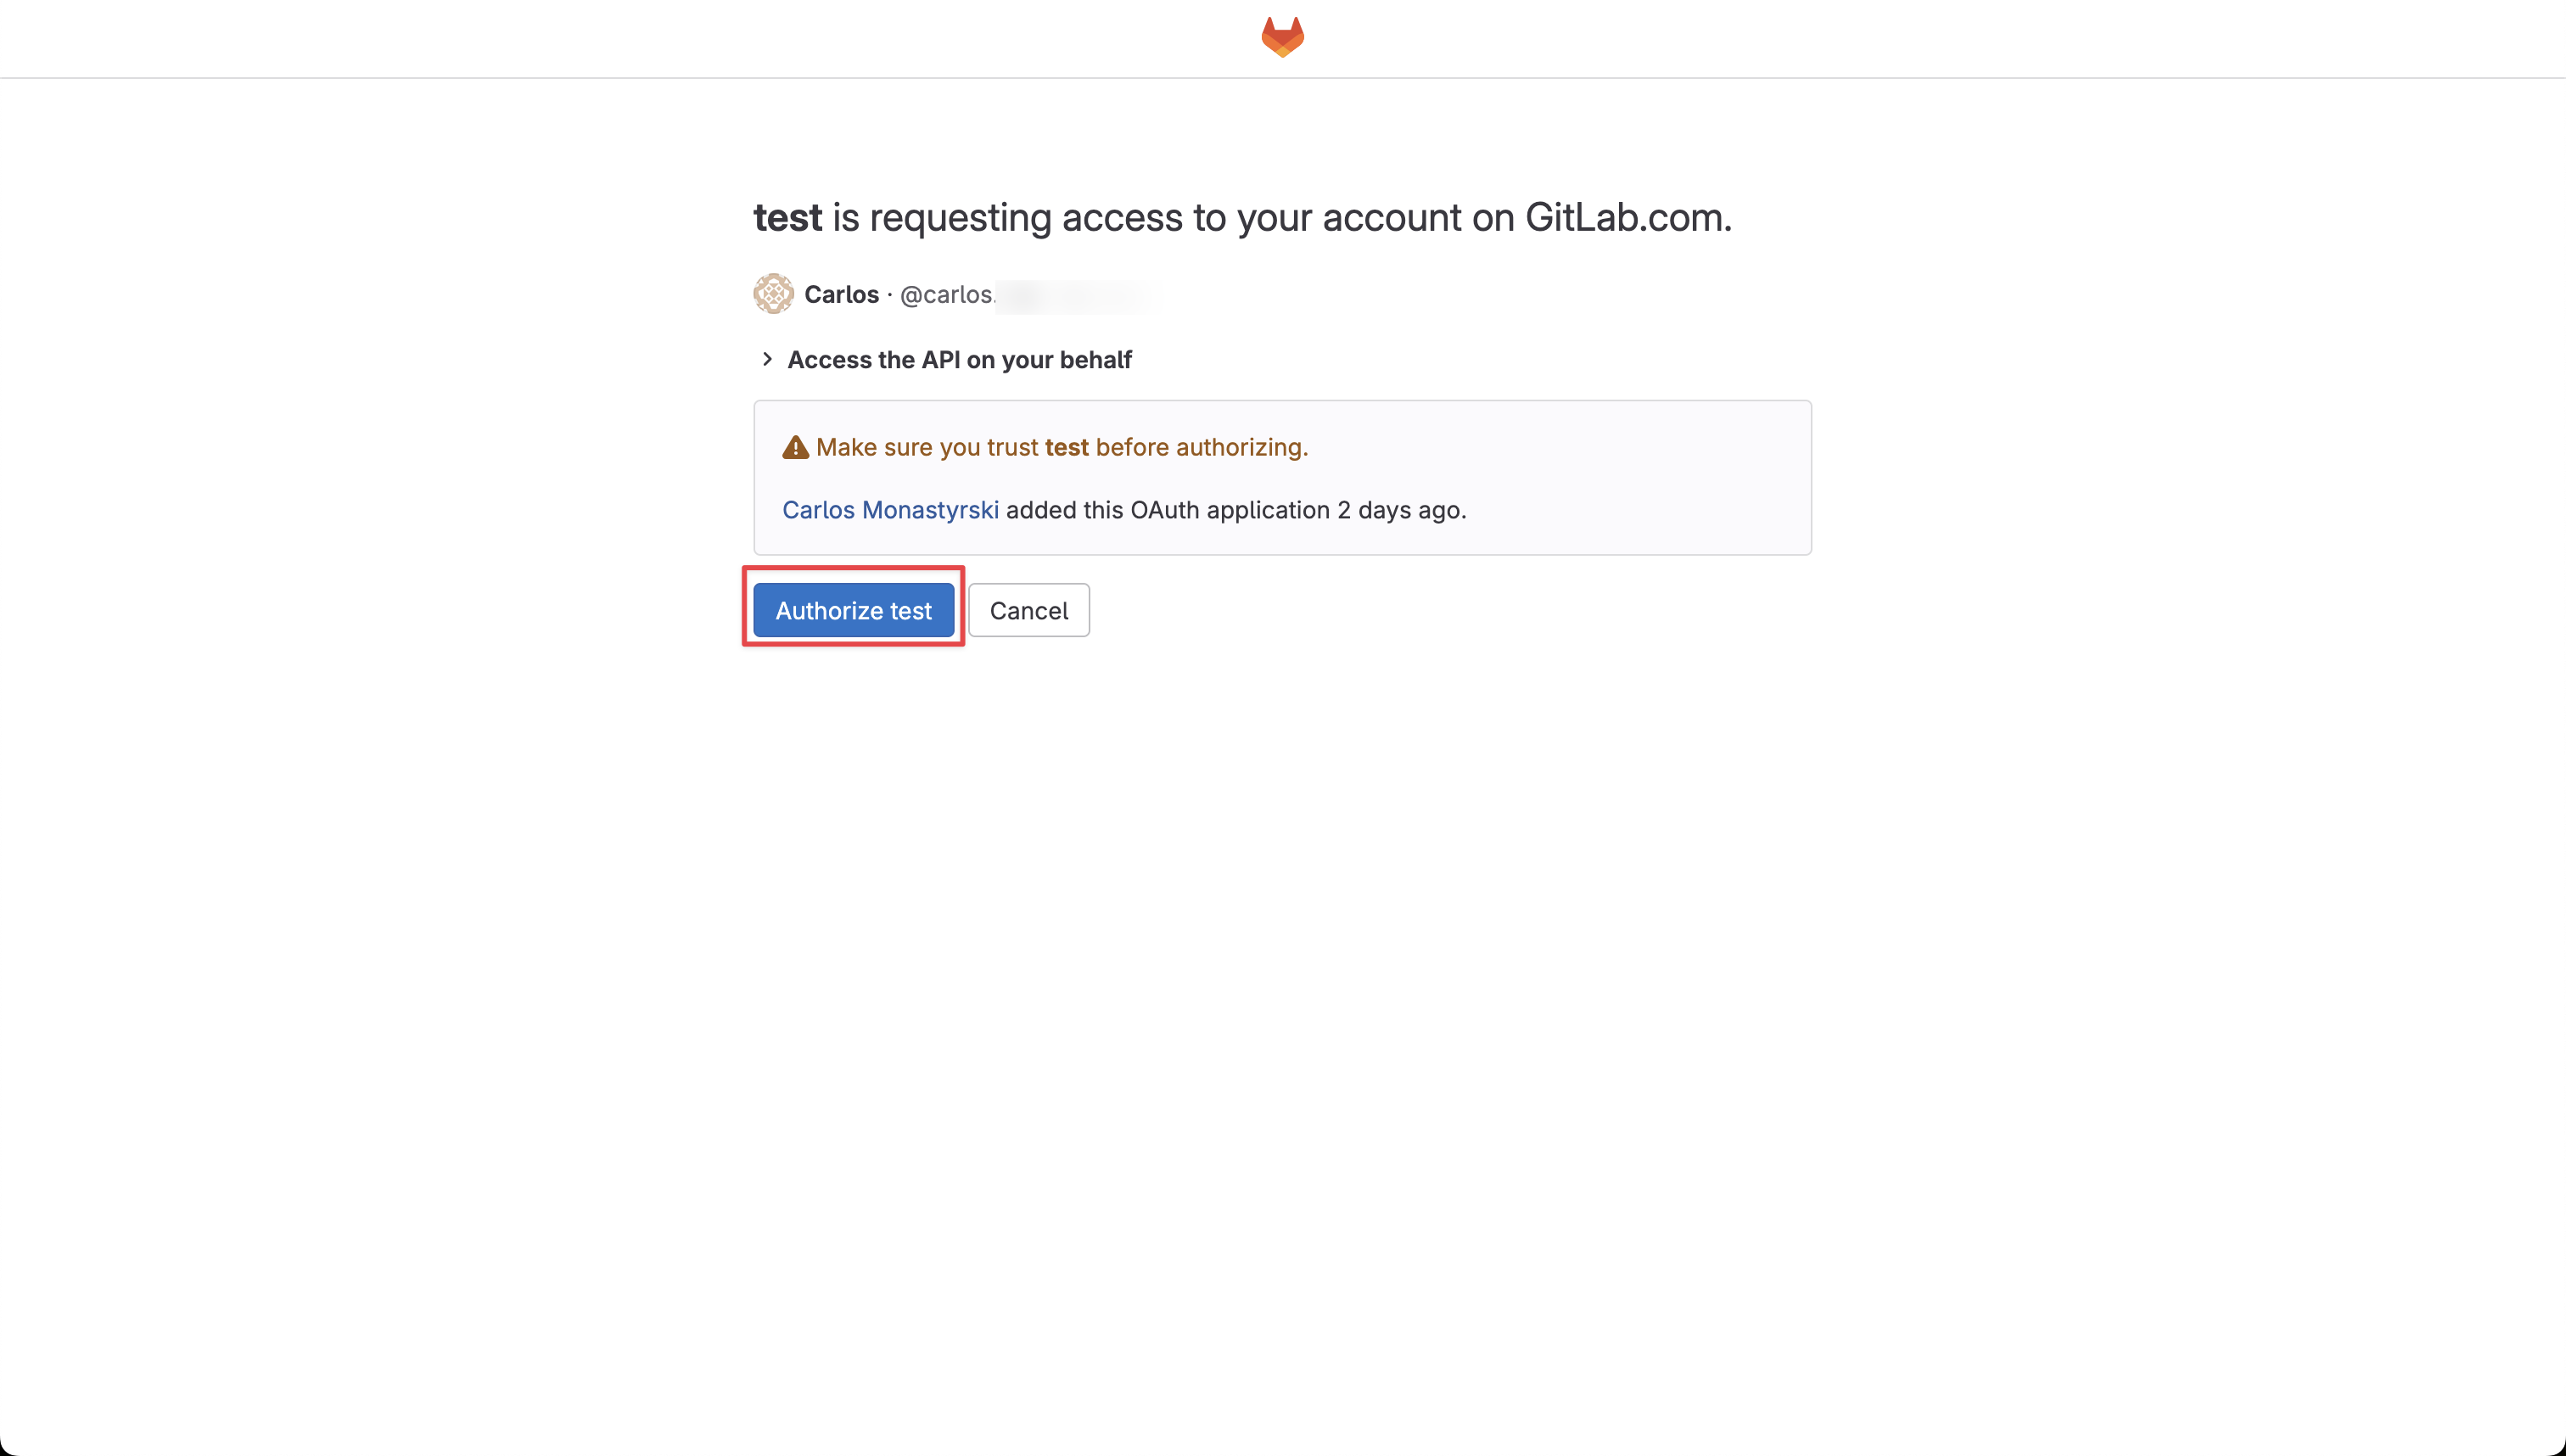
Grant Access
You will be redirected to GitLab to grant Infisical access to your GitLab account. Once granted, you will be redirected back to Infisical’s App Connections page.